Sunday, April 10, 2022

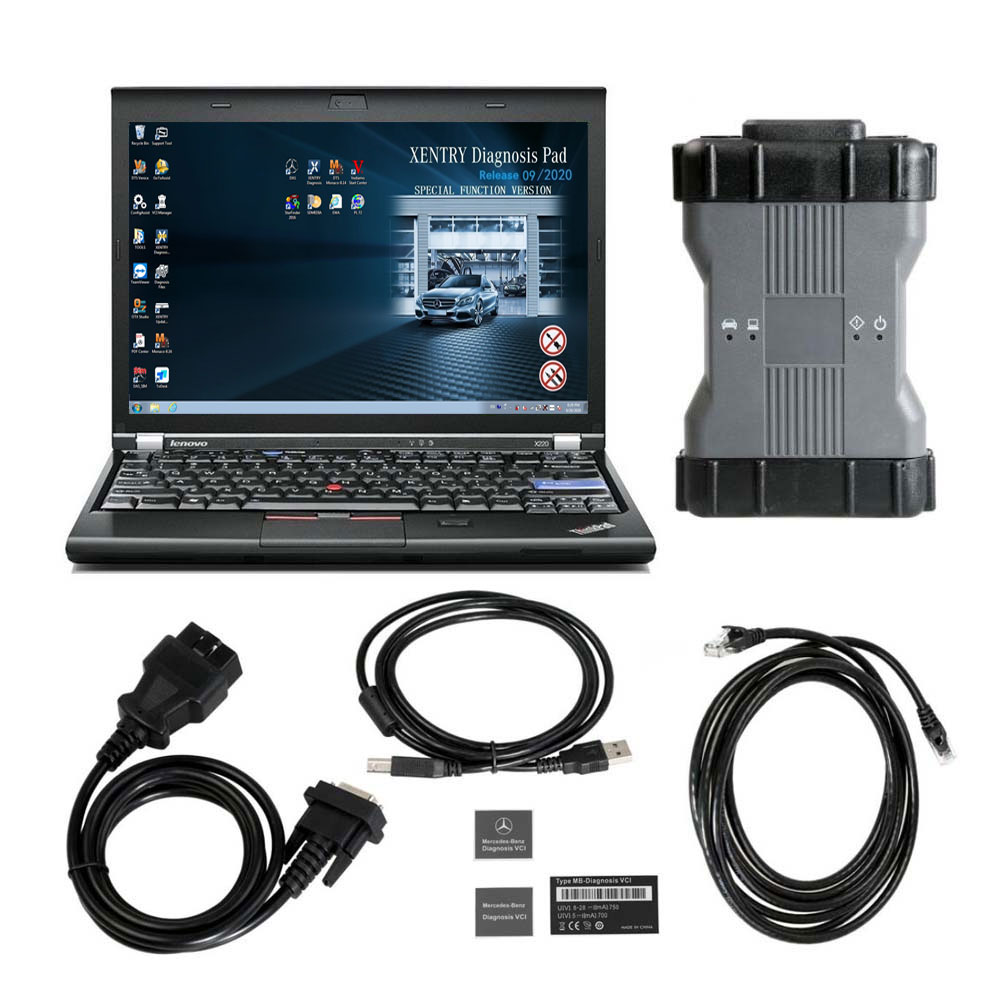
Benz DoIP C6 with different computers

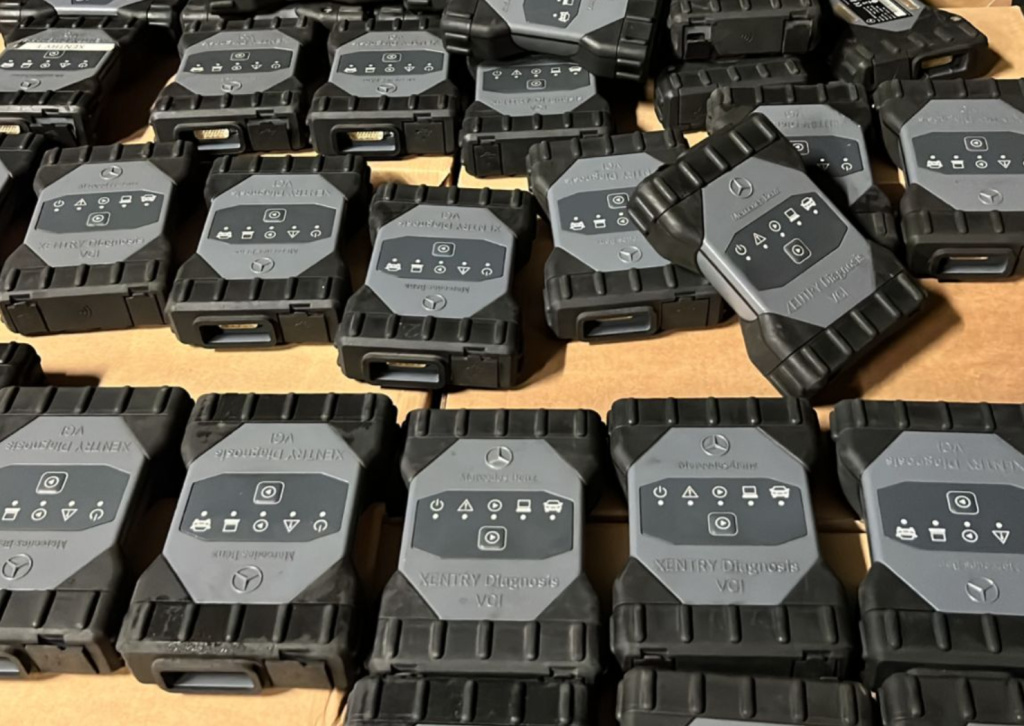
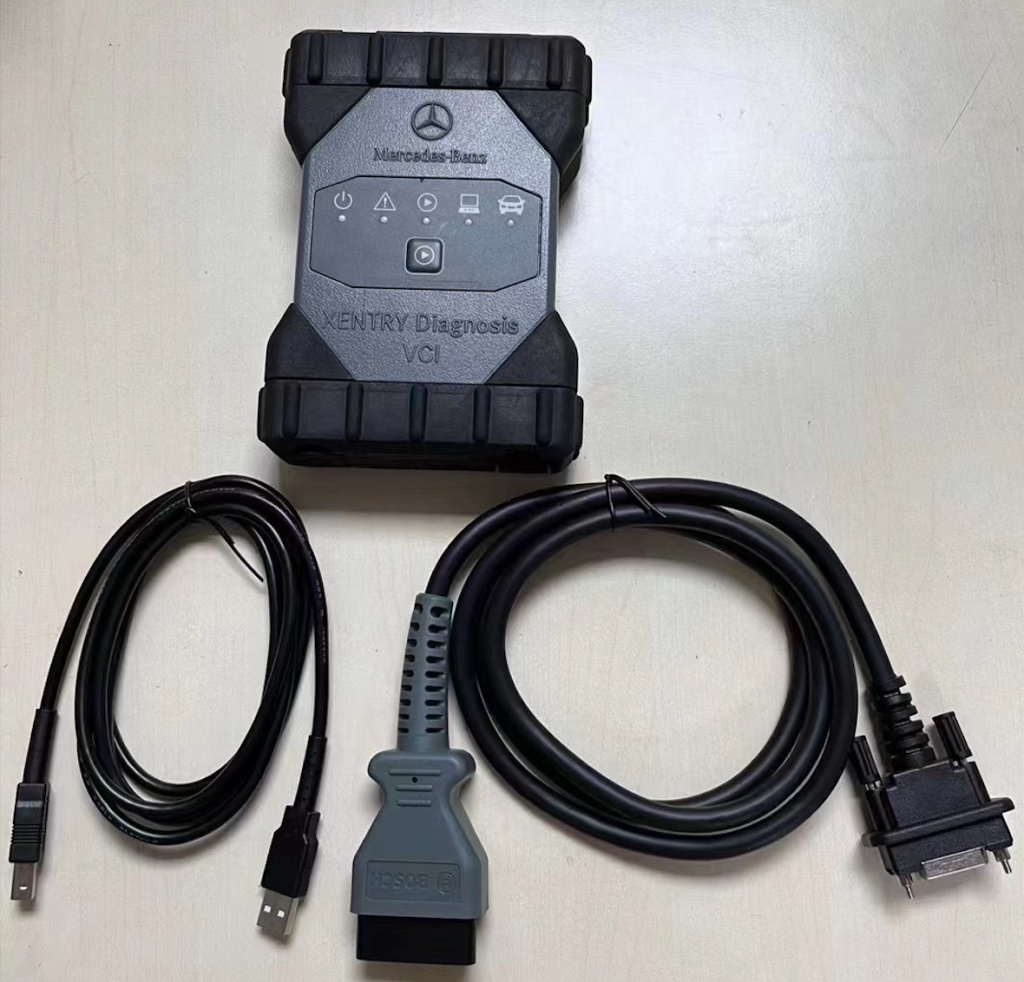
Mercedes Benz C6 OEM Xentry diagnosis VCI DOIP Pass thur interfac is the latest interface for For Mercedes & SMART vehicles can replace Star C4/C5.

Lots of customer encounter setting problem when using MB STAR C6 diagnosis, so we recommend this bundling sale for those customer who want once get in hand then can use it directly. We will install and activate for you ready to use. What's more, this package offer saves you money than buying.

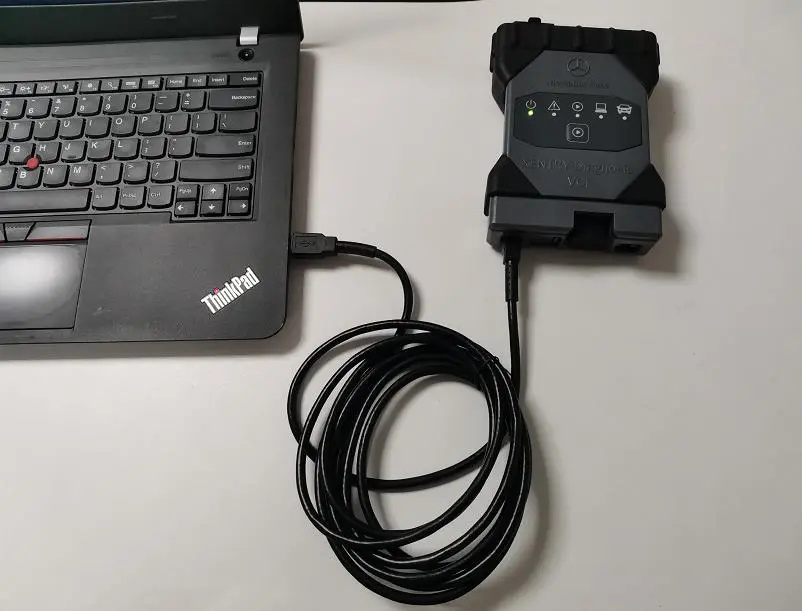
1. Benz DoIP C6 Plus lenovo X220 Laptop

Second Hand Laptop Lenovo X220 Specification:
Brand: Lenovo
Condition: Used
Type: Laptop/Notebook
Screen Size: 12.5
Processor Type: Intel (R) Core(TM) I5-2520M CPU
Processor Speed: 2.50 GHz
Memory: 4GB
Hard Disk:500G HDD

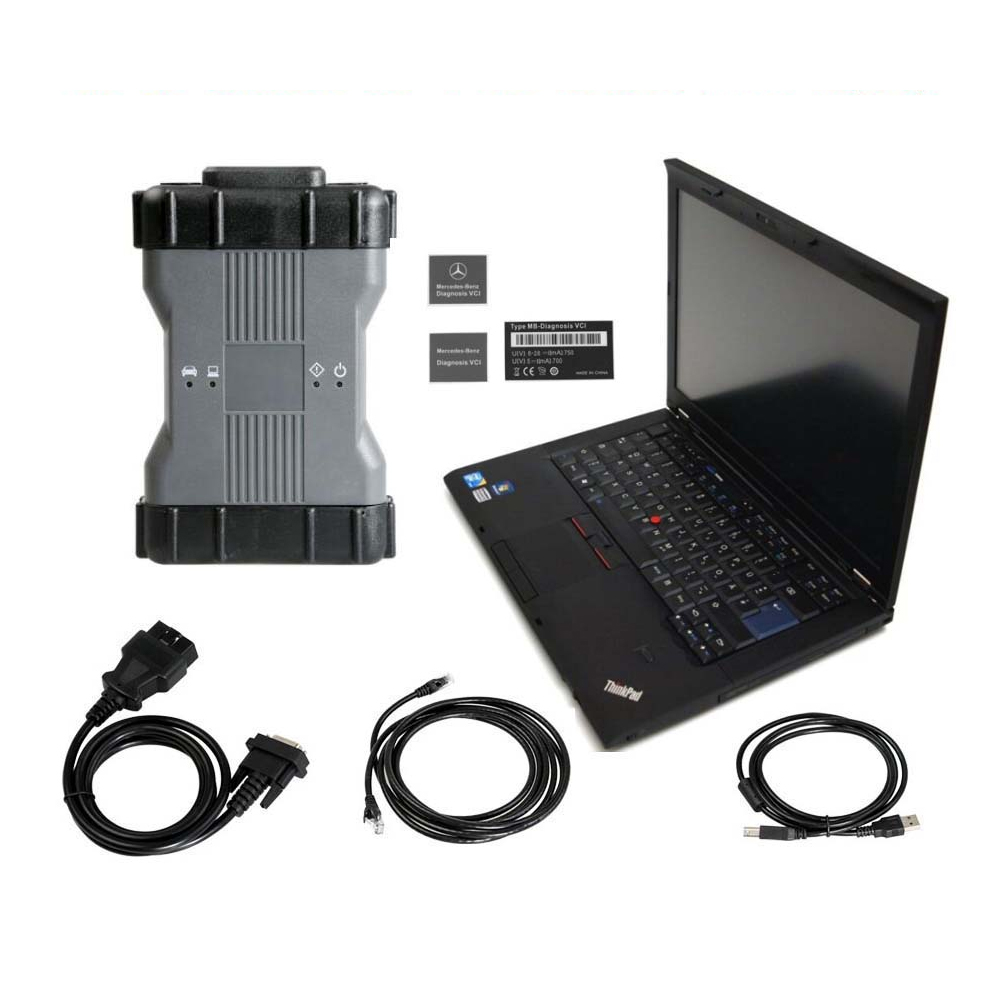
2. Benz DoIP C6 Plus Lenovo T420 Laptop

Second Hand Laptop Lenovo T420 Laptop Specification :
Brand: Lenovo
Condition: Used
Type: Laptop/Notebook
Screen Size: 14.0
Processor Type: Intel (R) Core(TM) I5-2520M CPU
Processor Speed: 2.50 GHz
Processor Configuration: Dual Core
Memory: 4GB
Compared with other laptop, this one is better quality and run faster.

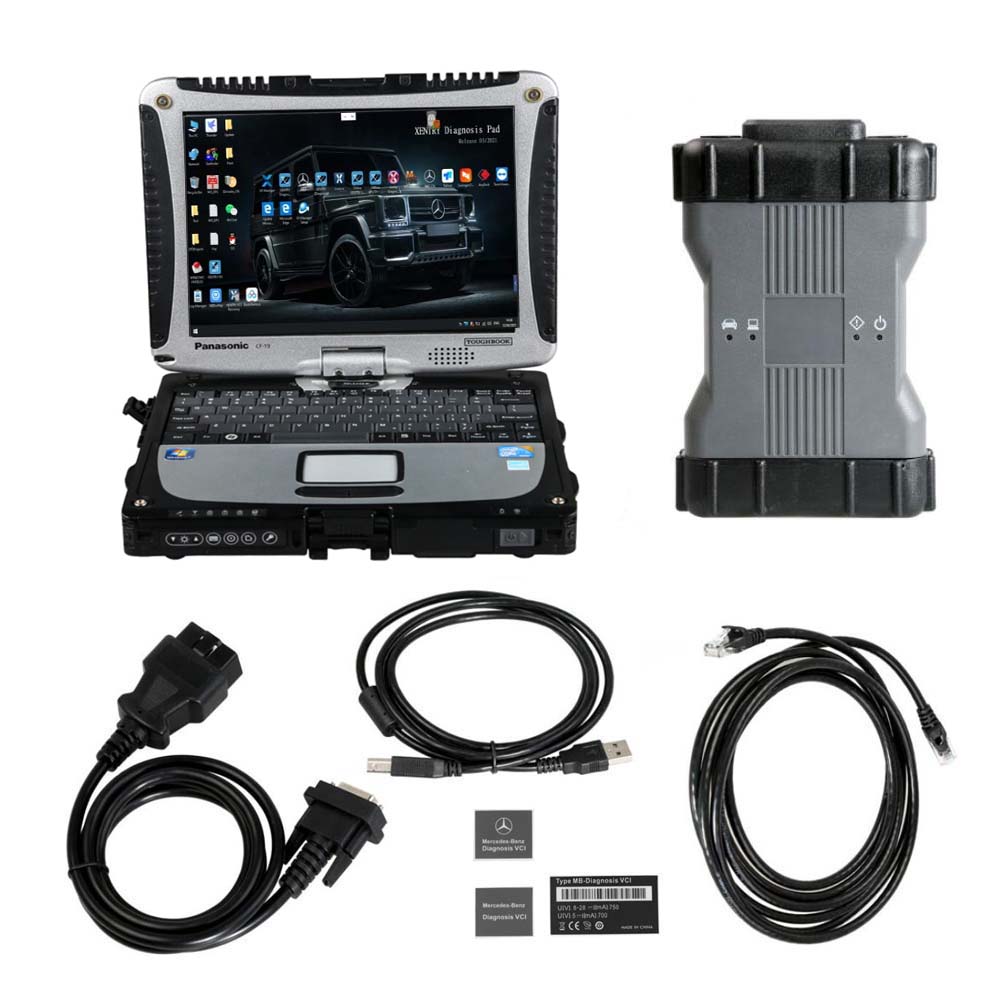
3. Benz DoIP C6 Plus Panasonic CF19 Laptop

Second Hand Panasonic CF19 I5 4GB Laptop System Information:
Processor: Intel(R) Core(TM)I5 CPU U540@1.2GHz
Processor Speed: 1.20 GHz
Memory Size: 4096 MB (DDR3)
Hard Disk:500G HDD or 500G SSD

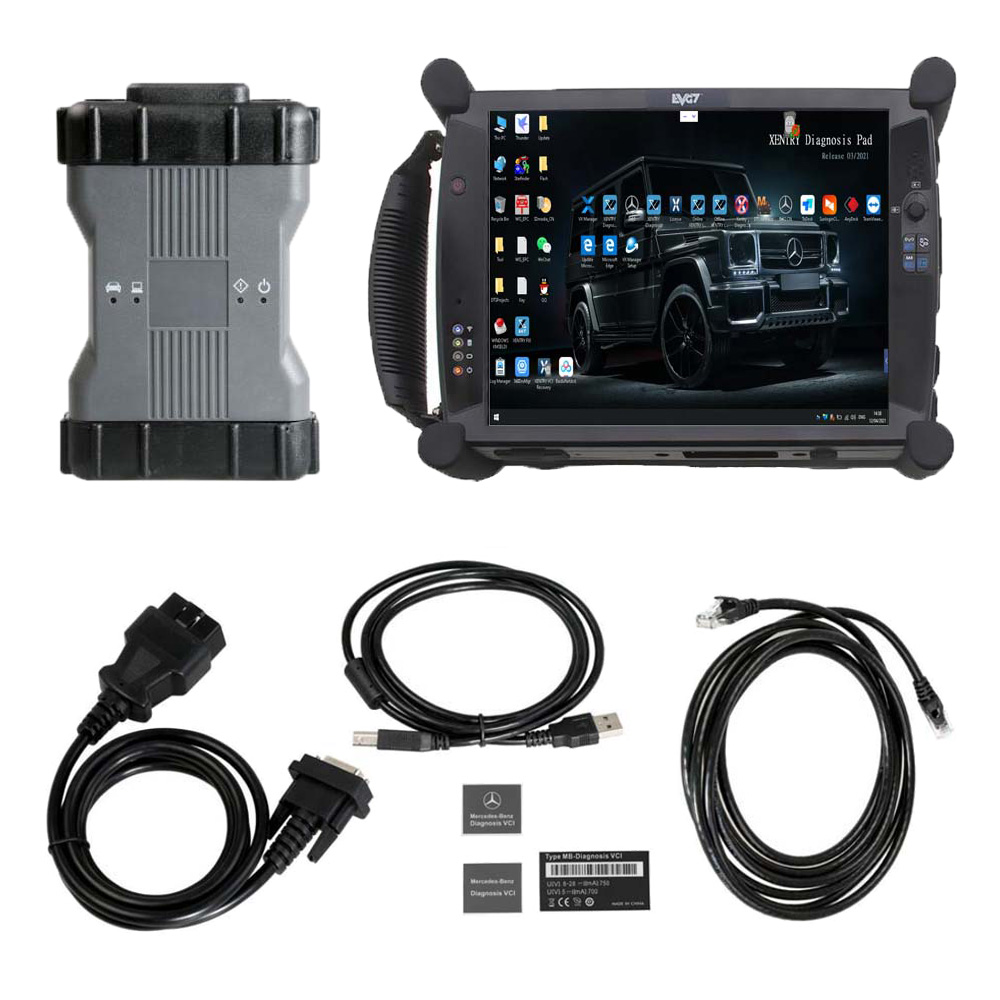
4. Benz DoIP C6 Plus EVG7 Tablet PC

EVG7 DL46 Specification:
Condition: NEW
Mark: EVG7
Model: DL46
Processor: Intel Celeron 1037(Dual - 1.8Ghz/L3 2M)
DDR: The biggest support memory: 4GB
HDD: 500 GB SATA HDD.
LCD: 10.4 Inch The resolution of the 1024x768
Graphics:
touchscreen widescreen LED backlight
The core graphics Intel HD Graphics
Speakers: Built-in Speakers
Wireless: 802.11b/g/n
LAN: The built-in 10-100M card
Bluetooth: BT2.0 , 4.0
USB: USB3.0 / Mini USB / 2 x USB2.0
Card Reader: TF Card Reader
Other Interface:
VGA Voice Input / The Sound Output /
DC Power Jack / Parallel LPT Port I/O
VGA Output
Battery Type: 9 The core of lithium batteries 10.08V 6600 mAh
Power Adapter: 110V-240V The adaptive communication power supply
Battery Life: The specific time depending on the use environment
Specifications: 270x180x60 mm
weight: 1911g (with battery)
Certificates: CE / FCC / RoHS

Saturday, April 9, 2022

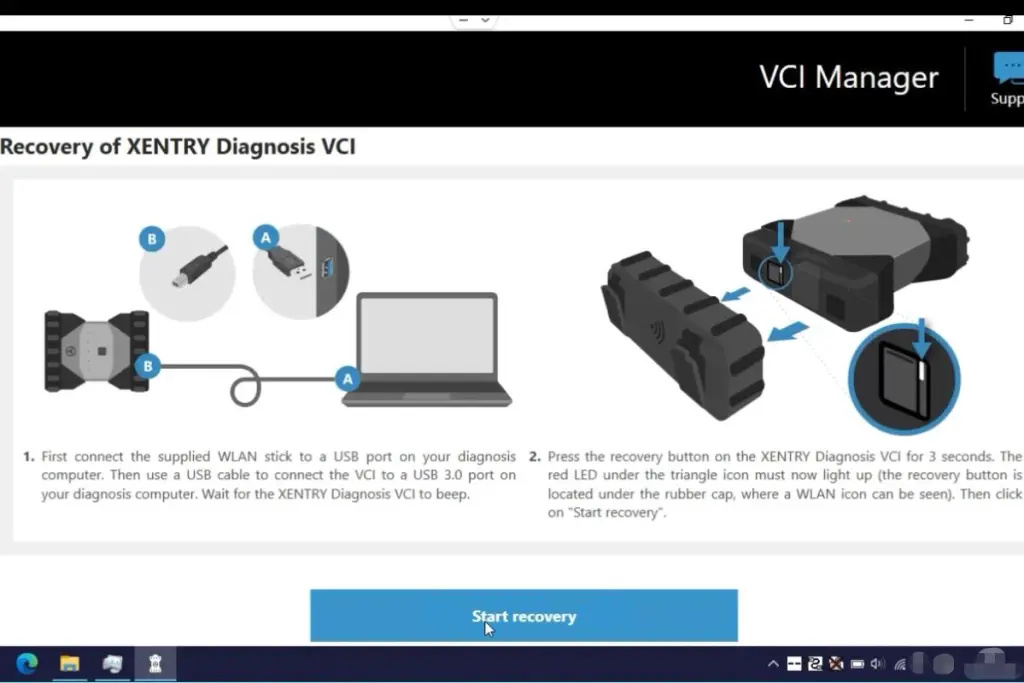
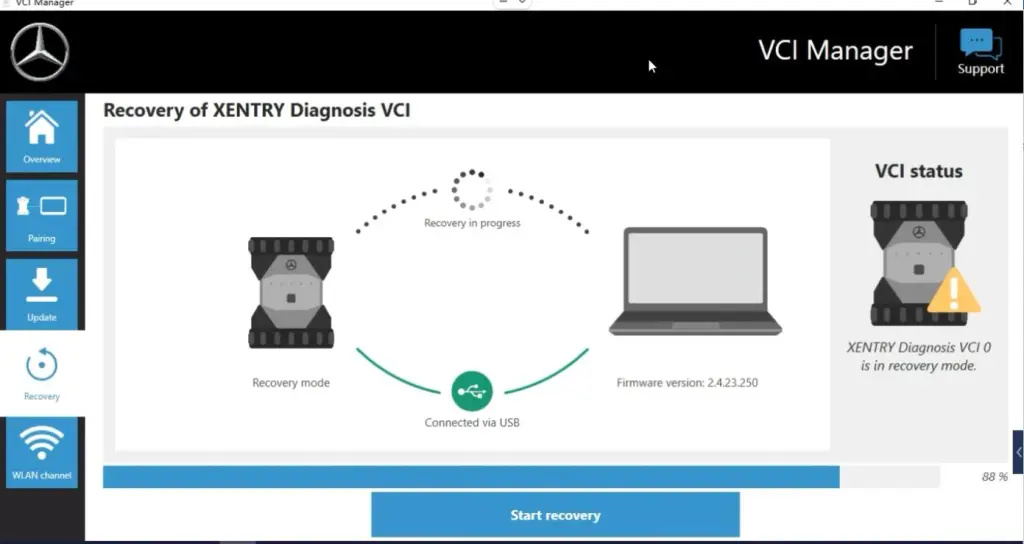
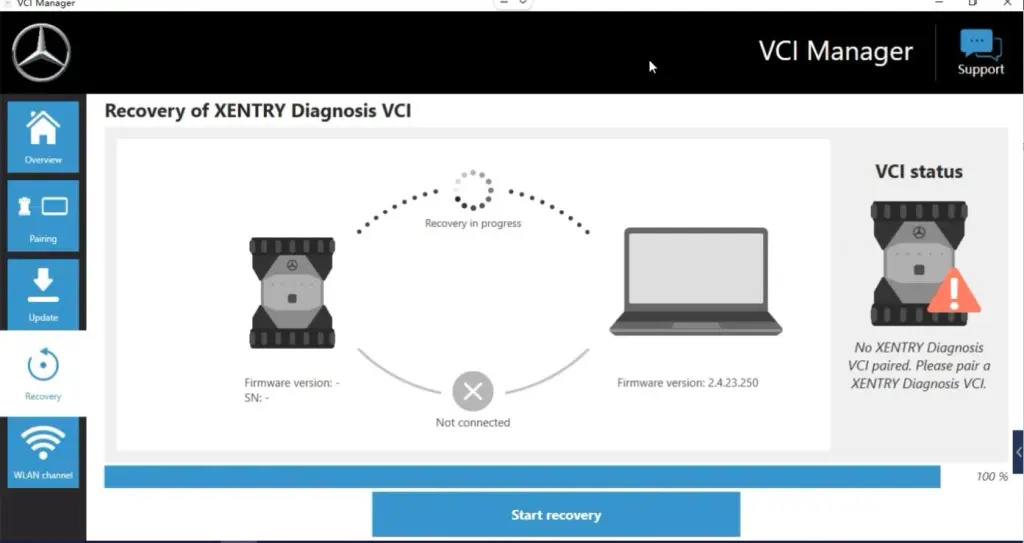
How to restore Mercedes Benz C6 firmware


How to restore Mercedes Benz Xentry diagnosis VCI C6 firmware

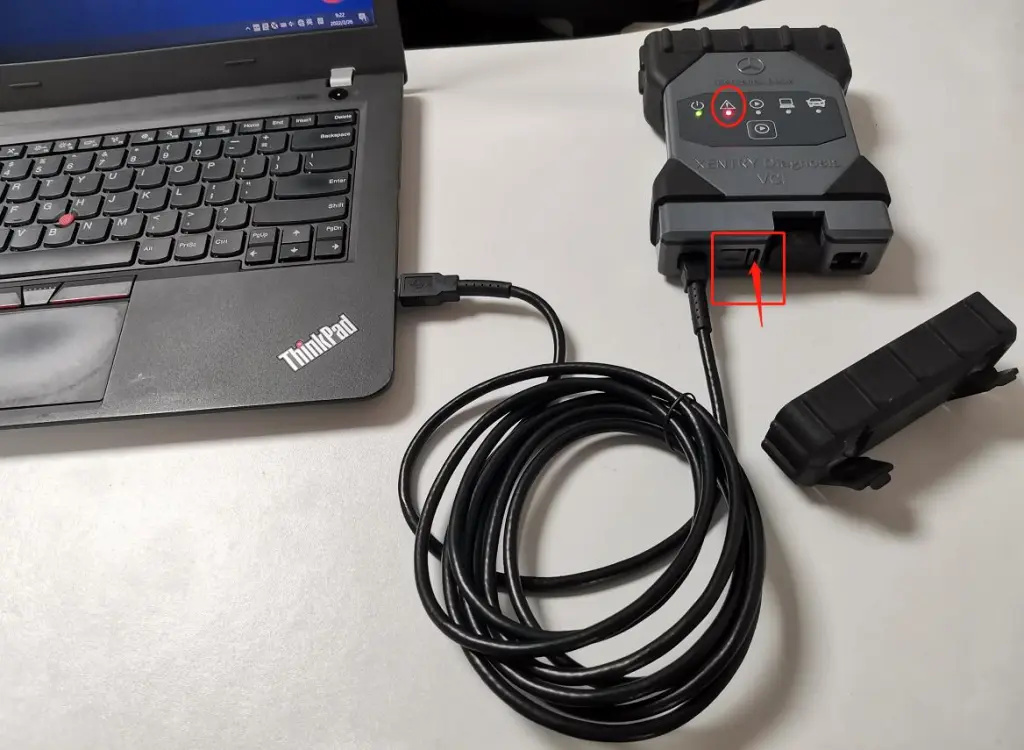
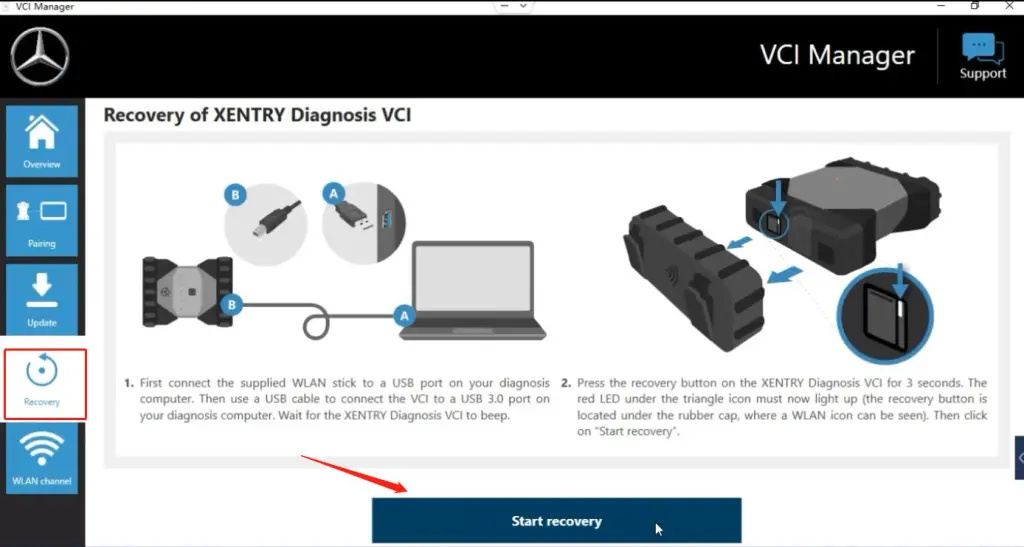
1.Open VCI Manager,click Recovery,View the how-to manual;(USB connect Xentry diagnosis VCI C6)


2.Hold the button for three seconds, the red LED lights up;

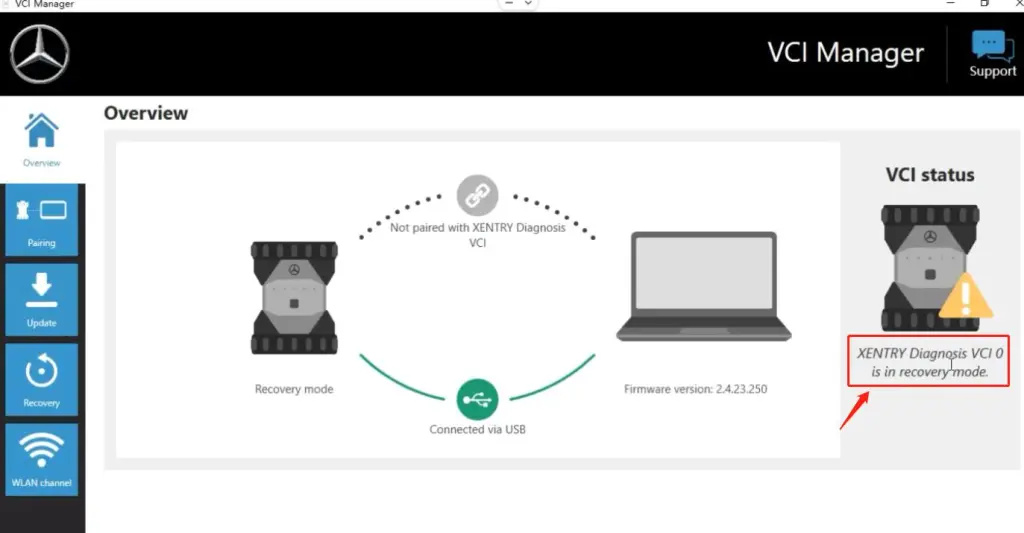
3.Recovery mode;

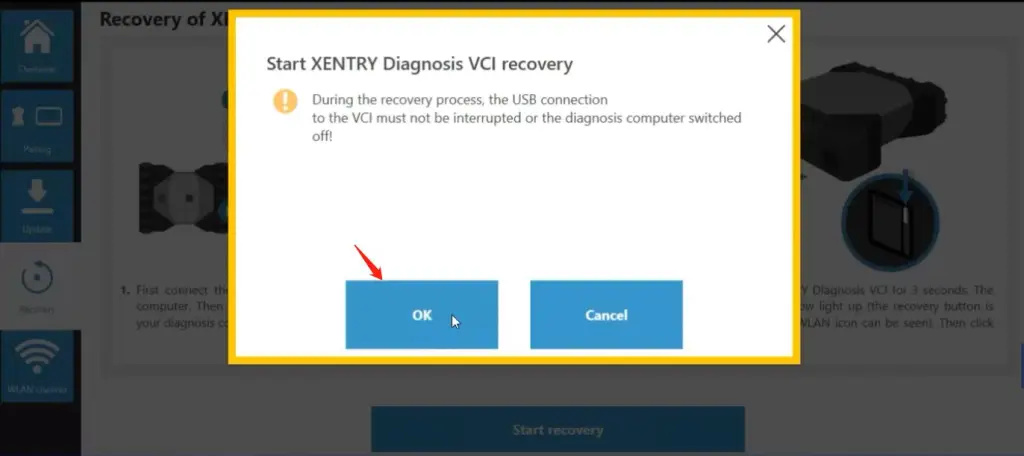
4.Recovery,Start recovery;

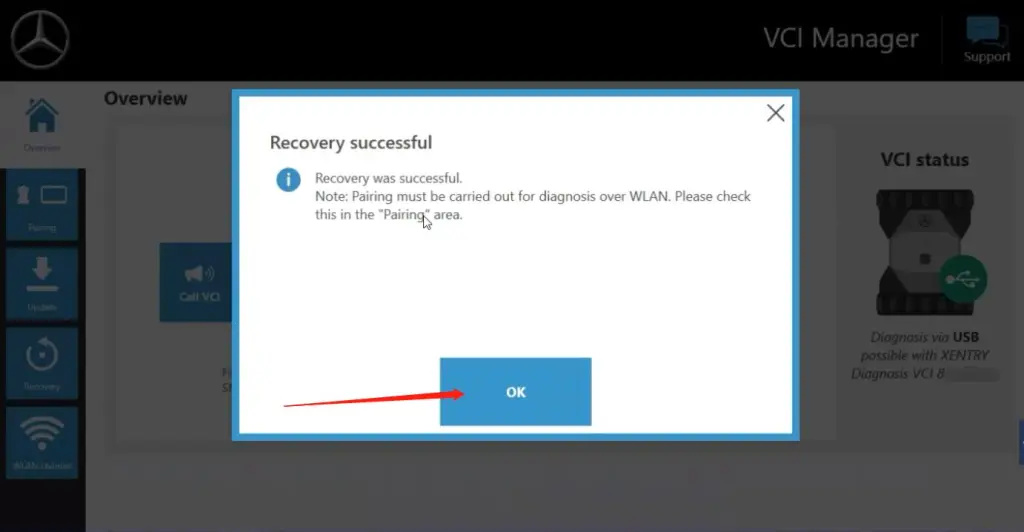
OK


5.Recovery successful;

Friday, April 8, 2022

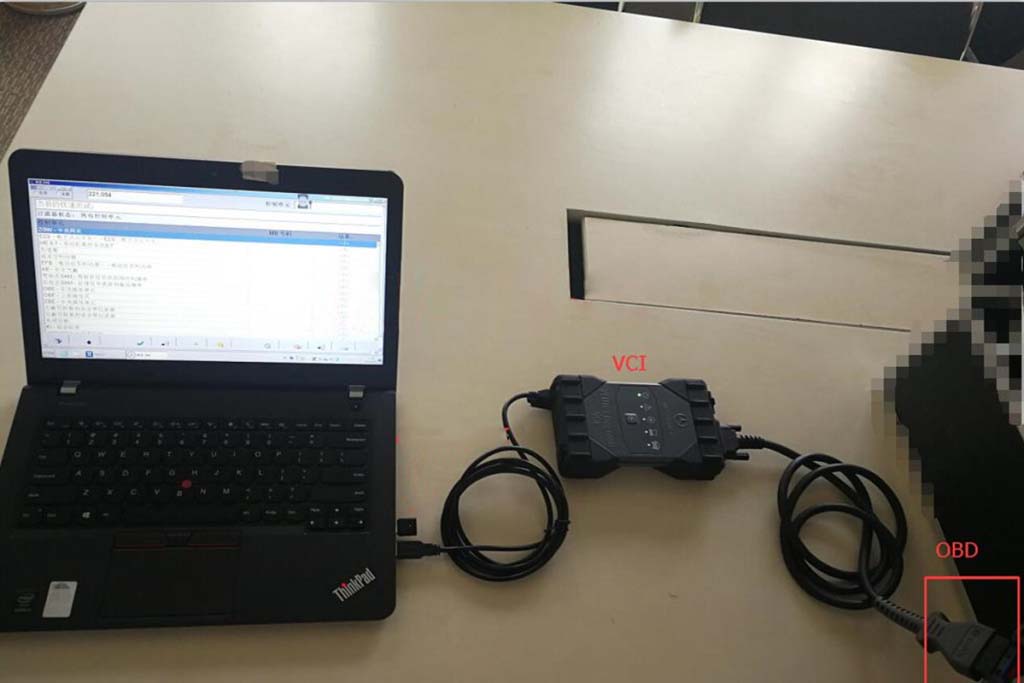
How to connect Benz C6 Xentry Diagnostics

How Mercedes Benz C6 VCI is connected to Xentry Diagnostics

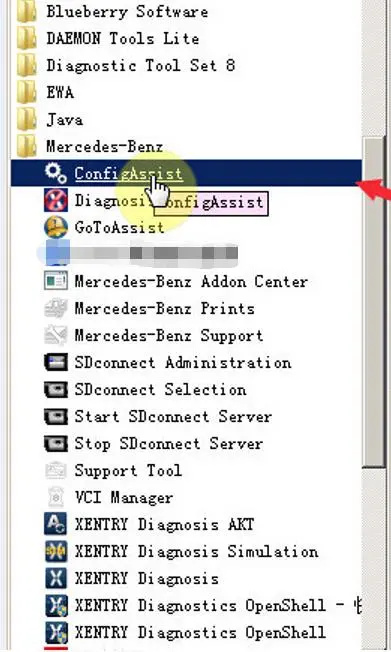
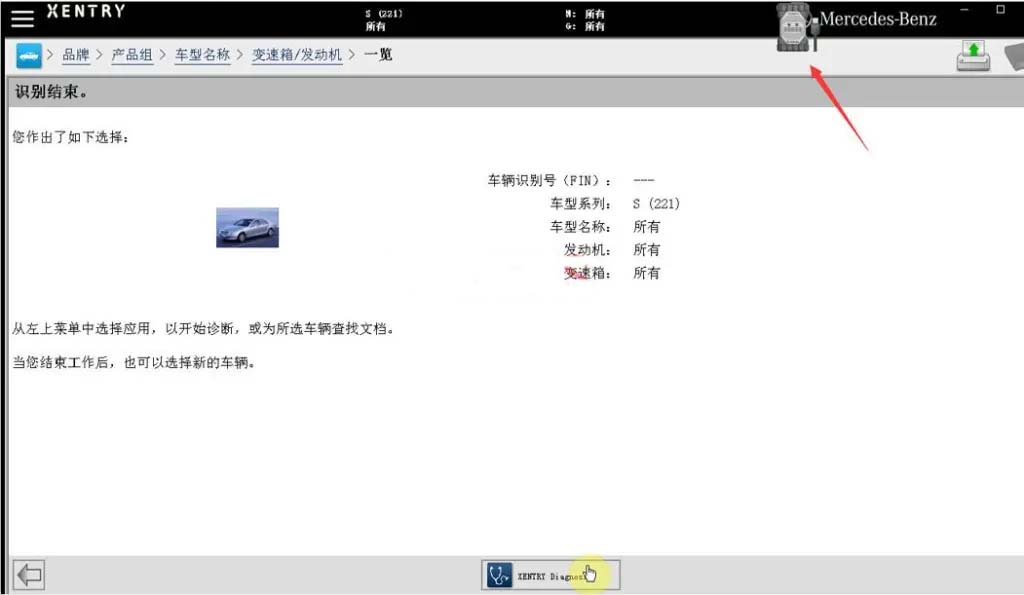
1.Connect OBD and cable(Xentry diagnosis vci/C6);

2.use configassist config;

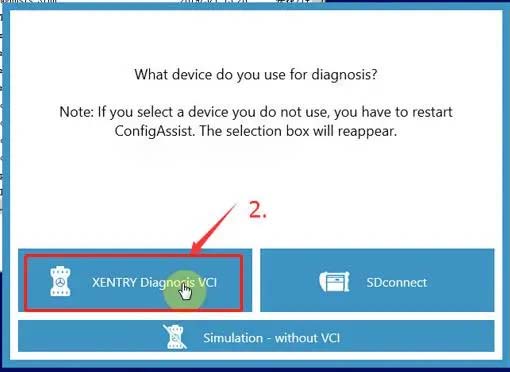
3.Select Xentry diagnosis vci;

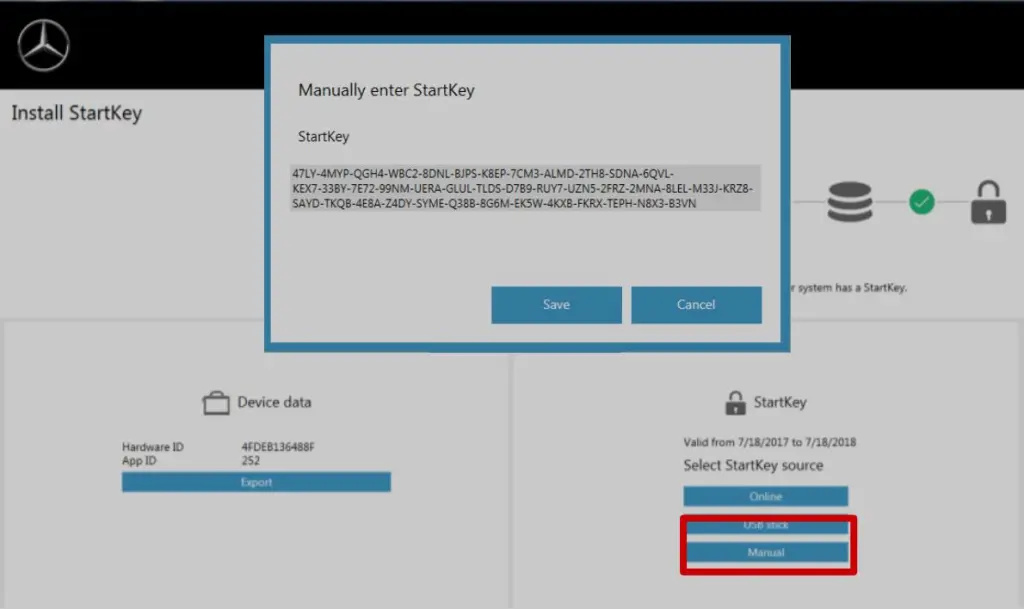
4.Enter key;

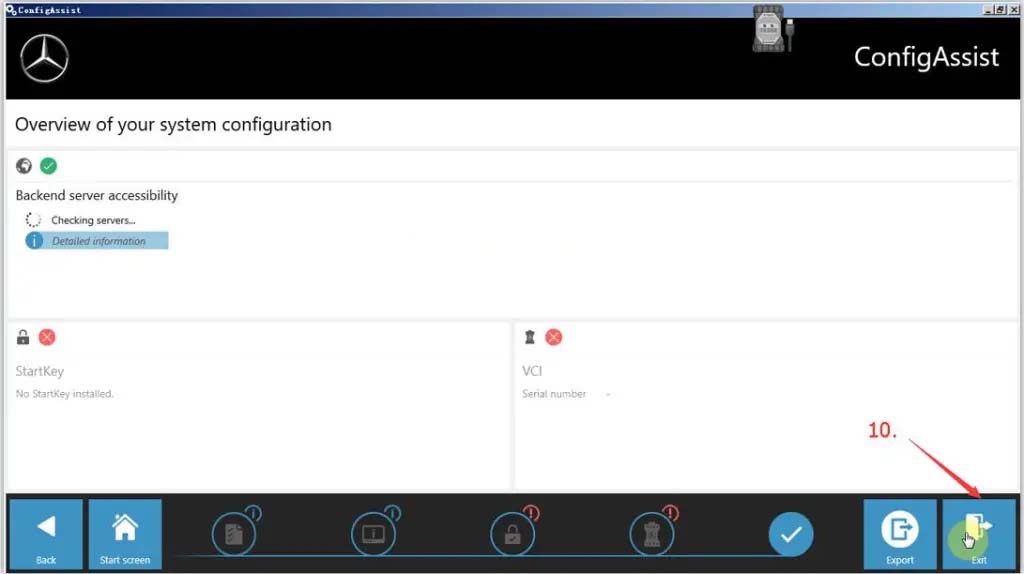
5.config finish;

6.connect car ,Diagnostics.

Thursday, April 7, 2022

Mercedes Benz VCI C6 Explorer software
Mercedes Benz VCI C6 Explorer software


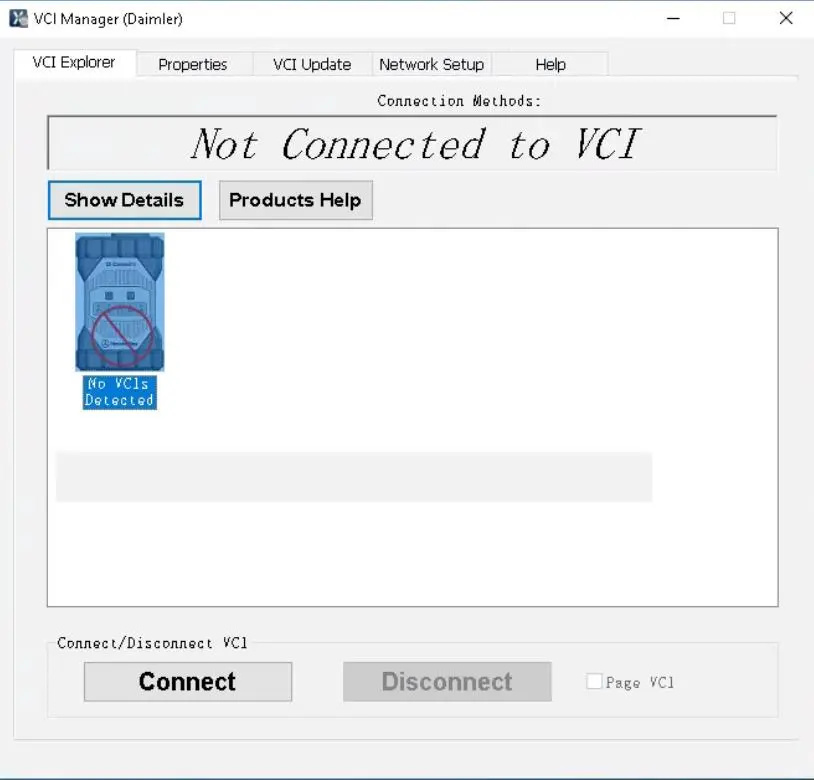
VCI Explorer

The Explorer window presents a graphical overview of the all the testers connected to your local network. It displays all detected testers as icons, with their corresponding serial numbers below the icon. The serial number of each tester appears on the label on the back of the tester, beneath the barcode.

The Explorer window also shows the states of each tester, for example, whether its internal software needs to be updated.

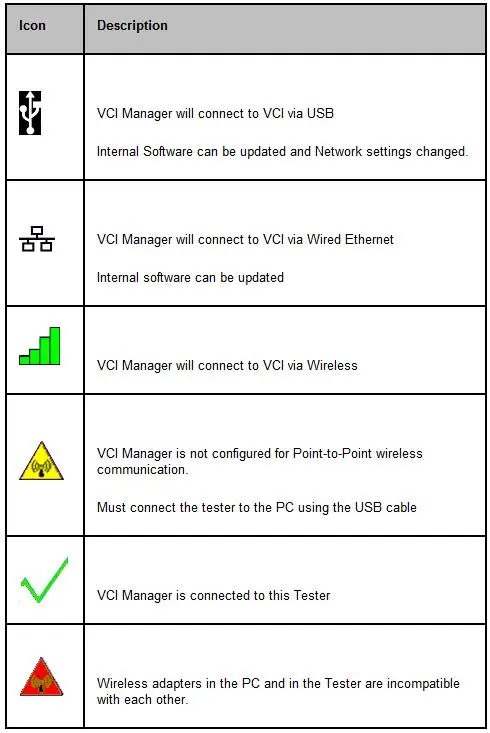
The VCI Manager has a priority for connection methods to your tester. A connection method icon will be displayed over your tester icon to show which connection method will be used by your VCI Manager. The priority for connection is as follows:

* USB connection / Ethernet connection (Must be activated using USB)
* Wireless connection (Must be activated using USB)

The initial connection to an VCI must be made using USB. Make sure your tester is properly connected to one of the PC’s USB ports, using the provided USB cable.

* Highlight the icon for the tester you want to use. The VCI Manager icon displayed on the tester will indicate the communication method to be used if the <Connect> button is selected.
* The VCI Manager may automatically change the label on the <Connect> button for the tester that is connected to the PCs USB port. If the internal software needs to be updated the <Connect> button will change to <Update VCI>. If the tester is in recovery mode, the <Connect> button will change to <Recover>.
* Pressing the <Connect> button will connect to the device, or allow you to update or recover your tester.

Once a tester is connected, the <Connect> button becomes inactive and the <Disconnect> button becomes active. A check mark also appears over the tester to indicate that it is now connected. To disconnect from a connected tester, simply click its icon and then click the <Disconnect> button.

The PC LED on the tester will flash indicating a connection to the host is established.

Do not disconnect the tester or remove power from the tester during an update or recovery.
Software

In order for the VCI Manager software to work with your tester, their software versions must match. If your tester software version and PC software version do not match, the Explorer window will automatically detect this. The conditions that can occur when an update is detected:
Tester Internal Software – Update Available

* A newer version of the VCI Manager software is installed on your computer, and the internal software on the tester is now older than the VCI Manager. When this happens, the Explorer window in the VCI Manager software will alert you to the mismatch, and you will be instructed to update the tester’s software.

VCI Manager Software Requires an Update

* The tester’s internal software can be newer than the VCI Manager software. This type of mismatch generally happens if you have updated both the VCI Manager and tester’s software on one computer, then attached the tester to another computer on which the VCI Manager software has not yet been updated. In this case, you will see a message telling you to update the PC (VCI Manager) software. For this condition you may choose to update the software on the computer, or enable “Recovery” mode on the tester.

Paging the Tester

You may occasionally want to audibly identify the tester you are currently connected to. This may be useful in an environment where there are several testers in the same area, and you wish to locate the tester you have selected.

To do this, check (by clicking) the Page VCI box at the bottom right of the window. The selected tester will begin to beep and will continue beeping until you un-check the Page VCI box.

Note: The tester must be powered up to be shown in the Explorer.
Control Buttons

The buttons on the Explorer Screen work as follows:
Show Details

Click the Show Details button to view a screen displaying a variety of details about the highlighted tester. This screen displays the tester’s serial number, its current status (e.g., Ready, Update Software) and a large window on the right, containing a variety of additional useful information.
Product Help

Click this button to display the help file for the VCI Manager.

Connect/Update VCI/Recover

This button has different states, depending upon which actions can be performed, or are detected by the VCI Manager.

* Connect: The tester software is up to date with the VCI Manager software. You can set up or change the configuration of your tester. Once the connection has been made, the button becomes inactive (grayed) and it cannot be used.
* Update VCI: The tester requires a software update by the VCI Manager. Only a software update for the tester is possible.
* Recover: The tester is detected to be in recovery mode by the VCI Manager. If selected, the tester software will be updated to match the same software version as the VCI Manager on the PC you are connected to.

Disconnect

The Disconnect button is initially inactive (grayed) and cannot be used. However, once you have connected to the selected tester, this button becomes active. When the Disconnect button is active (text is black), you can disconnect from the selected tester by clicking this button.
Wednesday, April 6, 2022

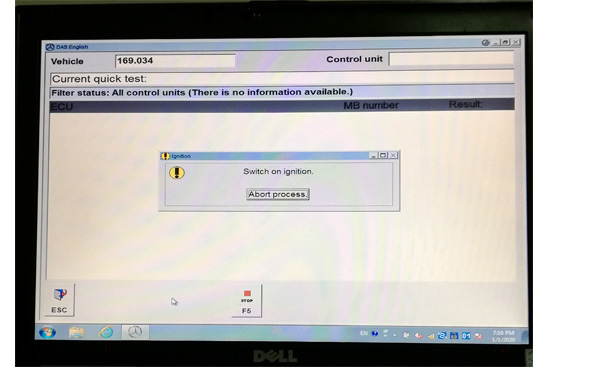
C4 Prompt appears "Switch on ignition" Solution

Problem:
My Mercedes star diagnostic C4 Prompt appears "Switch on ignition" when diagnosing my car. What is the problem ?

Solution:
This is probably due to a bug in the program that requires upgrading from C4 and updating the program again. If you don't know how to update the program, you can contact us and our technicians can teach you for free.

Wednesday, March 30, 2022

SUPER MB PRO M6 vs C4 C5


SUPER MB PRO M6 vs C4 C5

1. Super MB Pro M6 uses the advantages of wireless testing and strong penetration of wifi signals to reduce the dependence on the communication transmission line during the test and breaks the limitation of the distance of the test. The factory tester C4 is durable and easy to carry.

2. M6 appearance adopts ABS + PVT plastic structure, which is anti-drop and easy to carry, reduces the loss of the product shell to the wireless shielding, and greatly improves the wireless distance and stability.

3. SUPER MB PRO M6 adopts the dual cooling mode of heat sink and fan. When the internal temperature of the diagnostic tester reaches 35 degrees or more, the product fan intelligently automatically turns on the strong cooling mode. This greatly improves the stability and safety of product programming.

4. The network cable interface of M6 adopts a built-in structure, which will not loosen and damage the network port due to falling and collision.

5. This M6 is fully compatible with the original software, and the firmware is updated independently by the manufacturer. No additional driver installation is required

6. SUPER MB PRO M6 supports all the functions of the manufacturer, the latest DOIP protocol, K-line, multi-channel CAN line, LIN line, RS485, etc., can test the latest new cars and very old models.

7. The M6 supports various Mercedes-Benz models such as 12v small cars, 24v diesel trucks, buses, and utility vehicles.

8. The firmware update does not need to install a battery, directly connect to the car power supply through OBD, there is no need to worry about firmware damage during the upgrade process.

Friday, March 25, 2022

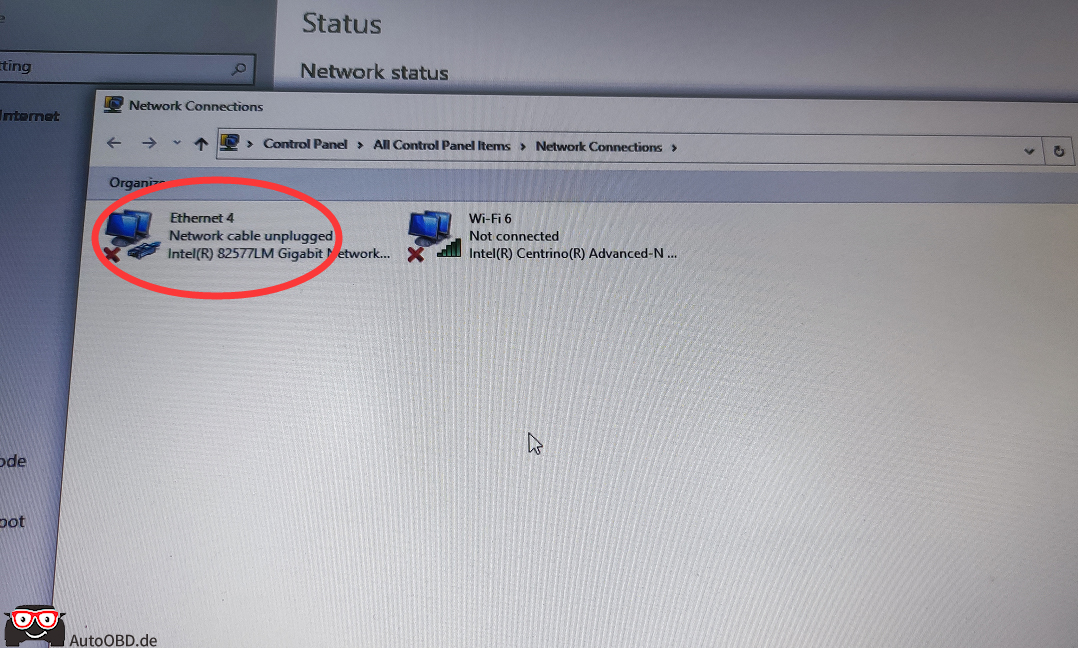
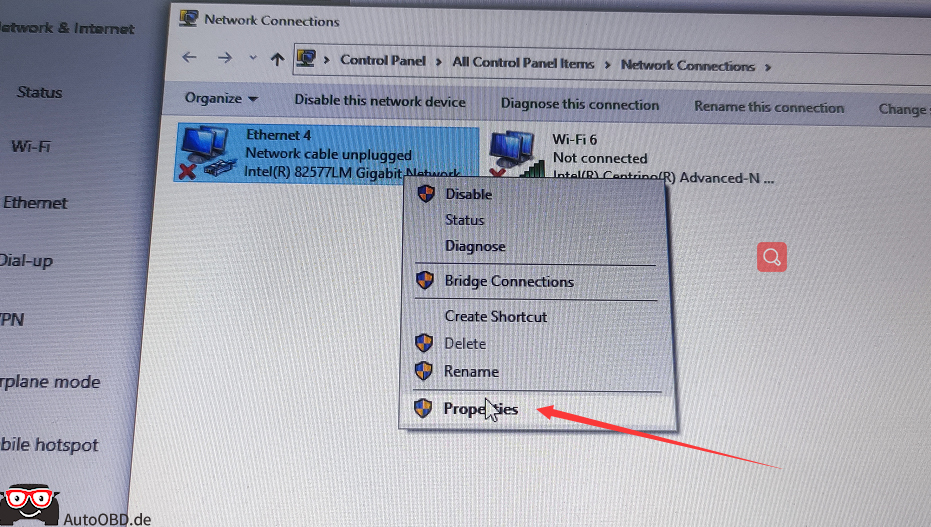
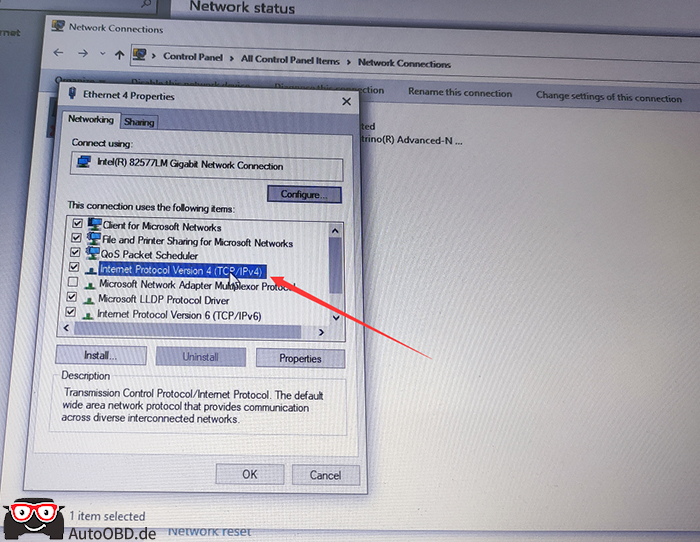
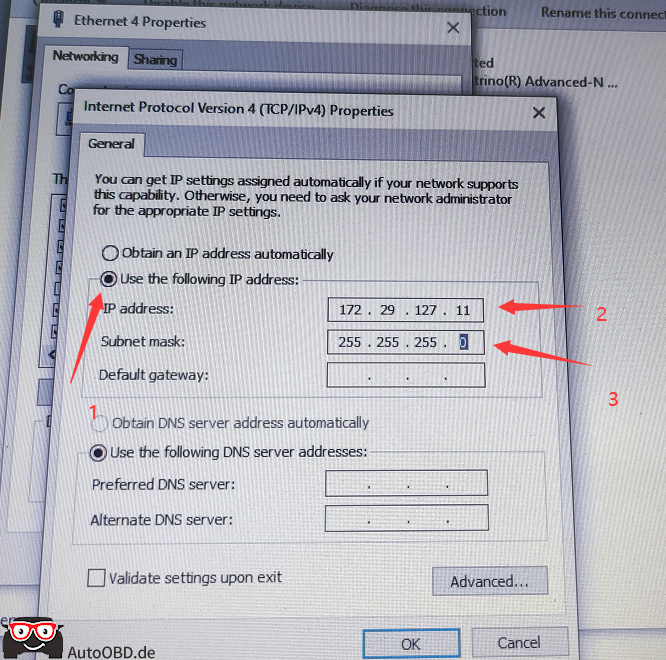
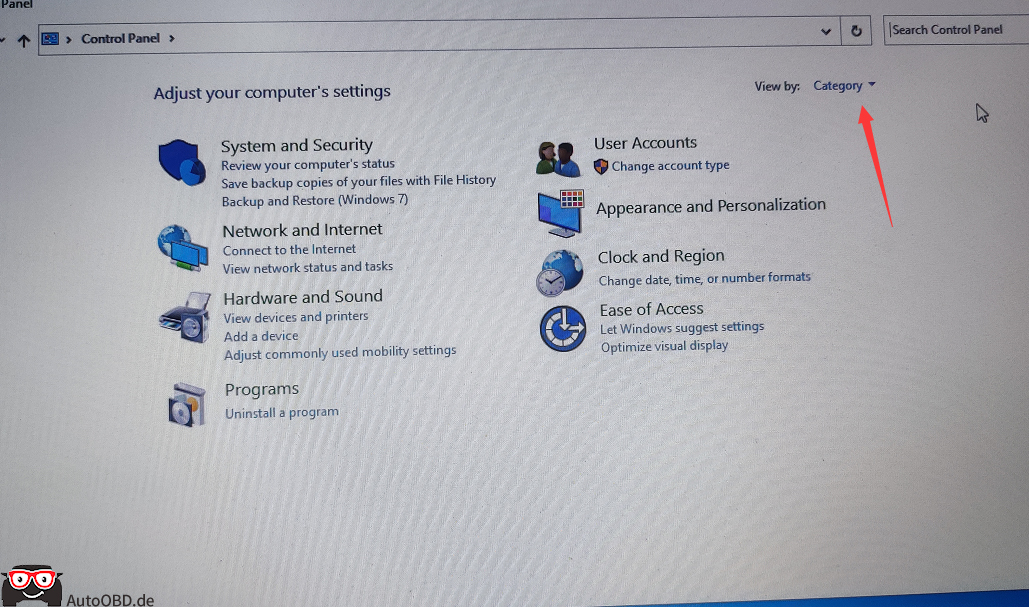
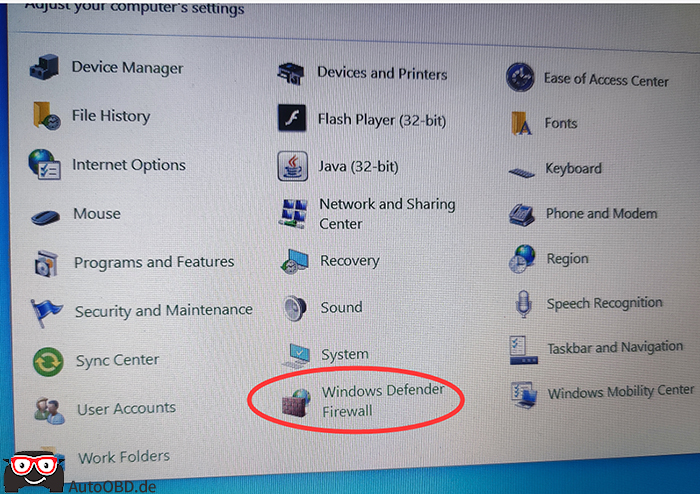
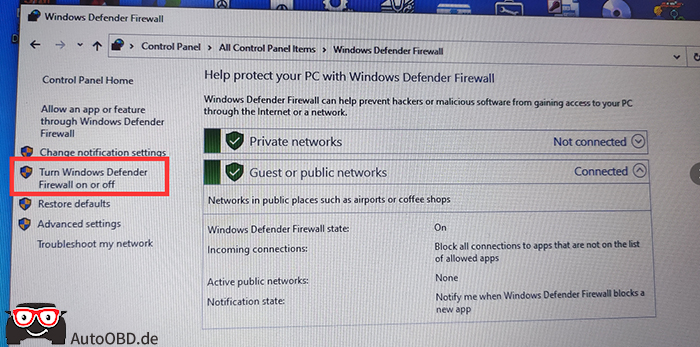
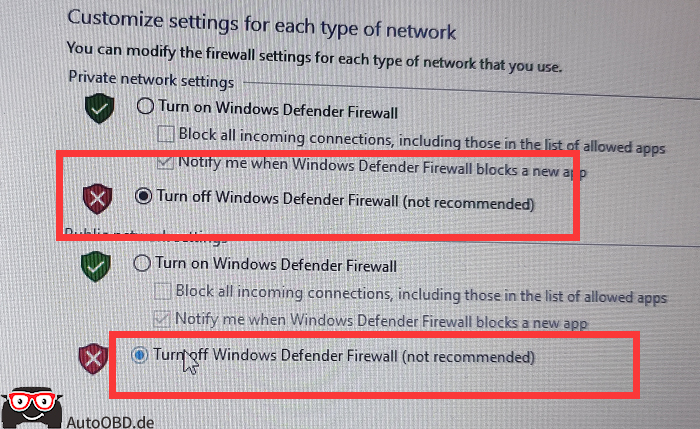
How to Set IP Address and Close Firewall for SD C4 C5 Software?


How to Set IP Address and Close Firewall for SD C4 C5 Software?

Ethernet IP V4:

172.29.127.11

Subnet Mask:
255.255.255.0

How-to-Set-IP-Address-and-Close-Firewall-for-SD-C4-C5-Software-1
How-to-Set-IP-Address-and-Close-Firewall-for-SD-C4-C5-Software-2
How-to-Set-IP-Address-and-Close-Firewall-for-SD-C4-C5-Software-3
How-to-Set-IP-Address-and-Close-Firewall-for-SD-C4-C5-Software-4

Then check if the firwall is closed.

How-to-Set-IP-Address-and-Close-Firewall-for-SD-C4-C5-Software-5
How-to-Set-IP-Address-and-Close-Firewall-for-SD-C4-C5-Software-6
How-to-Set-IP-Address-and-Close-Firewall-for-SD-C4-C5-Software-7
How-to-Set-IP-Address-and-Close-Firewall-for-SD-C4-C5-Software-8