Showing posts with label Star Compact 5. Show all posts

Wednesday, October 20, 2021

MB SD Connect C5 Star Xentry Diagnosis Hardware, Software, Guide, Install, Upgrade


MB SD Connect C5 Star Xentry Diagnosis Hardware, Software, Guide, Install, Upgrade

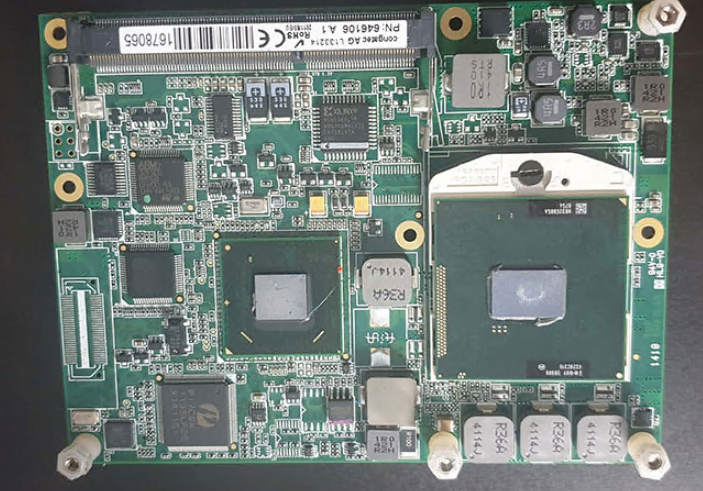
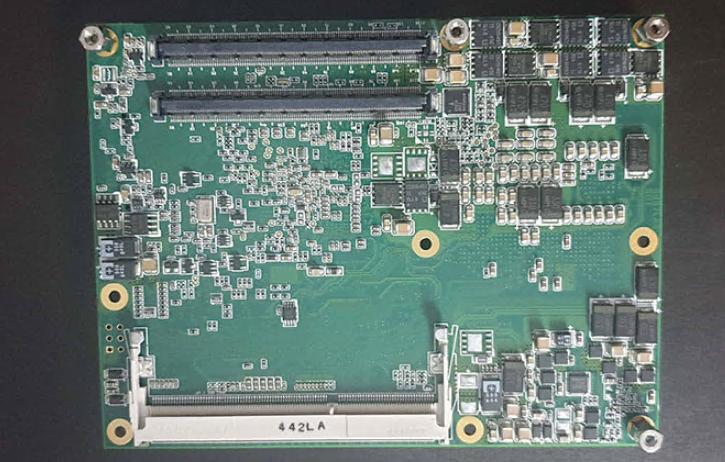
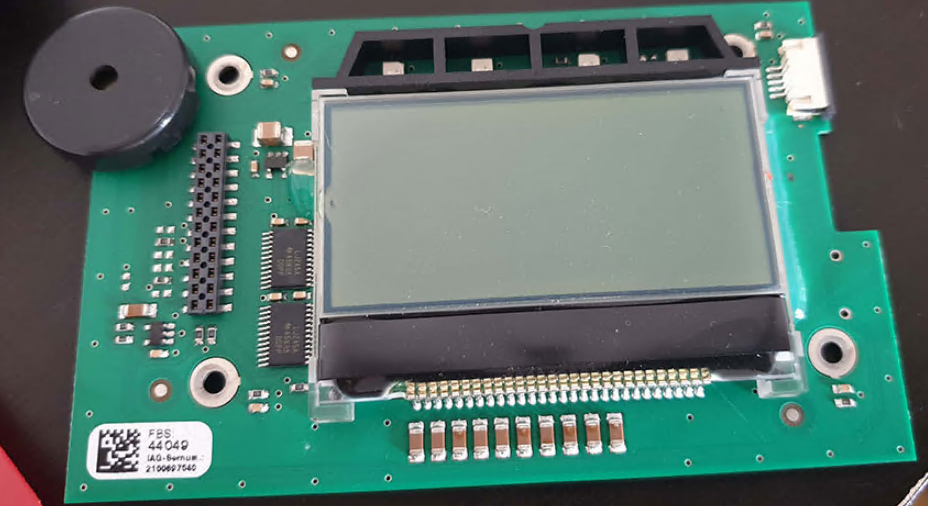
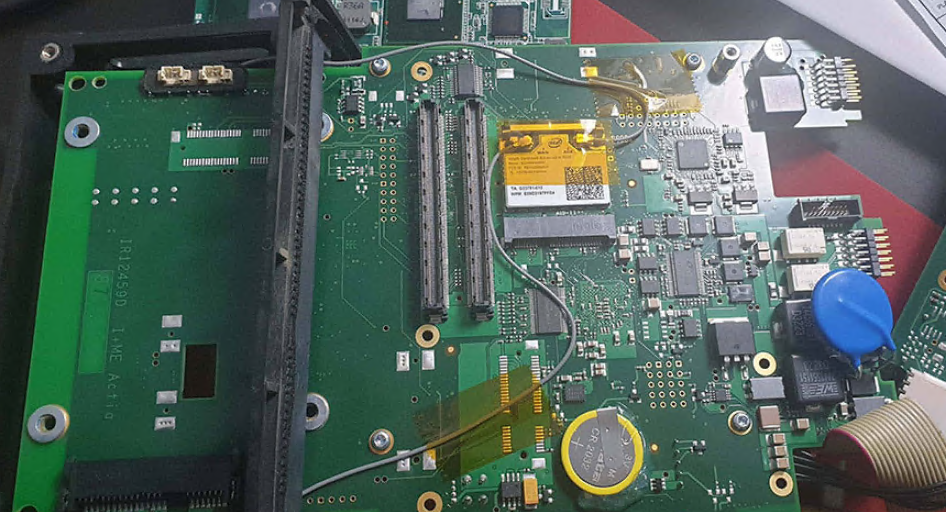
Well, after buying lots of Xentry Connect and working with them, I realized, man they are slow as shit, from booting up the interface, to appearing in xentry control, to opening up xentry, lots of time, this is because it is not like china clones, or SDConnect (C4), or VCI (C6) which are normal interfaces not a whole computer like Connect, so I managed to completely disassemble the interface and see if it is possible to do something about it.

So, this interface or minicomputer has the following:
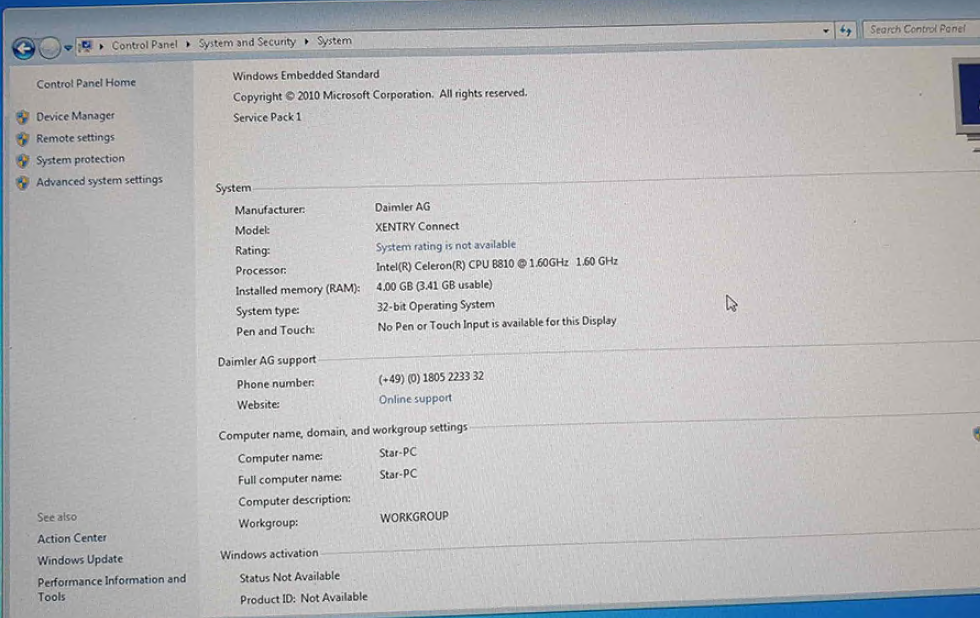
OS: Windows 7 32bit Embedded
MB: HM65 Chipset
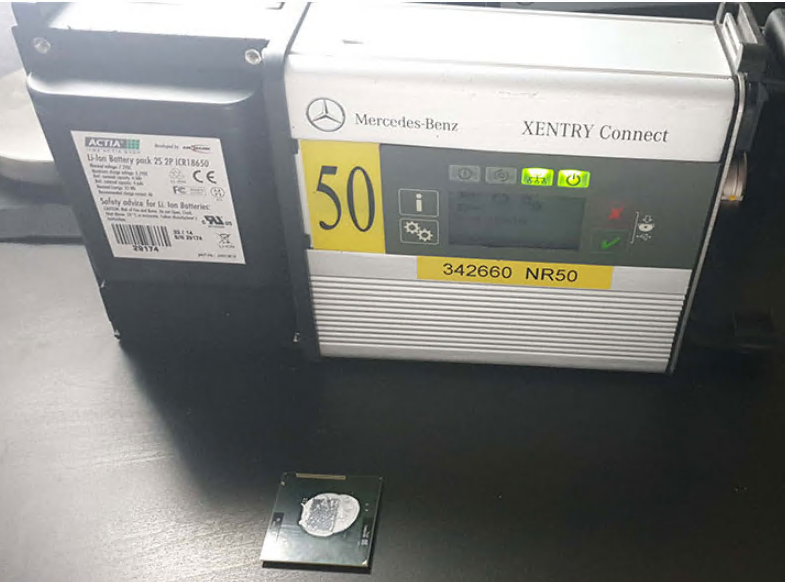
CPU: Intel Celeron B810 2 cores 2 threads 1,6Ghz 35w, 2mb L3 cache, PGA989 (2nd gen) this is the biggest issue, cheap shit processor
GPU: Integrated obviously
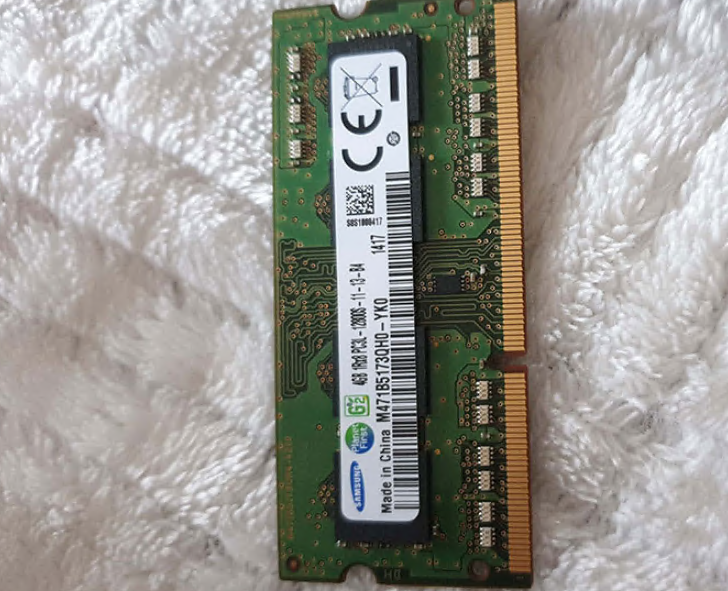
RAM: 4Gb Samsung DDR3 1333Mhz, can’t put 8gb because windows is 32bit so limited to 3,5Gb
SSD: Xmore quality 256GB
WiFi: Intel Centrino Advanced-N 6205 2,4Ghz and 5Ghz 300mbps PCIe Half MiniCard not wow but decent

it has a USB dongle into the board, it is 4Gb, no idea what this is

This device is in testing/development at least since 14/07/2011, first versions appeared in at least 2012

I encountered 2 versions of this ssd, 1 with 238GB found on XC older than 2014, 1 with 223GB found on XC newer than 2015

Upgrade: change that celeron cpu to something better, I personally changed it to i7 2640m 2 cores 4 threads 2,8Ghz 3,5Ghz 4Mb cache 35w

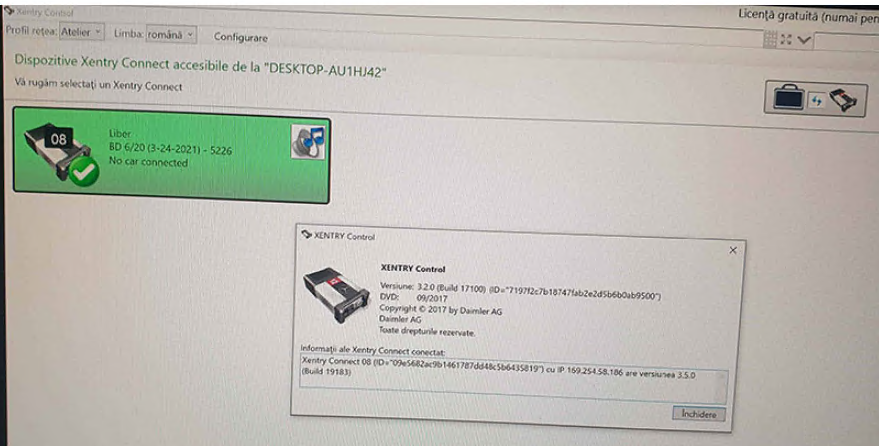
From starting xentry program until Data status 2020/06 appeared

Celeron: 57 Seconds
I7 2640m: 25 Seconds

From Sleep mode to No car connected

Celeron: 47 Seconds
I7 2640m: 37 Seconds

MUCH FASTER in Xentry program!!!
The reason why I choose the i7 2640m is because it is the most powerful 2nd gen processor of 35W (VERY IMPORTANT), more watts mean more heat, and the interface only has 1 small radiator and 2 small ventilators (like a laptop), i wouldn’t risk for right now putting a better processor as i’m afraid it will not cool as it should, it will overheat

Tried a 2670qm (4 cores 8 threads) and the interface shuts down, not temperature problem but watt consumption problem, motherboard can’t deliver enough power and shuts down even ventilators completely, so maximum i recommend 2 cores 4 threads

Also, it is possible to install 3rd gen processors but motherboard doesn’t support 3rd gen processors even doe it is the same socket PGA-989

Check attachment regarding Compatible processors for 2nd gen

INSTALL:
1. Take out battery
2. Take out shield from Backside of Xentry Connect, it has double side addesive
3. Unscrew the 6 screws from radiator
4. Take out radiator
5. Turn the small black protection
6. Change cpu with NEW thermal paste
7. Put all back and that’s it

SSD: You could try putting a better ssd, space is enough actually more than needed for only Xentry, it’s ok for Vediamo, WIS/EPC, Monaco etc.
Couldn’t find any data or performance stats for this ssd, never heard about this company, you can clone this ssd with another one and try

Ram: 4Gbs is max for 32bit, even more, no reason to put more than 4Gb ram, only if you somehow manage to install windows 7 embedded on 64bit

WiFi: Looked for the Intel AC-7260 but it is said it is buggy as hell, also you need to change drivers for the wifi card, which is kinda complicated, you can install driver booster on the interface’s windows (through remote desktop connection) and install driver from the wifi card you install

It supports USB 2.0, 3.0 and 3.1

SOFTWARE:
1.1 Xentry Tab (Part of Xentry Kit 2)
This is the software that you will have on your laptop

1.2 Options:
1)Download separately Xentry Tab from attachment you have there Setup, open and install
2)Skip to 2.1 and install from Xentry Kit 2 folder, you have there Setup, open and install

2.1 Xentry Connect (Part of Xentry Kit 2)
I highly recommend to update interface to latest Xentry, which is 2020.06 also there will not be a newer Xentry for this interface, need to buy kit 3 or 4
1. Link is in the attachment, download KIT2 06-2020 Final Edition
2. Extract with 7zip and copy the folder and put it on a minimum 32Gb USB Stick or External SSD/HDD

3. Installing the release update on the XENTRY Connect
Please note: The XENTRY Connect must be in standby mode to install the release update. You can shut down the XENTRY
Connect directly on the device via the menu (gearwheels button) or from the XENTRY Control session.

4. Connect the power supply unit to the XENTRY Connect and insert the USB data storage medium into a free USB port of the XENTRY Connect.

5. Now start the update mode of the XENTRY Connect by simultaneously pressing the two “red cross” and “green tick”buttons.

6. Once “Start update” appears on the display, confirm this with the green tick. The update procedure starts. This will be indicated as follows on the XENTRY Connect display:

The USB update takes about 100 minutes. The XENTRY Connect indicates when the update is finished on the display.

7. You can complete the process by pressing the “gearwheels” button. Or, wait until the XENTRY Connect automatically shuts down (approx. 10 minutes after the picture appears on the display).

2.2 Configuration from Xentry Control
1. Start the interface
2. Connect LAN cable to interface and laptop
3. Open Xentry Control and in the top section open configuration
4. Go step by step with lan and wifi and others bla bla

2.3 Xentry License/StartKey
In case your Xentry Connect has expired license, 99% chance because dealership started to use kit 3 from 2018/06, can check by opening StartKey Center or Xentry (No Acces authorization code), then you need to activate license
For this, i’m not publishing for free solution, contact me if needed, activation is 100 Euros

Problems/Issues/Errors:
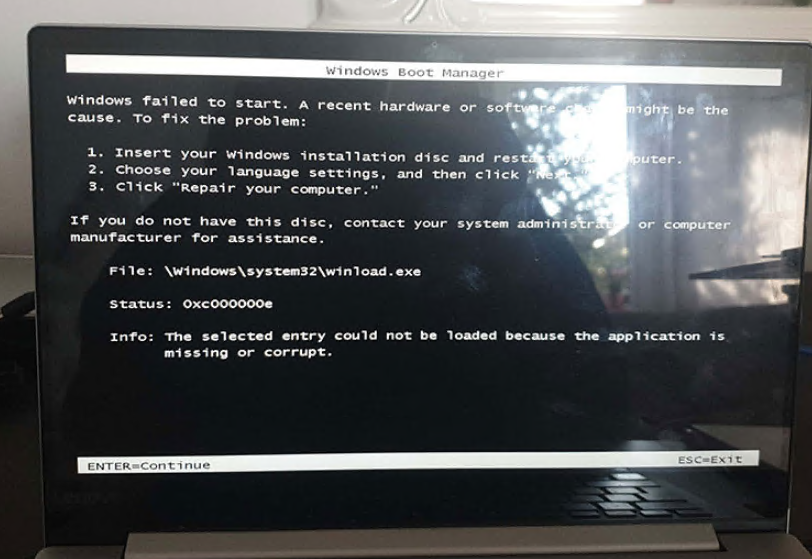
In case you have Device is booting/Update (when not updating) for looong time, more than 3 minutes

1. Make NORMAL not embedded Windows 7 32bit NOT 64bit USB bootable drive, minimum 4Gbs

In case you have new laptop with USB 3.0 and you have no mouse in Windows 7 install setup, you need to integrate USB 3.0 Drivers into Windows 7 ISO with NTLite, check youtube

2. Take out SSD from Xentry Connect
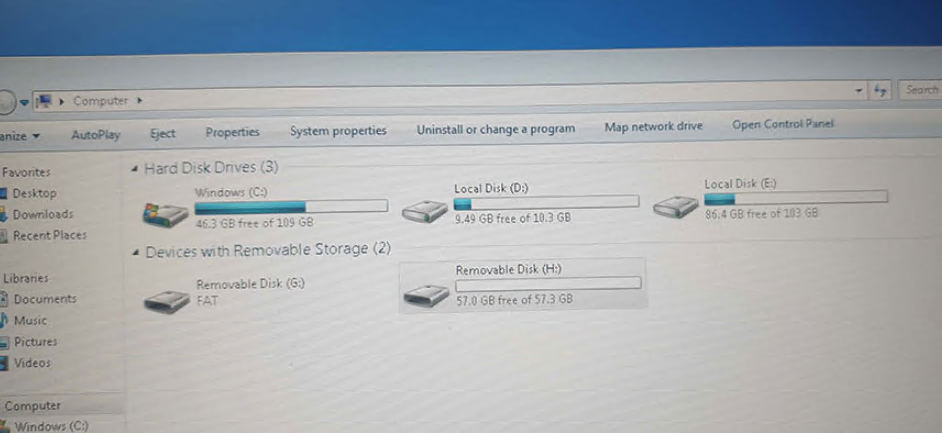
3. Connect to laptop, or if you have older laptop install in laptop
4. Connect USB Stick with Windows Embedded 7 32bit
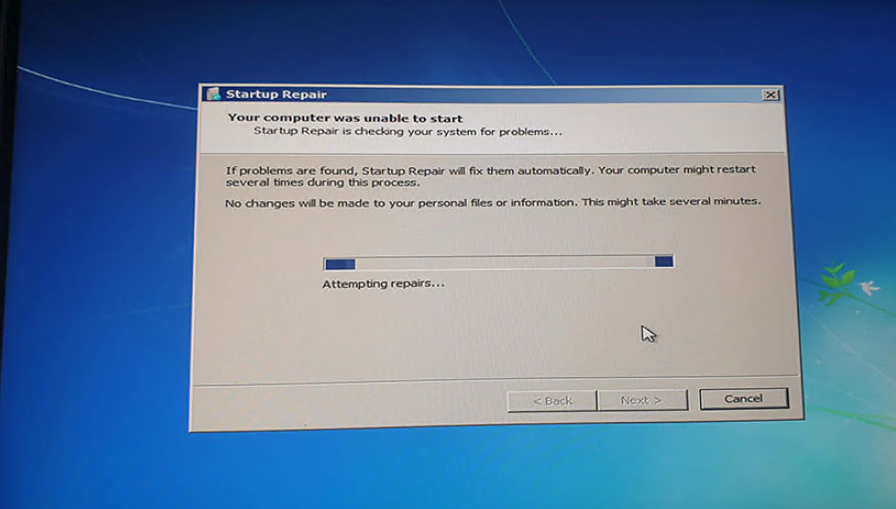
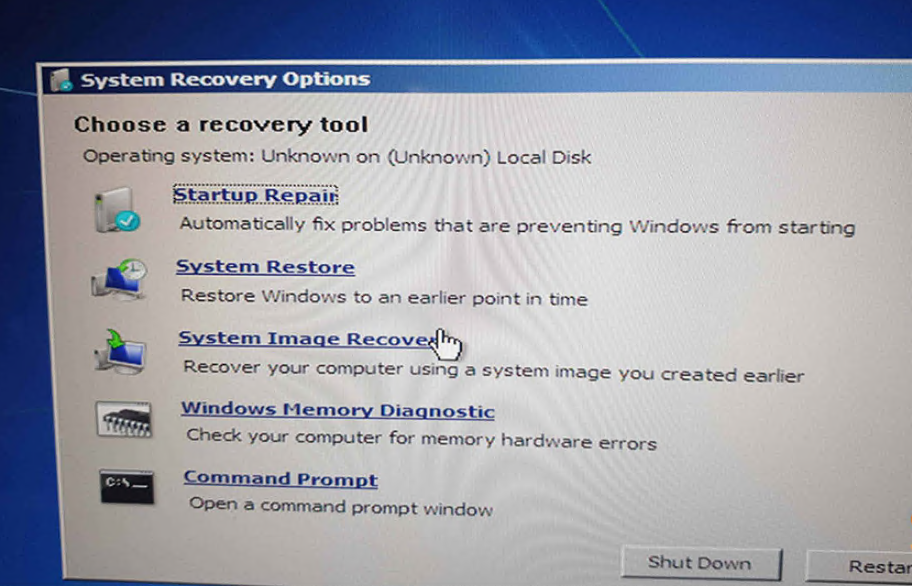
5. Select Language, Repair my computer
6. Select Startup Repair, let it do it’s thing
7. Insert SSD back to Xentry Connect and done

VERY IMPORTANT, PUT AT LEAST 1 SCREW to hold SSD to not move, if it moves you will corrupt BCD again (not booting, update/device is booting for long time, jump to 2)

If you have update error, doesn’t matter what error:
1. Open Support Tool
2. Go to Reset
3. Check I have spoken to the Diagnosis UHD and would like to reset the Xentry Connect
4. Click Setting up USB data media
5. Select USB stick (file that will be on USB stick is 1.6KB so insanely small)
6. Insert USB stick into XC
7. Press Tick (Green) and X (Red) at the same time (while in Sleep mode)
8. Let it to it’s Reset (x/15)
9. Perform Update with 2020/06

Only the display is lighting up but no text can be from multiple causes, internal defect, missing hardware display files, bios chip fucked etc.

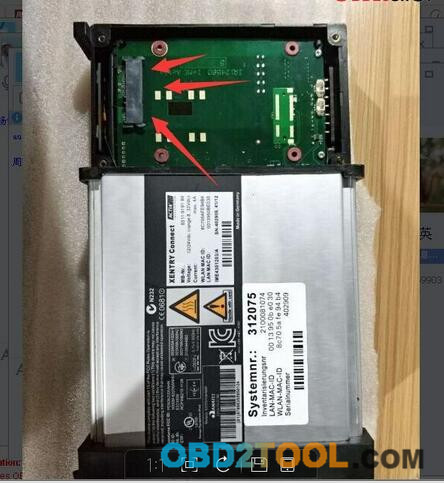
If you don’t want to change cpu which would be a stupid decision, at least take off the back cover, A LOT of dust accumulated over the years can be there and it is blocking cooling very badly (see picture attached)

OPTIONALLY

DAS Standalone
Vediamo 05.01.01
WIS 2020.04 (after 2020.04 xentry connect no longer supported), i tried copying missing files from 2020.04 to 2020.10 but it doesn’t work and it’s not that simple)
DTS Monaco 8.16


Thursday, October 14, 2021

How to Sovle MB SD C5 battery too low?


Problem:

I tried to update the mux but saying battery too low.

How-to-Sovle-MB-SD-C5-battery-too-low-1

Solution:

Your MB Star C5 host needs to install a new battery before proceeding with the firmware upgrade. Please buy new battery: 6 units Ni-MH Rechargeable batteries, Size: AA, Voltage: 1.2V.

Please follow this article on how to install battery for C5:

https://blog.obd2.ltd/how-to-install-mb-sd-c4-rechargeable-batteries/

***For new sdconnec C4 Plus / MB SD C5 with DoIp, you can update the firmware without installing battery.

https://blog.obd2.ltd/update-sd-connect-without-batteries/

The next question is: I have gotten the batteries, I am trying to configure the toolkit.

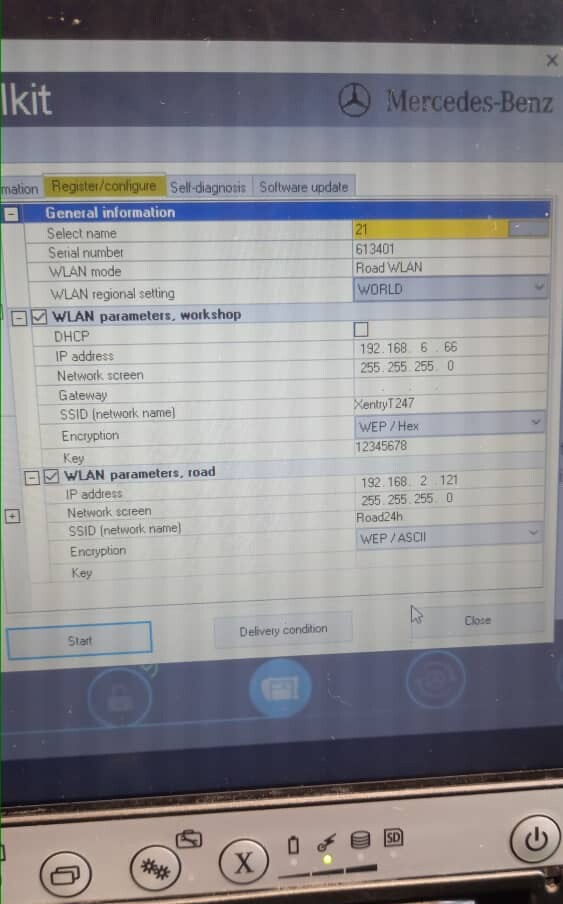
Replied: Refer to the following picture to set, password:26 a

Do not tick off Wlan parameters, workshop. and Choose web/hex here.

How-to-Sovle-MB-SD-C5-battery-too-low-2
How-to-Sovle-MB-SD-C5-battery-too-low-3

Finally, MB SD C5 is working. And ready to do diagnosis or programming.

Sunday, June 13, 2021

MB SD C5 Xentry 2012.11 Battery Too Low Solution

I need help want to activate my 2021 MB star SD C5 Mercedes  xentry  with Panasonic toughpad tab scanner with 2012.11 version of the software.

Have tried to update the mux but saying battery too low.

sd-c5-low-battery-solution-01
sd-c5-low-battery-solution-04
sd-c5-low-battery-solution-03

Obd2tool.com solution:

Your MB Star C5 host needs to install a new battery before proceeding with the firmware upgrade. Please buy new battery: 6 units Ni-MH Rechargeable batteries, Size: AA, Voltage: 1.2V.

sd-c5-low-battery-solution-02


Thursday, December 21, 2017

Why will you choose DoIP Xentry connect C5?

Xentry Connect C5 provides complete diagnosis for newest hybrid W222,with a qualitative improvement in hardware and software by authorization of diagnostic interface to control the software,it will allow you to work on windows xp, win7/8/10 system.
Why should you buy DoIP Xentry connect C5?
Original Plan 1:1 Copy Mercedes Wifi Xentry Connect C5 multiplexer For Mercedes Car And Trucks.
After 2015, all Star Diagnosis equipment is no longer supported. First of all, this means that there is no update of the diagnostic data for the newest cars and their systems, as well as the lack of the possibility of coding and programming of electronic units due to the backlog of the software data level in the device, from data in the electronic control units of the car.
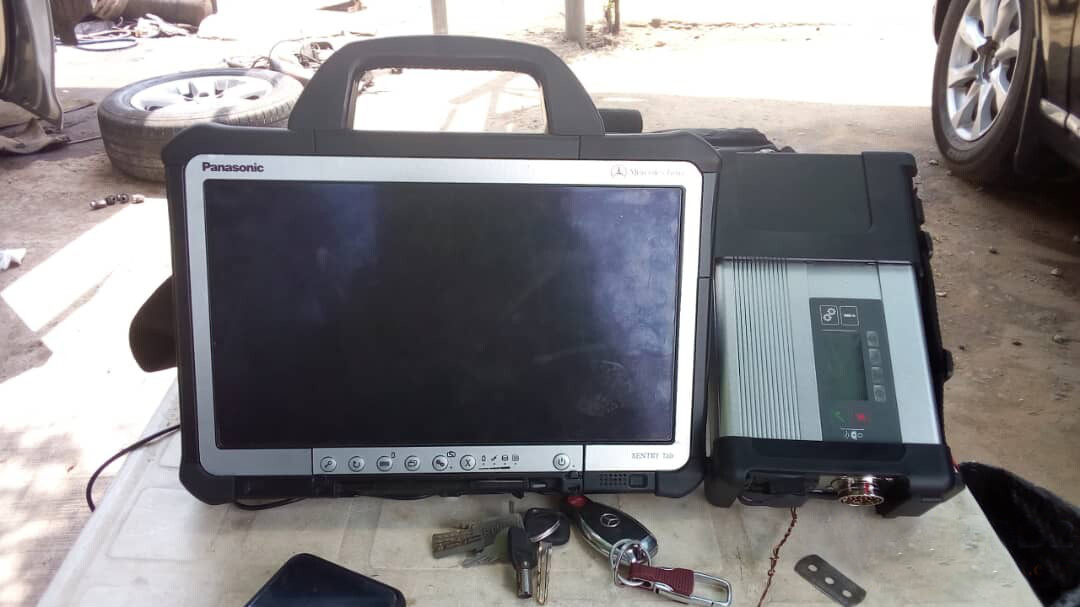
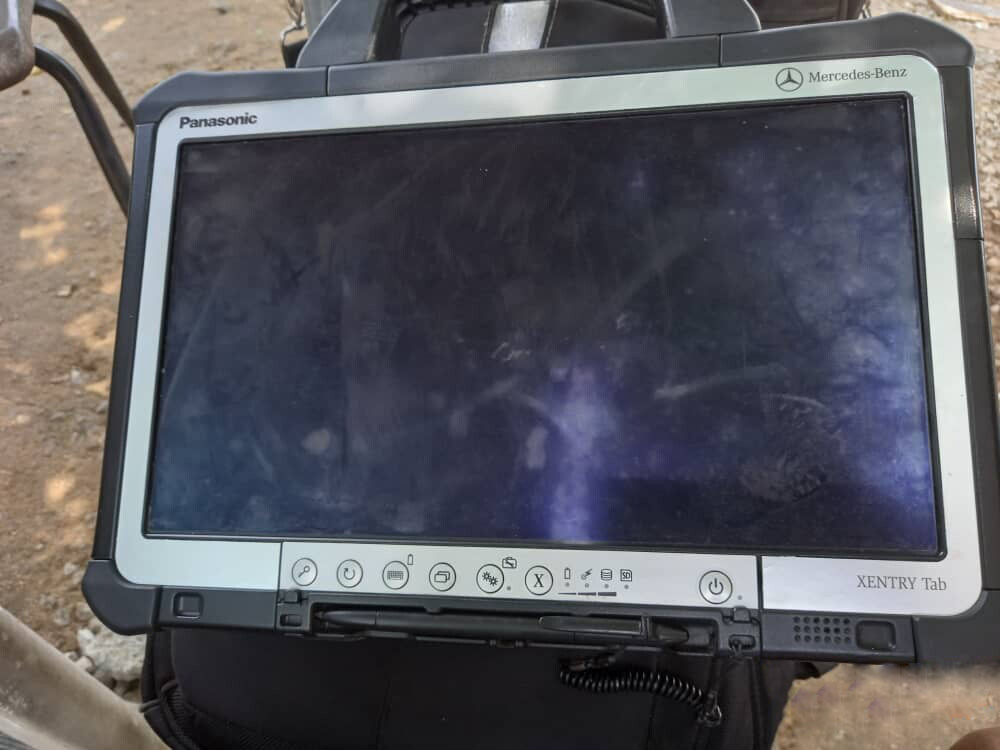
Already at the end of 2014, at most dealerships, almost all of the previously used Star Diagnosis Compact4 with SDConnect DoIP multiplexers were almost completely removed. Instead, dealers received Xentry Kit kits, which include the latest Xentry Connect multiplexers and Xentry Tab tablets from Panasonic. Tablets are custom-made, although they also have a “civilian” version – the Panasonic Toughbook CF-D1, somewhat inferior in terms of battery life to the original Xentry Tab, but it has a much more powerful configuration.
Honestly, the need to use the Xentry Tab on non-dealer services seems somewhat exaggerated to me. With dealers everything is clear – they were forced to use this equipment.
And what about workshop service? Undoubtedly, the tablet from Panasonic is not very bad … But … Its price is disheartening. The cost of the Japanese tablet is realistic to buy pieces of eight new laptops or tablets from other manufacturers.
So , we suggest you buy Mercedes Benz DoIP Xentry Connect C5 MB Star C5 Plus Panasonic CF52 Laptop from us , We will install and activate for you ready to use. What’s more, this package offer saves you money than buying them alone.
After all, there are many reasons to choose Xentry C5 Connect. The main thing is one: since 2015, the diagnostic multiplexer Xentry Connect C5 becomes the only one used at dealerships.
Thus, by purchasing this equipment, you will not lag behind the progress. Each client of of yours, seeing with his own eyes ,that you are in your work using the same device that he saw at the dealer’s service station, will understand that he made the right decision entrusting his car to your specialists.
Xentry Connect DoIP Software List:
1.DAS 2017.12: the automatically Diagnosis Assistance System
2.Xentry 2017.12: New software released by Bennz Company after 04/2009 by diagnosis new cars.
3. WIS net 2017.04:Workshop Information System
Supply the whole view of the wiring diagram in a car, component location diagram and maintenance method. What you do is to enter the chassis number, and then you will get the manufacture data, engine configuration and the car model -all in detail.
4. EPC.net 2017.04:Electronic Parts Catalog
5. ST Finder:Part Location Finder options: 2008 and 2016
6. STARUTILITIES :the movement management system and self-test
7. SD MEDIA 2014
8. PL71: 2016 Mercedes software with PL70
9. Engineer Software:DTS monaco V8.03 And Vediamo V5.01.00 Support Offline Programming
10. HHT Software for old cars
2017.12 DoIP Xentry Connect C5 Benz SD Connect PCB
1
2
3
4
5
DoIP SD Connect C5 in test:
6
7
8

2017.12 MB SD Connect C5 with Super Engineering Software DTS monaco And Vediamo Plus EVG7 Tablet Support Offline Program

2017.12 MB SD Connect C5 with Super Engineering Software DTS monaco And Vediamo Plus EVG7 Tablet Support Offline Program


1.Support Wireless
2.Xentry Software Version:2017.12
3.Hardware Verison:  OS:2.3   CSD:2.11
4.SupportedMulti-Language: English
5.Including Super Engineer SoftwareDTS monaco V8.03 And Vediamo V5.00.06 
6.Support Offline Programming
7.All software activated. All system ready to use

Software list:
1. DAS 2017.12: the automatically Diagnosis Assistance System
2. Xentry 2017.12: New software released by Bennz Company after 04/2009 by diagnosis new cars.
3. WIS net 2017.04:Workshop Information System
Supply the whole view of the wiring diagram in a car, component location diagram and maintenance method. What you do is to enter the chassis number, and then you will get the manufacture data, engine configuration and the car model -all in detail.
4. EPC.net 2017.04:Electronic Parts Catalog
5. ST Finder:Part Location Finder options: 2008 and 2016
6. STARUTILITIES :the movement management system and self-test
7. SD MEDIA 2014
8. PL71: 2016 Mercedes software with PL70
9.Engineer Software:DTS monaco V8.03 And Vediamo V5.01.00 Support Offline Programming
10.HHT Software for old cars
Xentry Software:


DTS monaco V8.03 Super Engineering Software:


With the Vediamo benz engineers software out of the market, Super engineer software DTSmonaco is coming, it can achieve separate programming, scan entire vehicle software code, read entire vehicle setting code data, It truly one-button operation, Keep entire vehicle data is not a dream.   

Mercedes-Benz engineer software comparison:
Vediamo: Vediamo software can only read module single data, set code, authority is too low

DTS maonaco software is development by Mercedes Benz manufacturers ,all car data one click scan and save. Data can be directly change the underlying data, the module used directly copied data replacement. Automatic programming, can automatically set code completely out of online operation. not afraid of your new models, the latest models more awesome
DTS and Vediamo difference
Function
DTS
Vediamo
entire vehicle setting code one-click save
yes
no
entire vehicle control unit software number one-click save
yes
no
read entire vehicle fault code
yes
no
data exchange
yes
no
quick test
yes
no
single control unit one-click setting code offline
yes
no
Offline programming
yes
yes
Increase or decrease SA code
yes
yes
Personalized settings control unit parameters
yes
yes 

DTS-monaco introduction:
1.DTS-monaco is the official software used by Daimler Benz development engineers
2.DTS Monaco is universal engineering test terminal for the diagnosis and control function of the vehicle controller, The name Monaco is derived from the modular analyzer used in vehicle traffic
3.DTS Monaco covers all the tasks in the field of engineering, testing and production test preparation 
4.When Mercedes-Benz maintenance test it is the greatest authority,the perfect support for C5(SDconnect) and (Ecom) Hardware(at present, Das-xentry.Vediamo lower authority)

DTS-monaco special feature:
1.Quick Test;Entire vehicle ECU quick test, and the test can choose to edit more
2.Variant Coding; Coding with variation add VO- delete VO function
3.ID identification ; One click to read the whole car and save all modules programmed numbers
4.Complete Variant Coding; One time to read all the ECU coding vehicle data, can be written to the vehicle again, completely off-line operation
5.Diagnostic Services; Advanced features can see your choice of internal and external data module, turn on the computer authorization(not driving license), Activate ECU, reset ECU, modifying the original chassis number
6.Flash programming; Fully offline programming
7.Diagnostic Trouble Code; Diagnostic module DTC fault code
8.ECU Exchange; Two of the same ECU, by reading data import data exchange
9.Symbolic trace: Record and track the file, after repeated viewing, analysis of fault logic point

Basic programming set code function:
1.unit for off-line programming
2.a key to off-set code
3.W166, cancel the programmed number of calculation method of urea, one perfect canceled all 166 urea system.
The new c s-series to the factory installed conversion:
4.222, 205 installing fragrance systems
5.2015, paragraph 212, changing traffic light permanently lit
6.212, 204, adding electric ear
7.222 205 HU5 traffic solution for DVD video
8.W164 closed recycling system
9.W205, retro atmosphere lamp
10.205, 222 adding electric ear electric trunk, the trunk kicking function
11.166, how to modify the gateway set up codes
12.166 meters finished degrees Fahrenheit to degrees Celsius
13.US standard maintenance mileage be set to the number of miles
14.164 disabled diesel particle filter regeneration system
15.166 canceled urea
16.205 added electric rear vision mirror
17.HU45 regional Chinese resolve lock
18.W204 W166 foldable rear-view mirror
19.change the 166 on board, display in Celsius
20.W212 disable ECO configurations
21.activate the HOLD function ABR2XT
22.open W22 looked up appears
23.the AMG sports package enabled W212
24.the air bag computer reset factory State W166
25.to increase the brightness of the color instrument cluster s W222
26.22.97g to install the steering wheel shift paddles
27.W221 AMG W216 dashboard style
28.airbag ECU unlock W204 212
29.disabled child seat recognition sensors W221
30.opening rear fog lamps as spare brake lights with W222
31.increasing engine power MED177 


Vediamo  V05.01.00 Engineering Software:
Super-Engineer Mode for Benz cars Vediamo  V05.01.00 is the latest version with activation!
【Don‘t need online 】, (ONLINE SCN CODING) can complete the special function programming, Such as Modified 7-speed gearbox, shift paddles,etc..
Finally, with this software, you no longer need to programming on line or applying to change SA on line. Now you can use Vediamo(off line) to programming,setting code, changing SA Code and so on.


MB SD Connect Compact 5 Supported Vehicle List:

MB SD C5 Support Mercedes Benz Cars After Year 2000
 
Passenger Car Support List:
A(176),  A(169),  A(168),  B(246),  B(245),  CLC(117),  C(204)  C(203),  C(202),  190(201),  E(212),  E(211),  E(210),  124(124),  S(222),  S(221),  S(220),  S(140),  S(126),  
E(207),  CLK(209),  CLK(208),  CLS(218),  CLS(219),  CL(216),  CL(215),  CL(140)  SLK(172),  SLK(171),  SLK(170),  SL(231),  SL(230),  SL(129),  SL(107),  SLS(197),  
M(166),  M(164),  M(163),  G(463),  G(461),  E(212),  E(211),  E(210),  124(124),  S(222),  S(221),S(220),  S(140),  CLK(209),  CLK(208),  CLS(218),  CLS(219),  CL(216),  
CL(215),  CL(140),  SLK(172),  SL(231),  SL(230),  SL(129),  SL(107),SLS(197),  M(166),  M(164),  M(163),  G(460),  GL(164),  GLK(204),  R(251)

Van Support List:
MB 100(631),  T1,  SprinterIII,  SprinterII,  SprinterI,  Sprinter900,  Citan,  Vito(639),  Vito(638), V(638),   Viano(639),  T2,  Vario,  Vaneo(414)
 
Truck Support List:
Actros963/4,  Actros2,3,  AtegoIII,  AtegoII,  AxorII,  Eonic,  Zetros,  Actros,  Atego Light,  Atego Heavey,  HPN M96,  Atron,  HPN M2000,  SKL,  FSK,  Further model series
 
Unimog Support List:
U20,  UGN,  UHN
 
Bus Support List:
TRAVEGO,  INTOURO,  INTEGRO,  CITARO,  CAPACITY,  CITO,  TOURISMO,  O350/O403, CONECTO,  O404,  O405-O408,  
Minibus,  OC500,  TOURO,  TOURINO,  MBC,  MULITEGO,  O500,  O500/OH,  OH,  OH368,  OF,  OF384,  LO,  O400,  
FURTHER MODEL SERIES
 
Super Sports Car Support List:
SLR(199)

Package List:
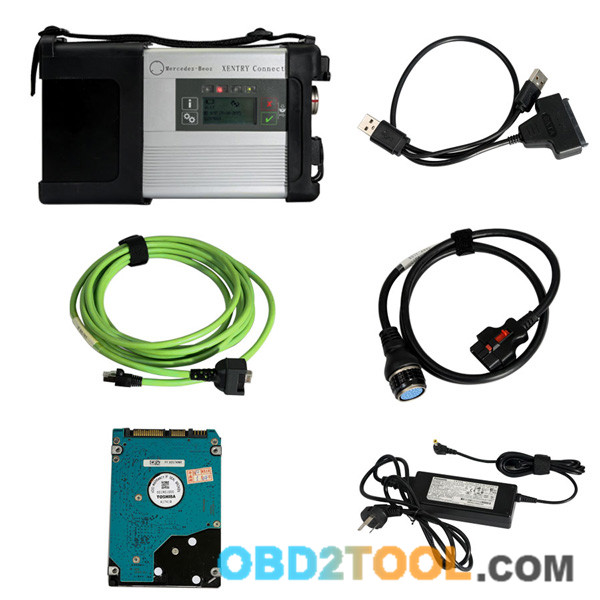
1pc x Multiplexer
1pc x OBDII 16PIN Cable
1pc x 38PIN Cable
1pc x 14PIN Cable
1pc x 8PIN Cable
1pc x Lan Cable
1pc x EVG7 Diagnostic Controller Tablet PC (All software activated. All system ready to use

http://www.obd2tool.com/goods-5186-MB+Star+C5+With+Vediamo+V050006+Engineering+Software+Plus+EVG7+Tablet+PC.html 

How to use 2017.12 MB Star C5 hard disk and how to update Star C5

MB STAR C5 moveable hard disk is used for containing Xentry DAS, please do not use it as a computer system hard disk.
39-1
Here two tips to follow.
Option 1. you use C5 disk on your own computer. Tip: advice you not rework it or dismantle it and plug it to the computer to modify the data.
Option 2. you buy the extra computer together with MB Star C5, then you are advised to prepare one blank hard disk for system installation because the computer you bought doesn’t come with hard disk.
39-2
How to update DoIP Xentry Connect C5?
Usually you are required to send back the Benz diagnostic tool MB Star C5 hard disk for update unless the engineers can make out the updating software for download.
Attach one picture which shows the hard disk location in the C5 mux.

Friday, November 24, 2017

Download OpenShell FIX for W204 207 212 in DAS standalone menu

Free download the FIX enables the access to diagnosis of vehicle types W204 (C, GLK Class), W207, W212 (E Class) via DAS standalone menu, without XENTRY. Very convenient.
https://mega.nz/#!hTQ0kZIR!SStg4wbHAa_QdGz3No5gmkJ_7uaZ47UPzM0F4RhxAOs
Password: xdos_das_reem_fix1117
32bit Windows only, not 64bit
Note: it’s free, but not tested by professionals!!!!!!! unknown security and perhaps high risk sometimes!!!
You can go to http://www.obd2tool.com/goods-5194-MB+SD+C4+With+Super+Engineering+Software+DTS+monaco+And+Vediamo+Plus+EVG7.html
to have the tested Xentry/DAS, used with relief
27-1

How to configure Xentry Connect C5 V09.2017

2017 Xentry Connect C5 user manual: how to configure/set up MB SD Connect C4/C5 to use for the first time
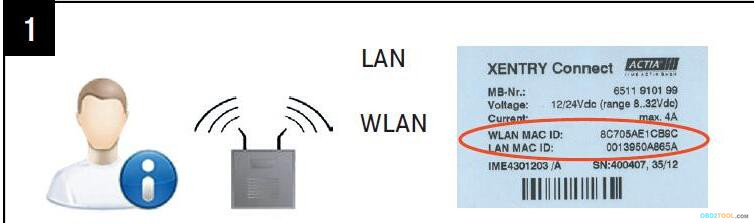
Please have your XENTRY Connect MAC addresses (Wi-fi and LAN) enabled for the workshop network byyour IT supervisor/IT service provider in advance. You can read off theMAC addresses (Wi-fi and LAN) from the stickers on the devices.
26-1
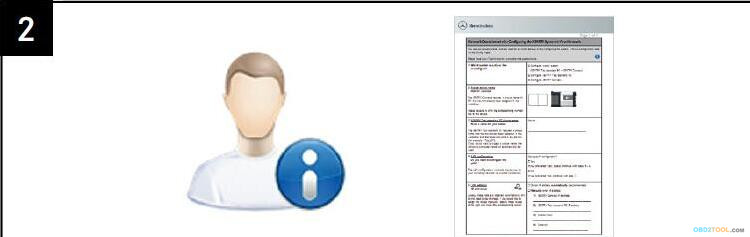
Your case already contains a printed empty network questionnaire.
Please have it filled out by your IT supervisor. Important! Do notcontinue the initial startup until the questionnaire has been filled outcompletely! This will help to avoid additional work.
26-2
The latest Mercedes diagnostic software 09.2017 disk came with your MB SD Connect C5.
You can start the network configuration now.
Completely charge and turn on the XENTRY Connect.
Starting the XENTRY Connect for the first time can take up to 10 minutes.
Configuration can be started whilst both devices are still charging.
Attention! Be sure to use the correct power supply units!
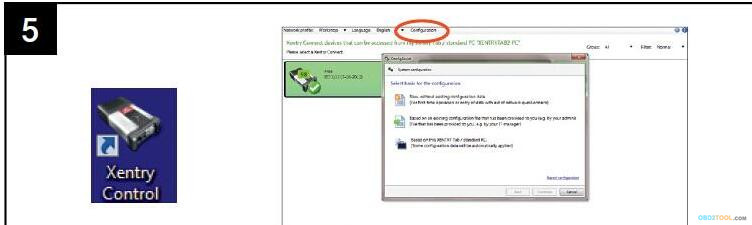
Start the XENTRY Control software using the desktop link on the laptop. ConfigAssist is already open; if not,call up ConfigAssist via the “Configuration” menu.
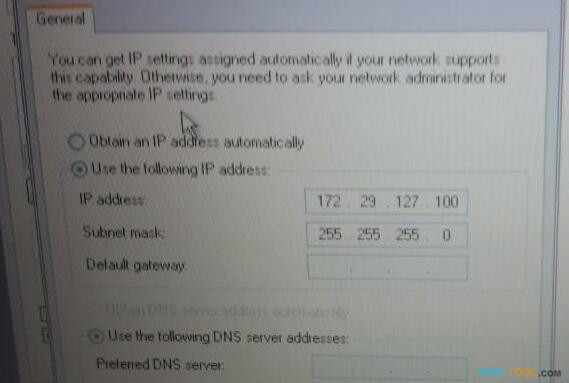
Note! If you work with static IP addresses, you must perform theconfiguration via the expert dialog and transfer the configuration tothe XENTRY Connect via a USB stick.
26-3
Please have the filled out network questionnaire on hand:
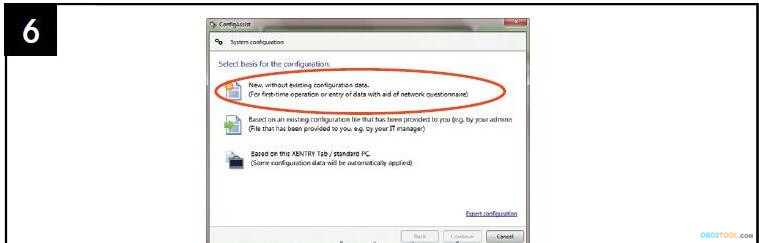
How would you like to configure the devices?
Select one of the 3 options.
Recommended selection: “New without existing configuration data”.
26-4
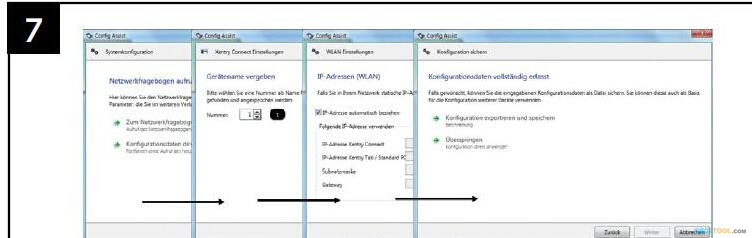
Please continue following the ConfigAssist dialogs and enter the required
data from the network questionnaire.
Next, switch on the XENTRY Connect. This has already finished installing.
26-5
In the final steps, the configuration is transferred from the laptop to the XENTRY Connect. You will be prompted to interconnectthe devices using the supplied black Ethernet connecting cable.
This cable connection is required only for configuration
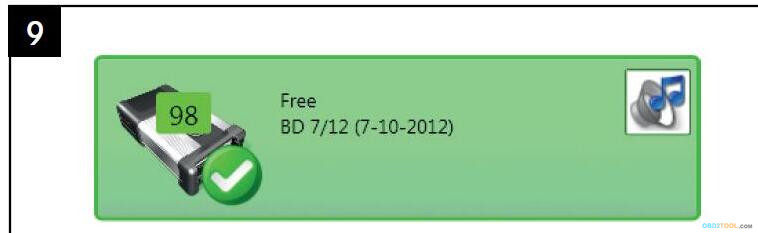
If configuration is successful, a green tile with the number of the Benz diagnostic tool XENTRYConnect C5will be displayed. You can now use the devices: Remove theblack Ethernet connecting cable to work via WLAN and with an onlineconnection. Then click on the green tile in order to read out the datafor ordering the StartKey.
26-6
Done!

(Solved)SD connect interface is Saying “please put in batteries”

Problem:
Hello MB star
I just recieved My tablet and it looks and work Very good .
But The sd connect interface is Saying “please put in batteries”
What type of batteries is it ?
Solution:
This problem same to :
MB Star C4 mux display: Favor inserir baterias(Please insert batteries)
Here you go :
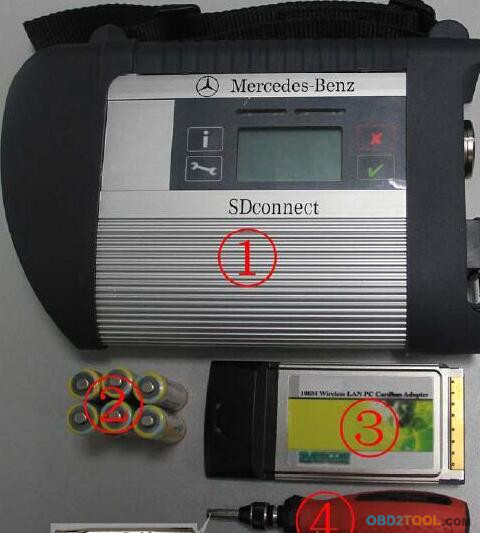
1.Please prepare the following tools:
25-1
①— SDconnect multiplexer which need to input the batteries。
②— 6 units Ni-MH Rechargeable batteries,Size:AA, Voltage:1.2V, Capacity:above 1700mA。
③— 1 unit 108M WIFI Card。
④— Plum screwdriver,Specification:T-20
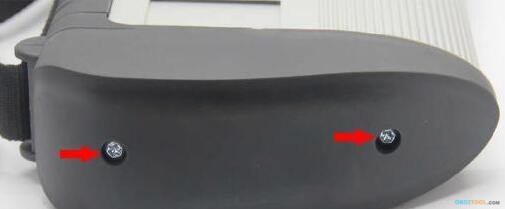
2.Take out the rubber:
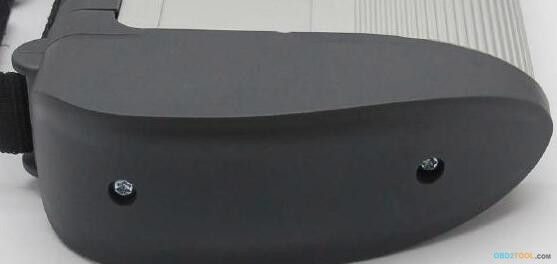
2.1 Use the T20 Plum screwdriver to take out the screws as below.
25-2
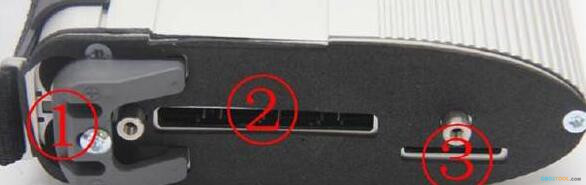
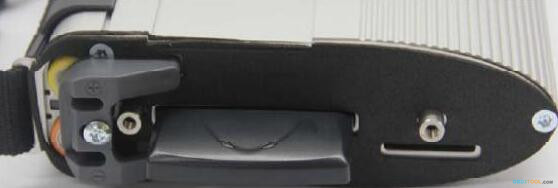
2.2 Take out the rubber as below.
25-3
①— Batteries Space.
②— WIFI Card Space.
③— SD Card Space.
3.Insert the Rechargeable batteries.
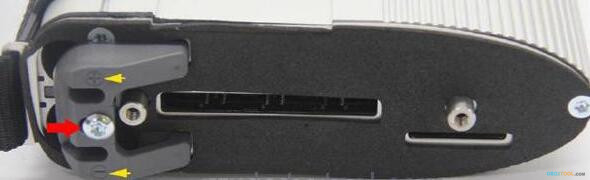
3.1 Use the T20 Plum screwdriver to take out the screws of Batteries Space fixation as below.
25-4
3.2 Take out the fixation of Batteries Space. Pay attention to the Battery polarity marked in the Batteries Space.
25-5
3.3 Insert the batteries. Note the Battery polarity.
25-6
3.4 Button on the Fixation of Batteries Space after inputting the Rechargeable batteries.
25-7
3.5 Use the T20 Plum screwdriver to fix the screws of Batteries Space fixation as below. Inserting the batteries is finished.
25-8
4.Installing WIFI Card.
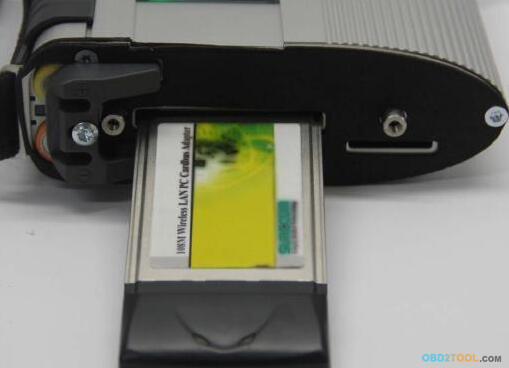
4.1 Inserting the WIFI Card into the WIFI Card Space. Please make the correct direction.
25-9
4.2 Push it to make it totally connected.
25-10
4.3 Cover the rubber and fix the screws to finish all the work.
25-11
Note 1:
Go to the info section within DAS Xentry— search SDconnect and you will find what all the SDconnect symbols defined!!
25-12
Note 2:
pls check these picture, you can choose self-diagnosis your MB STAR ScannerSD connect c4
25-13 25-14