Since you’re reading this thread then I’m guessing you were like me
and are searching for information on these Chinese MB STAR systems.
I’m sure you’ve found several web sites selling these things, prices ranging all over from $380 up to over $800 but unfortunately I there isn’t a damn thing about anyone actually purchasing one of these and verifying the sellers claim on whether they really work or if they really don’t require the original IBM ThinkPad to work properly.
Well, here ya go folks!
So after months of searching and doing research with not much luck I finally took the risk and bought one of the Chinese MB STAR C3 systems.
I was very hesitant in buying one of these Chinese devices. The total price with shipping turned out to be $450. There were several places on the internet with prices ranging all over. I only found one place that was a little less expensive than $450 total, I think maybe $430 but that guy was not very prompt in returning my emails. I finally ordered mine from obd2tool.com. Michael Luo was the sales rep who immediately responded to my inquiry on the device and he immediately responded to all my emails and questions within a day at worst. He was very friendly and patient with me and his English surprisingly good.
The one they sell was claimed to work on most any laptop, not just the IBM ThinkPad was required to run the software. Which is what these systems were originally intended for.
It took me about three weeks to finally receive the device VIA DHL after I sent the payment. Mine took a little longer to receive because I placed the order right before Chinese new year, but Michael warned me that shipping will take an extra week because most of China was off for a week for Chinese new year.
When I finally received the unit I was very surprised on how heavy they box was. I guess this is why it was $50 just for the shipping.
When I opened the box I was very surprised and very impressed in the quality and the amount of contents. The multiplexer unit itself is a very heavy duty all aluminum enclosure with tough rubber end caps and real nice polished aluminum connector ends. It even came with the stickers to make it look like an original MB STAR system.
It came with several cables to make it work with most any car including the 32 pin round connector for those Euro models. All I really needed was the 16 pin cable that plugs into the CAN slot.
I was very impressed with the quality of all the cables. They all felt and looked very heavy duty and had heavy duty solid aluminum connectors. None of it looked cheap at all.
The kit came with a Samsung External USB 80 gig hard dive which had the MB STAR software loaded on it. Also included to my surprise was a PCMCI to serial card with driver software. I’m assuming that the STAR system will not run from a USB to serial box and since I told Michael which system I had, he knew that I did not have a serial port on my laptop so he included this for free.
All in all I was very impressed with what I received as far as quality and everything that was included for the $450.
Now on to the operation of the unit:
After doing a little research I learned that the software might not work on Windows 7.
I didn’t even bother trying since a buddy of mine gave me an old tablet with a serial port built in and already had XP loaded on it. So I just decided to use that since it was a touch screen and would probably be a little easier to use than my bulky 17” screen laptop.
I forgot to mention, you will need at least 1 gig of RAM to run this program, it will not even load with anything less than a gig. Luckily I had an extra 512 board lying around the office… Shhhh…lol
This is what I did first before I even started messing with the software:
Since this thing is already kind of bulky I really didn’t want to run it with an external hard drive attached so I figured out a way to include this image on my internal hard drive.
Since this image was about 63gig I needed a larger hard drive for my tablet. Luckily I had access to a 180gig laptop SATA drive from work since we sometimes through them out after we do testing on them. (Oh shut up, we through these things out! lol) I connected both drives to my desktop PC and went to work. You probably figured out by now that I did this all at work since who actually has a desktop at home anymore? I hope my boss doesn’t read this…lol The first thing I did was use Acronis and cloned the old tablet drive to the new 180gig drive so that I now had a large enough drive to add the STAR image to it. Next I used Partition Magic to add a logical partition of about 80gigs to the drive. Next I used a free program called Drive Image XML. I first made a backup image of the 80gig drive that came with the unit. I saved this to my secondary hard drive on my desktop PC (My own personal 1 Terabyte drive) just in case I needed the original image in the future. I then used the Drive Image software to restore the backed up image to the new 80gig logical partition I created on the new 180gig drive. When I first tried to put the new hard drive in the tablet it would not boot. It turned out that I needed to delete the drive letter from the main partition where my original XP image was. I recommend you do this by Automotive Scan Tool before you install it back in the laptop since I had to take the drive back out, hook it up to my other PC again and delete it from there, then re-install the drive into the tablet.
BAM! This worked! I now have a hard drive with my original bootable image of XP with a separate logical drive letter with the image of the 80gig drive that came with the kit all on one hard dive so it’s easily assessable from the my computer I-con.
Now on to the software that came with this:
The image that came on the external hard drive, which is now on my internal drive is actually an image of an IBM ThinkPad that runs in a program called VMware. I was not familiar with this software but just went with it. There are some simple start up instructions included in a couple of power point slides. I followed those instructions but couldn’t get it to run. I was getting an error, which I apologies but I can’t remember exactly what it was, something about a compatibility issue. This made me very nervous that the software wasn’t going to run on my tablet. So I did a search for this error on the net and sure enough my good ole friends at Google had a web site with the answer for me. The site I found had my exact error message and simply said to delete some configuration file in the VMware folder. I’m guessing this is some kind of setup file that came loaded on the hard drive that was not correct for my tablet. So I first made a backup of this file, just in case, then deleted this file from the logical drive like it said to. I restarted the VMware program and Vola, it worked!
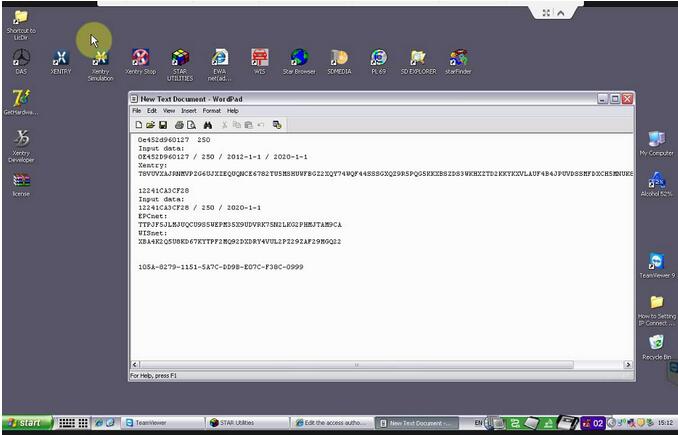
I now had VMware running with image of from an IBM ThinkPad that was preloaded with a several different programs on its desktop that I have never heard of. One of these programs was Xentry another was DAS as well as a few others. I included a snap shot of the screen so you can see all what it came with.
I first clicked on the Xentry I-con, but it would not load. I then tried the DAS I-con and waited. This is the frustrating part, this software runs VERY slow and took nearly 8-10 minutes to completely load. Maybe my computer is just very slow or maybe I need more memory, I don’t know but eventually it was up and running.
Hooking it up to the car:
Once the software finally loaded I connected the 16 pin cable to my CAN port under my dash, and the serial connector to my tablet PC then turned on the ignition of the car. I followed the menus and chose the type of car, etc. Unfortunately it would not auto detect my car. I don’t know if this was just my car or if it’s a bug in the software/hardware. My car had a lot of electrical and computer issues that the mechanic told me about, which is why I decided to buy this thing since I already spent $5k for him to fix most of the problems. So it could have just been a problem with my car not allowing it to auto detect, I couldn’t tell you.
This really wasn’t a big deal. The software simply took me through a few questions to manually select my exact vehicle model.
After a couple of minutes I was finally connected to the cars computer systems. The main menu had a few different choices, but I found the “Start quick scan” was the best option. Unfortunately there is nothing quick about this. The whole scan took a good 10-15 minutes to complete. I started having low voltage problems from the car since I had to have the ignition on and the door open during this whole process. This actually cased more false codes and problems so I recommend that you start the car and let it idle during this whole process. You could probably hook up a battery charger, I didn’t try that but will next time since the engine started getting kind of hot idling there for a good 40 or so minutes while I was doing all this.
Once it was finally done it came up with a long list everything in the car. At the end of each line it had a status of either an “f” or an “i” or and “E” or a check mark.
I was not familiar with software at all, so I played around with it a bit and tried hitting the green checkmark button on the ones that had an ‘f” this did in fact bring up another screen that allowed you to view the fault codes and erase them if you wanted to.
There is also an option on the main screen to erase all codes. It doesn’t tell you that it’s all codes but I’m pretty sure it is. Unfortunately it only clears most of them and you may still have to go into each one manually and clear them or check them to see if they’re current or just stored.
After playing with this software a little more I found that there are actually some trouble shooting steps assigned to each fault codes. I’m sure this makes it much easier for a Mercedes tech. If you select the fault code then hit the green checkmark this should take you to the trouble shooter. I think you may have to hit the magnify glass button at some point, I can’t really remember.
There is going to be a learning curve here and you’ll soon find out that if you back to far out of certain screens you have to re-scan or after you leave the main screen you loose the option of clearing all the codes without a re-scan. It can be a little frustrating at first, but after a while of playing with the software and after several beers while waiting it started to come into play.
So I starting checking out some of my reoccurring fault codes, but wasn’t sure what was real or just logged from an old occurrence so I deleted all the codes, then did a re-read again. A couple of the codes kept coming back as “f” but I expected this. I’m having an SRS problem that I’m trying to trouble shoot. When I finally got into the SRS code that kept reoccurring I learned that the software is in real time. Meaning that you can actually see the screen change if you fix the fault or re-cause it. Very cool!
So this is about as far as I got with the DAS software.
Right now I have 4 codes relating to my SRS system that I’m trying to clear up so I can get rid of the pesky SRS light and finally get the SRS system fixed.
The DAS software gave me a component number and a code which I am now trying to trouble shoot. This is where the other software comes into play. Keep reading…
The StarFinder software:
This software is ultra cool!! Again there was a bit of a learning curve but it didn’t take me too long to figure it out enough to find what I was looking for.
With this software I was able to type in the fault code that the DAS gave me and it popped up a schematic with the circuit of the part. You can then click on the diagnostic button to find out what it is and how to test it. Here is the really cool part!… When you click on the Star Finder button it brings up a list of all the fault codes or you can do a search and type yours in. Once you click on your fault code it brings up a series of actual pictures of the car of where the device is located and how to get to it. That was just too cool!! The star finder software makes it worth the money alone! Although, I guess it wouldn’t do you any good unless you had the error code from the DAS system. Lol So the two programs complement each other very well.
I think the other programs have something to do with warranty information and data entry by the tech while he’s working on the car. Which really makes me think this is an actual image of a complete hard drive from a service shop that seems to be cracked. Hey, at least it works!
So in conclusion the Chinese system I ordered for $450 was a great deal and works great! The car I used it on was a 2006 SL500. I also tried it on a 2001 SLK320 and had success with that as well. The VMware image thing was kind of odd but seemed to work just fine. My only complaint was that it was very slow. The system might run faster and better on an actual IBM ThinkPad but for what I’m doing, this setup works just fine. Just have a 6 pack of beer handy because you’re going to be doing a lot of waiting on the system to boot and load.
I hope this helps anyone who is thinking about buying one of Mercedes Star Diagnostic. I got mine for a total of $450 shipping included from obd2tool.com. I have done a lot of research and I highly recommend buying from these guys. I think it’s worth the extra $10-$20 over the cheaper site that I found. I promise I am in NO way affiliated with these guys what so ever. I am just a truly satisfied customer.
I recommend you emailing them first and telling them what computer you plan on using it on and what operating system and whether you have a serial port or not, etc. I’m not sure if it works on windows 7 or not. Also make sure you have at least a gig of RAM on the system you’re planning on running it on. It will not load with anything less.
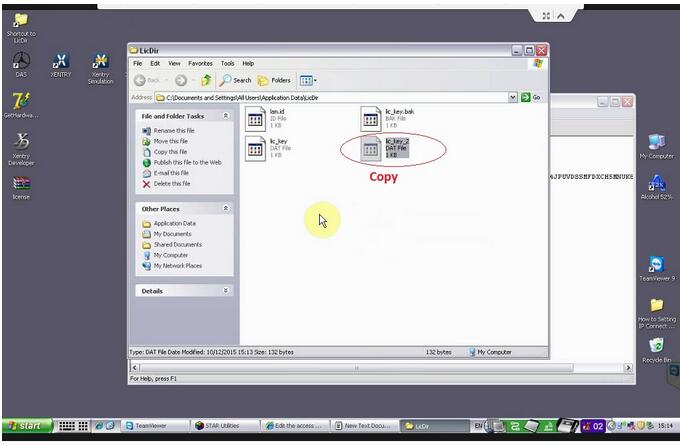
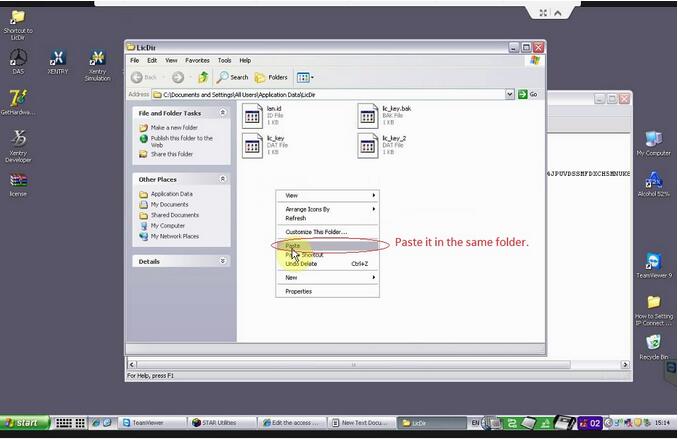
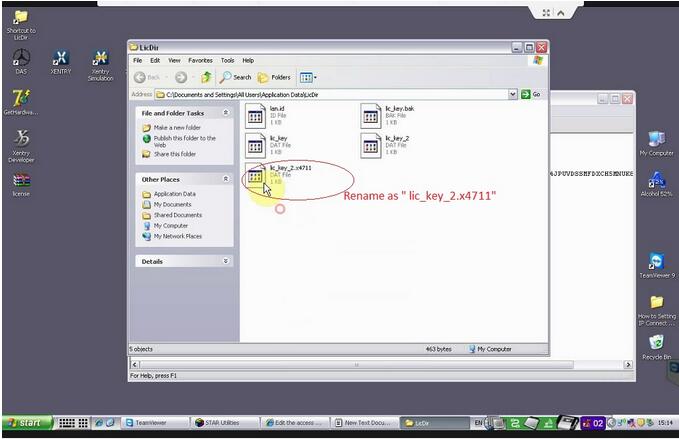
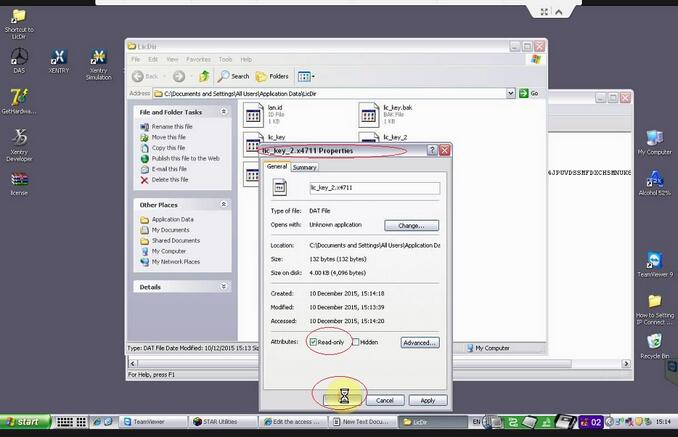
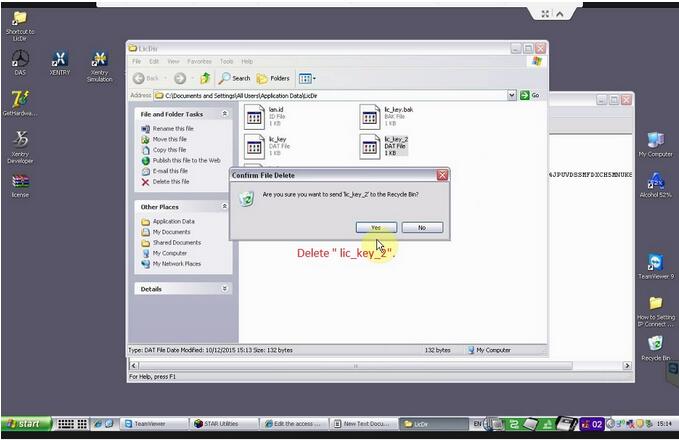
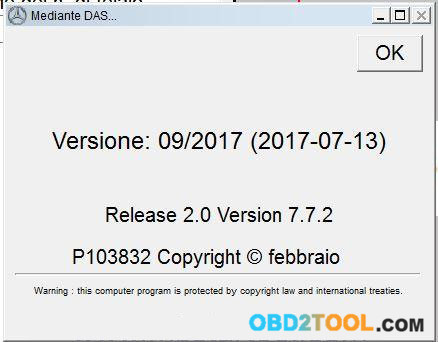
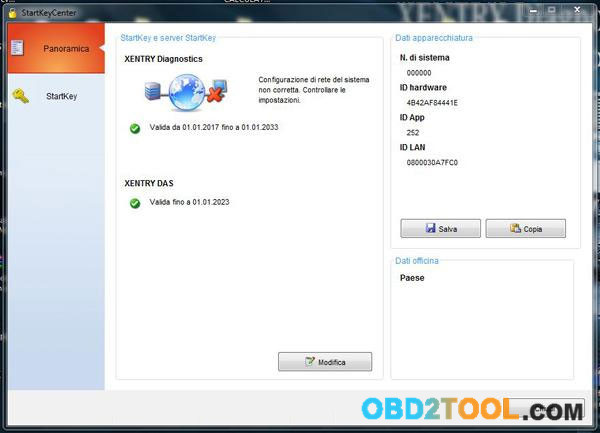
Here are some screen shots from the software. I apologies but I didn’t get any photos of the unit or cables but you’ll just have to trust me when I say that everything looked even better than the photos they advertise on their site. Everything looked like really heavy duty good stuff. Nothing looked cheap at all!
I’m sure you’ve found several web sites selling these things, prices ranging all over from $380 up to over $800 but unfortunately I there isn’t a damn thing about anyone actually purchasing one of these and verifying the sellers claim on whether they really work or if they really don’t require the original IBM ThinkPad to work properly.
Well, here ya go folks!
So after months of searching and doing research with not much luck I finally took the risk and bought one of the Chinese MB STAR C3 systems.
I was very hesitant in buying one of these Chinese devices. The total price with shipping turned out to be $450. There were several places on the internet with prices ranging all over. I only found one place that was a little less expensive than $450 total, I think maybe $430 but that guy was not very prompt in returning my emails. I finally ordered mine from obd2tool.com. Michael Luo was the sales rep who immediately responded to my inquiry on the device and he immediately responded to all my emails and questions within a day at worst. He was very friendly and patient with me and his English surprisingly good.
The one they sell was claimed to work on most any laptop, not just the IBM ThinkPad was required to run the software. Which is what these systems were originally intended for.
It took me about three weeks to finally receive the device VIA DHL after I sent the payment. Mine took a little longer to receive because I placed the order right before Chinese new year, but Michael warned me that shipping will take an extra week because most of China was off for a week for Chinese new year.
When I finally received the unit I was very surprised on how heavy they box was. I guess this is why it was $50 just for the shipping.
When I opened the box I was very surprised and very impressed in the quality and the amount of contents. The multiplexer unit itself is a very heavy duty all aluminum enclosure with tough rubber end caps and real nice polished aluminum connector ends. It even came with the stickers to make it look like an original MB STAR system.
It came with several cables to make it work with most any car including the 32 pin round connector for those Euro models. All I really needed was the 16 pin cable that plugs into the CAN slot.
I was very impressed with the quality of all the cables. They all felt and looked very heavy duty and had heavy duty solid aluminum connectors. None of it looked cheap at all.
The kit came with a Samsung External USB 80 gig hard dive which had the MB STAR software loaded on it. Also included to my surprise was a PCMCI to serial card with driver software. I’m assuming that the STAR system will not run from a USB to serial box and since I told Michael which system I had, he knew that I did not have a serial port on my laptop so he included this for free.
All in all I was very impressed with what I received as far as quality and everything that was included for the $450.
Now on to the operation of the unit:
After doing a little research I learned that the software might not work on Windows 7.
I didn’t even bother trying since a buddy of mine gave me an old tablet with a serial port built in and already had XP loaded on it. So I just decided to use that since it was a touch screen and would probably be a little easier to use than my bulky 17” screen laptop.
I forgot to mention, you will need at least 1 gig of RAM to run this program, it will not even load with anything less than a gig. Luckily I had an extra 512 board lying around the office… Shhhh…lol
This is what I did first before I even started messing with the software:
Since this thing is already kind of bulky I really didn’t want to run it with an external hard drive attached so I figured out a way to include this image on my internal hard drive.
Since this image was about 63gig I needed a larger hard drive for my tablet. Luckily I had access to a 180gig laptop SATA drive from work since we sometimes through them out after we do testing on them. (Oh shut up, we through these things out! lol) I connected both drives to my desktop PC and went to work. You probably figured out by now that I did this all at work since who actually has a desktop at home anymore? I hope my boss doesn’t read this…lol The first thing I did was use Acronis and cloned the old tablet drive to the new 180gig drive so that I now had a large enough drive to add the STAR image to it. Next I used Partition Magic to add a logical partition of about 80gigs to the drive. Next I used a free program called Drive Image XML. I first made a backup image of the 80gig drive that came with the unit. I saved this to my secondary hard drive on my desktop PC (My own personal 1 Terabyte drive) just in case I needed the original image in the future. I then used the Drive Image software to restore the backed up image to the new 80gig logical partition I created on the new 180gig drive. When I first tried to put the new hard drive in the tablet it would not boot. It turned out that I needed to delete the drive letter from the main partition where my original XP image was. I recommend you do this by Automotive Scan Tool before you install it back in the laptop since I had to take the drive back out, hook it up to my other PC again and delete it from there, then re-install the drive into the tablet.
BAM! This worked! I now have a hard drive with my original bootable image of XP with a separate logical drive letter with the image of the 80gig drive that came with the kit all on one hard dive so it’s easily assessable from the my computer I-con.
Now on to the software that came with this:
The image that came on the external hard drive, which is now on my internal drive is actually an image of an IBM ThinkPad that runs in a program called VMware. I was not familiar with this software but just went with it. There are some simple start up instructions included in a couple of power point slides. I followed those instructions but couldn’t get it to run. I was getting an error, which I apologies but I can’t remember exactly what it was, something about a compatibility issue. This made me very nervous that the software wasn’t going to run on my tablet. So I did a search for this error on the net and sure enough my good ole friends at Google had a web site with the answer for me. The site I found had my exact error message and simply said to delete some configuration file in the VMware folder. I’m guessing this is some kind of setup file that came loaded on the hard drive that was not correct for my tablet. So I first made a backup of this file, just in case, then deleted this file from the logical drive like it said to. I restarted the VMware program and Vola, it worked!
I now had VMware running with image of from an IBM ThinkPad that was preloaded with a several different programs on its desktop that I have never heard of. One of these programs was Xentry another was DAS as well as a few others. I included a snap shot of the screen so you can see all what it came with.
I first clicked on the Xentry I-con, but it would not load. I then tried the DAS I-con and waited. This is the frustrating part, this software runs VERY slow and took nearly 8-10 minutes to completely load. Maybe my computer is just very slow or maybe I need more memory, I don’t know but eventually it was up and running.
Hooking it up to the car:
Once the software finally loaded I connected the 16 pin cable to my CAN port under my dash, and the serial connector to my tablet PC then turned on the ignition of the car. I followed the menus and chose the type of car, etc. Unfortunately it would not auto detect my car. I don’t know if this was just my car or if it’s a bug in the software/hardware. My car had a lot of electrical and computer issues that the mechanic told me about, which is why I decided to buy this thing since I already spent $5k for him to fix most of the problems. So it could have just been a problem with my car not allowing it to auto detect, I couldn’t tell you.
This really wasn’t a big deal. The software simply took me through a few questions to manually select my exact vehicle model.
After a couple of minutes I was finally connected to the cars computer systems. The main menu had a few different choices, but I found the “Start quick scan” was the best option. Unfortunately there is nothing quick about this. The whole scan took a good 10-15 minutes to complete. I started having low voltage problems from the car since I had to have the ignition on and the door open during this whole process. This actually cased more false codes and problems so I recommend that you start the car and let it idle during this whole process. You could probably hook up a battery charger, I didn’t try that but will next time since the engine started getting kind of hot idling there for a good 40 or so minutes while I was doing all this.
Once it was finally done it came up with a long list everything in the car. At the end of each line it had a status of either an “f” or an “i” or and “E” or a check mark.
I was not familiar with software at all, so I played around with it a bit and tried hitting the green checkmark button on the ones that had an ‘f” this did in fact bring up another screen that allowed you to view the fault codes and erase them if you wanted to.
There is also an option on the main screen to erase all codes. It doesn’t tell you that it’s all codes but I’m pretty sure it is. Unfortunately it only clears most of them and you may still have to go into each one manually and clear them or check them to see if they’re current or just stored.
After playing with this software a little more I found that there are actually some trouble shooting steps assigned to each fault codes. I’m sure this makes it much easier for a Mercedes tech. If you select the fault code then hit the green checkmark this should take you to the trouble shooter. I think you may have to hit the magnify glass button at some point, I can’t really remember.
There is going to be a learning curve here and you’ll soon find out that if you back to far out of certain screens you have to re-scan or after you leave the main screen you loose the option of clearing all the codes without a re-scan. It can be a little frustrating at first, but after a while of playing with the software and after several beers while waiting it started to come into play.
So I starting checking out some of my reoccurring fault codes, but wasn’t sure what was real or just logged from an old occurrence so I deleted all the codes, then did a re-read again. A couple of the codes kept coming back as “f” but I expected this. I’m having an SRS problem that I’m trying to trouble shoot. When I finally got into the SRS code that kept reoccurring I learned that the software is in real time. Meaning that you can actually see the screen change if you fix the fault or re-cause it. Very cool!
So this is about as far as I got with the DAS software.
Right now I have 4 codes relating to my SRS system that I’m trying to clear up so I can get rid of the pesky SRS light and finally get the SRS system fixed.
The DAS software gave me a component number and a code which I am now trying to trouble shoot. This is where the other software comes into play. Keep reading…
The StarFinder software:
This software is ultra cool!! Again there was a bit of a learning curve but it didn’t take me too long to figure it out enough to find what I was looking for.
With this software I was able to type in the fault code that the DAS gave me and it popped up a schematic with the circuit of the part. You can then click on the diagnostic button to find out what it is and how to test it. Here is the really cool part!… When you click on the Star Finder button it brings up a list of all the fault codes or you can do a search and type yours in. Once you click on your fault code it brings up a series of actual pictures of the car of where the device is located and how to get to it. That was just too cool!! The star finder software makes it worth the money alone! Although, I guess it wouldn’t do you any good unless you had the error code from the DAS system. Lol So the two programs complement each other very well.
I think the other programs have something to do with warranty information and data entry by the tech while he’s working on the car. Which really makes me think this is an actual image of a complete hard drive from a service shop that seems to be cracked. Hey, at least it works!
So in conclusion the Chinese system I ordered for $450 was a great deal and works great! The car I used it on was a 2006 SL500. I also tried it on a 2001 SLK320 and had success with that as well. The VMware image thing was kind of odd but seemed to work just fine. My only complaint was that it was very slow. The system might run faster and better on an actual IBM ThinkPad but for what I’m doing, this setup works just fine. Just have a 6 pack of beer handy because you’re going to be doing a lot of waiting on the system to boot and load.
I hope this helps anyone who is thinking about buying one of Mercedes Star Diagnostic. I got mine for a total of $450 shipping included from obd2tool.com. I have done a lot of research and I highly recommend buying from these guys. I think it’s worth the extra $10-$20 over the cheaper site that I found. I promise I am in NO way affiliated with these guys what so ever. I am just a truly satisfied customer.
I recommend you emailing them first and telling them what computer you plan on using it on and what operating system and whether you have a serial port or not, etc. I’m not sure if it works on windows 7 or not. Also make sure you have at least a gig of RAM on the system you’re planning on running it on. It will not load with anything less.
Here are some screen shots from the software. I apologies but I didn’t get any photos of the unit or cables but you’ll just have to trust me when I say that everything looked even better than the photos they advertise on their site. Everything looked like really heavy duty good stuff. Nothing looked cheap at all!