Thursday, December 6, 2018
Friday, September 7, 2018
VXDIAG MB SD Connect C6 MB Star C6 Benz Diagnostic Tool
Original VXDIAG For XENTRY Diagnosis VCI VXDIAG For XENTRY Diagnosis DoIP Pass Through Interface
VXDIAG
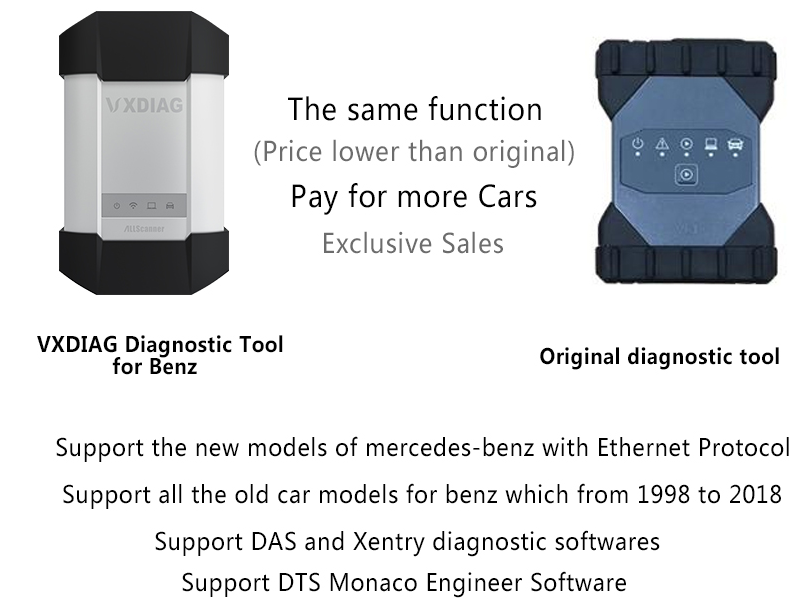
For XENTRY Diagnosis VCI is the latest interface for For Mercedes &
SMART vehicles can replace Star C4/C5. VXDIAG For XENTRY Diagnosis VCI
acts as a Pass-through Interface, also called Star C6, For Benz C6 multiplexer to provide complete communication between a vehicle and the VXDIAG For XENTRY software loaded on a PC.
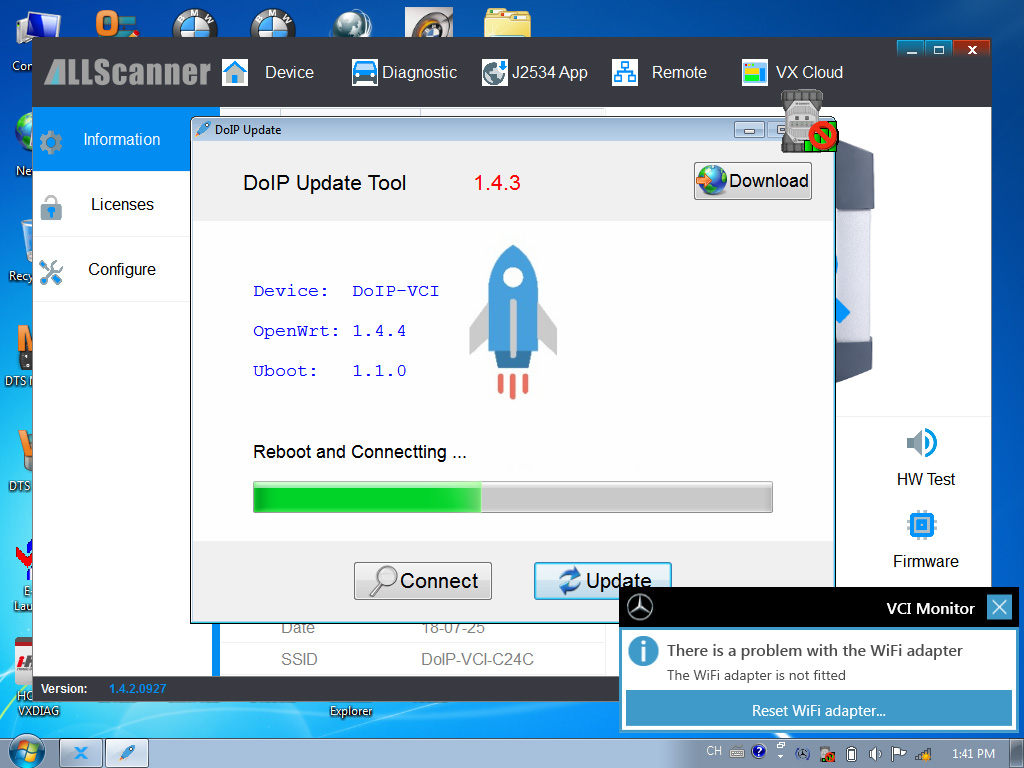
XENTRY Software Show:
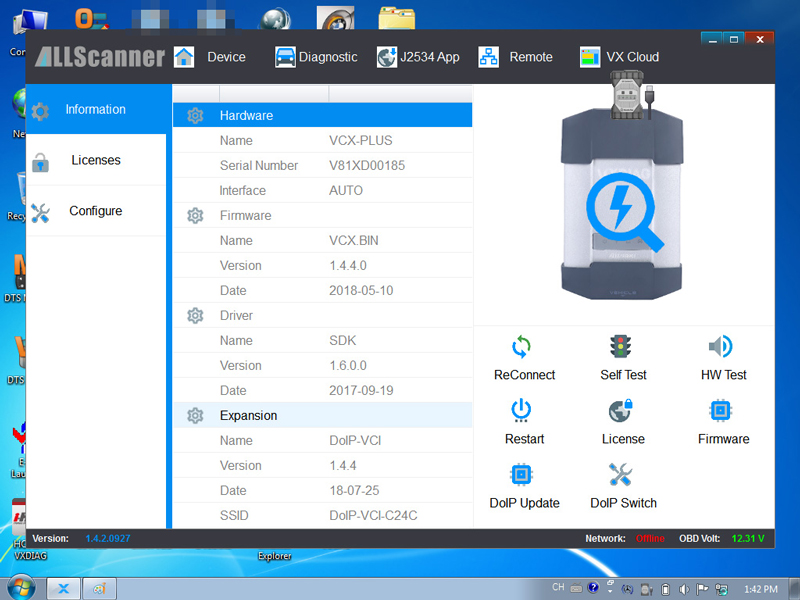
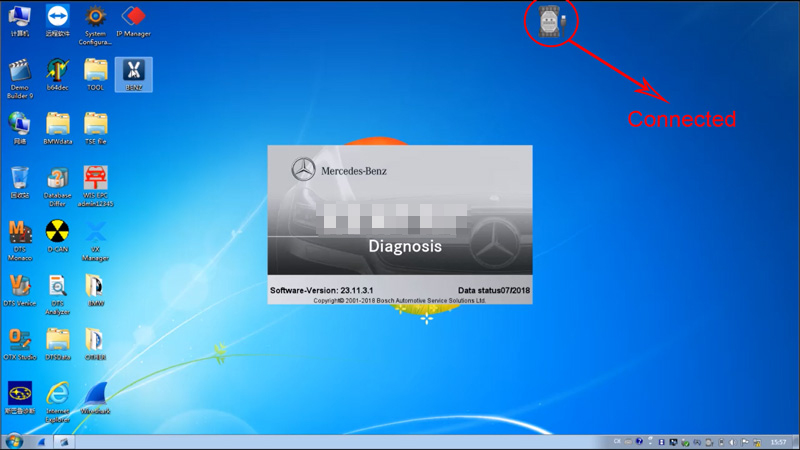
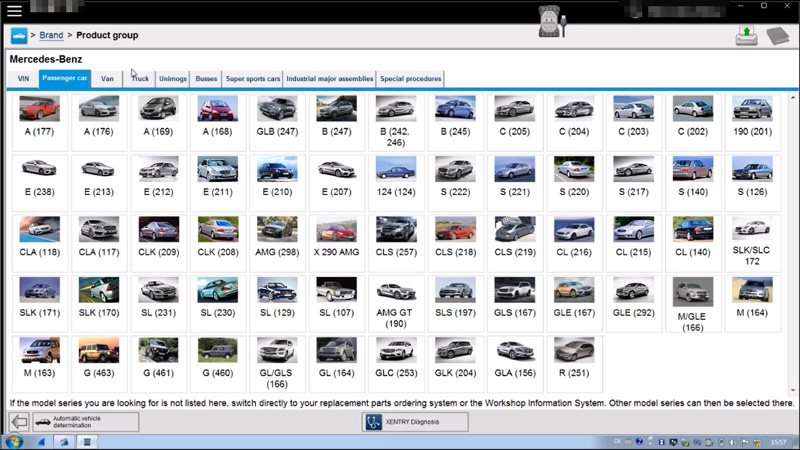
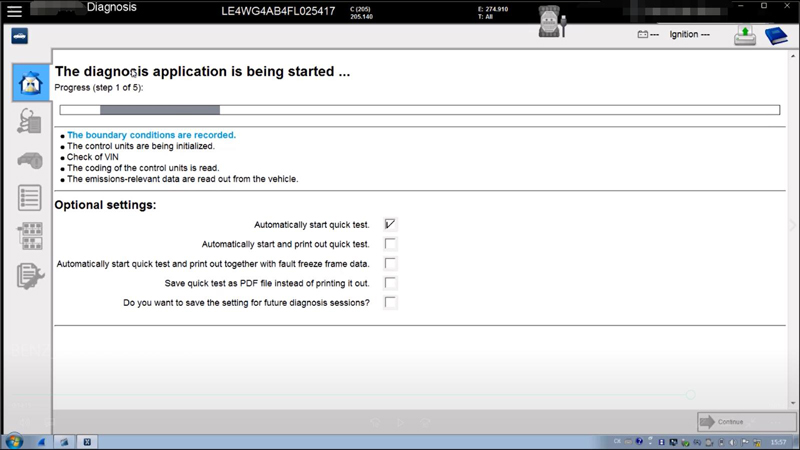
VXDIAG MB SD Connect C6 XENTRY Diagnosis VCI Overview:
Compatible Software: XENTRY/Das SoftwareSupport Vehicle: Mercede For Benz & Smart vehicles
DoIP: Support DoIP
Functions: Star Diagnostic & programming (SCN Coding)
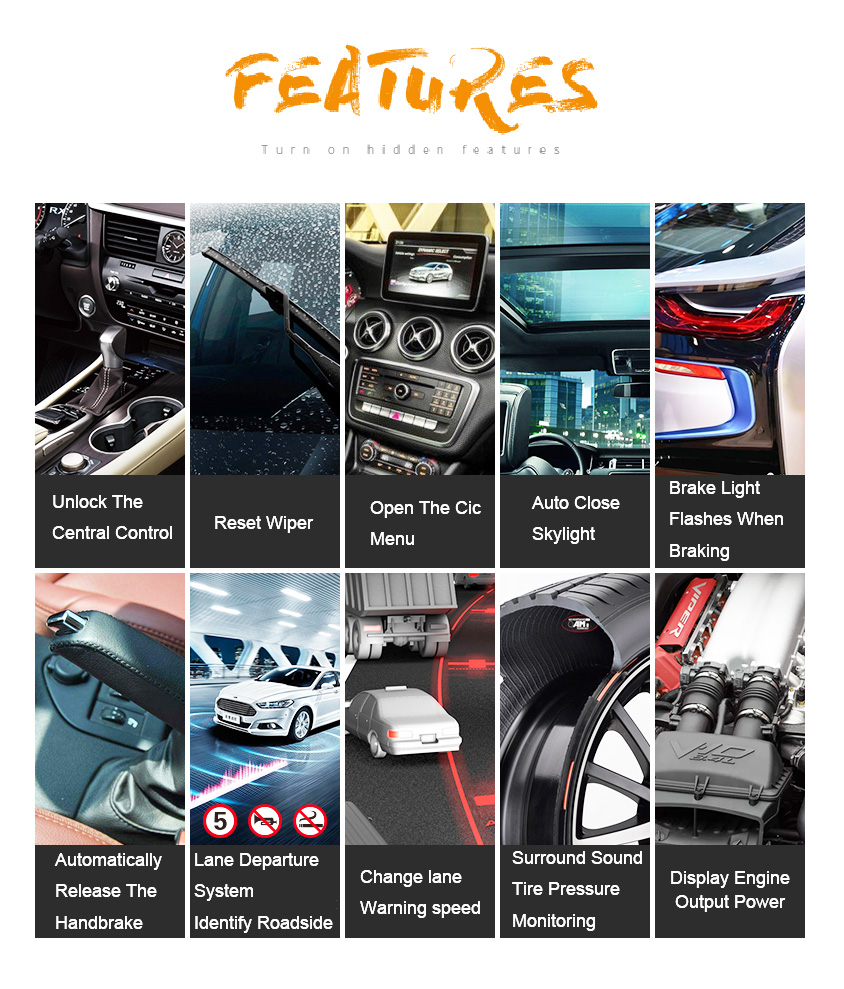
VXDIAG MB SD Connect C6 XENTRY Diagnosis VCI Features:
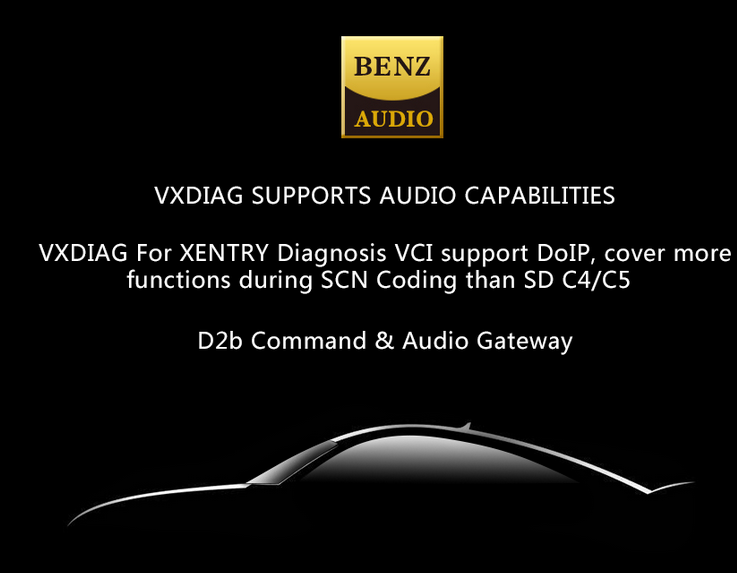
1.VXDIAG For XENTRY Diagnosis VCI can be used for all model series of For Mercedes For Benz vehicles2.VXDIAG For XENTRY Diagnosis VCI support DoIP, cover more functions during SCN Coding than SD C4/C5
3.VXDIAG For XENTRY Diagnosis VCI functions including diagnosing, programming, simulation studying, repair information, automotive maintenance, technical service bulletin and so on
4.VXDIAG For XENTRY Diagnosis VCI Diagnosis updates no longer necessary – firmware updates required on rare occasions
5.VXDIAG For XENTRY Diagnosis VCI does not need a power supply unit for external power supply
6.VXDIAG For XENTRY Diagnosis VCI Handy multiplexer with a small, sturdy construction (no PC core, battery, fan, or display)
7.Engines (All Gasoline & Diesel Systems)
8.Transmissions and Electronic Selector Modules
9.Airmatic and Active Body Control Suspension Systems
10.Traction Systems: ESP / ASR / ETS / ABS / BAS / SBC braking systems
11.Supplementary Restraint Systems (SRS) / Airbag, All body modules OCP / UCP / LCP / SCM / SKF / KFB / RCM / DCM’s
12.Drive Authorisation System
13.Sam (Signal Acquisition) Modules
14.Electronic Ignition System (EIS)
15.Pneumatic System Equipment and ATA functions
16.Air Conditioning / climate control Systems
17.Instrument Cluster
18.Tyre Pressure Control
19.Parktronic System
20.Keyless Go
21.D2b Command & Audio Gateway (D2B and MOST networks)
22.TV Tuner
23.Headlamp Range Adjustment
24.Seat Electronics
25.Rvc, RST & Vario Roof modules
26.Automatic Clutch System ACS
27.M-Class Body Modules (AAM / EAM / DAS / SEM / VG Transfer Case)
28.Assyst & ASSYST + systems
XENTRY Diagnosis VCI Summary:
The new VXDIAG For XENTRY Diagnosis VCI (Vehicle Communication
Interface) multiplexer serves as the interface to the vehicle when
performing diagnosis and repairs, and programming electric and
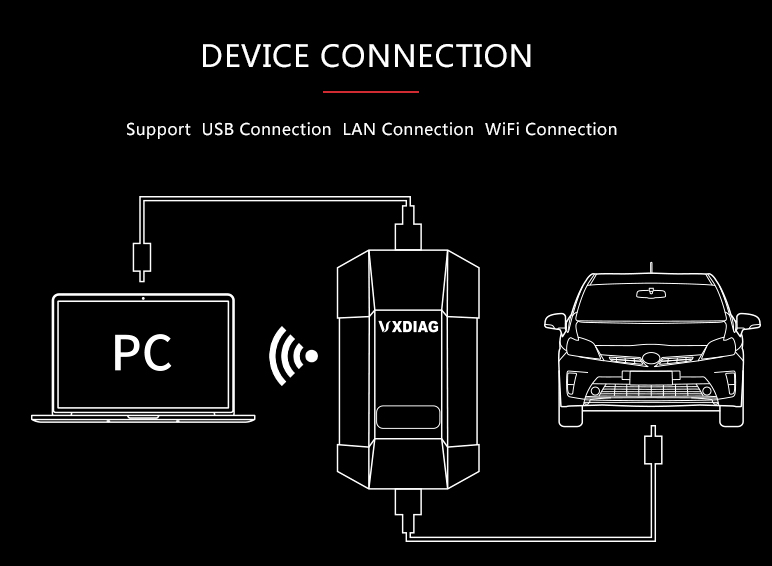
electronic on-board vehicle systems.The VXDIAG For XENTRY Diagnosis VCI does not have its own PC core, battery, fan, or display. It is operated using the VXDIAG For XENTRY Diagnosis Pad via WLAN or a USB cable connection.
Notice:
1.If
you choose it without laptop,please install the 500GB HDD on laptop
above 4GB Memory and I5 CPU, and use it on one laptop only. If change
laptop, software may get broken and need to ship HDD back to us to copy
software again.
2.You also can watch more videos to get more technical support from official website:
3.This VXDIAG can/’t support All Key Lost,needs one key at least.
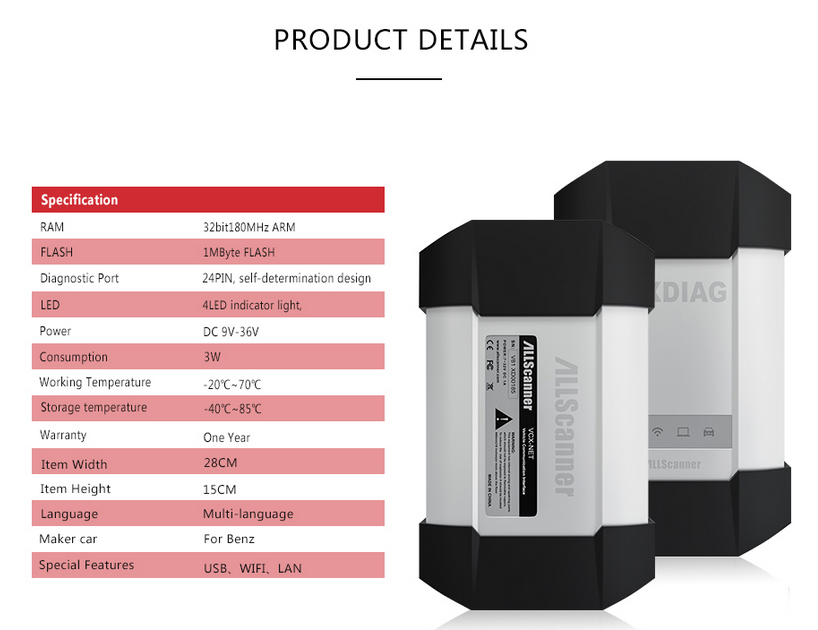
Specification:
Item StateRAM 32bit180MHz ARM
FLASH 1MByte FALSH
Diagnostic Port 24PIN, self-determination design
LED 4 LED indicator light,indicate power and status.
Power DC 9V-36V
Consumption 3W
Working Temperature -20°C~70 °C
Storage Temperature -40°C~85 °C
Warranty: One Year
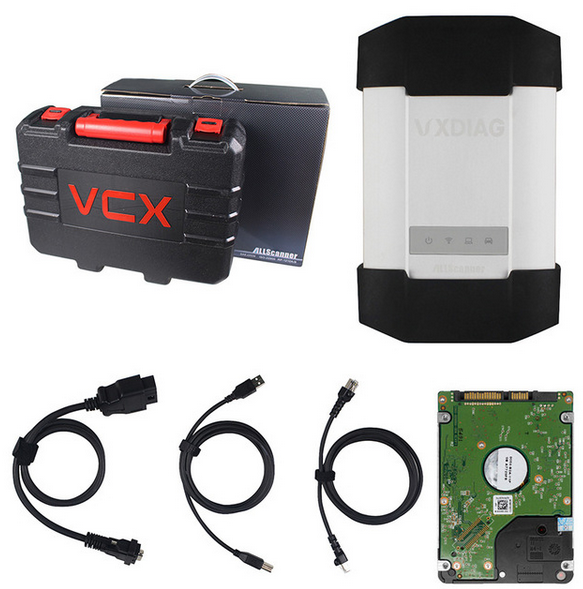
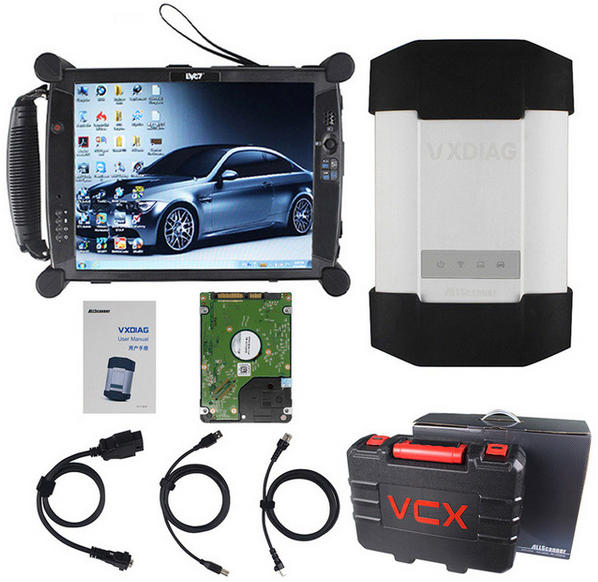
Package list:
Package 1:
1pc x VXDIAG VCX-PLUS
1pc x OBDII Cable1pc x USB Cable
1pc x 500GBhdd
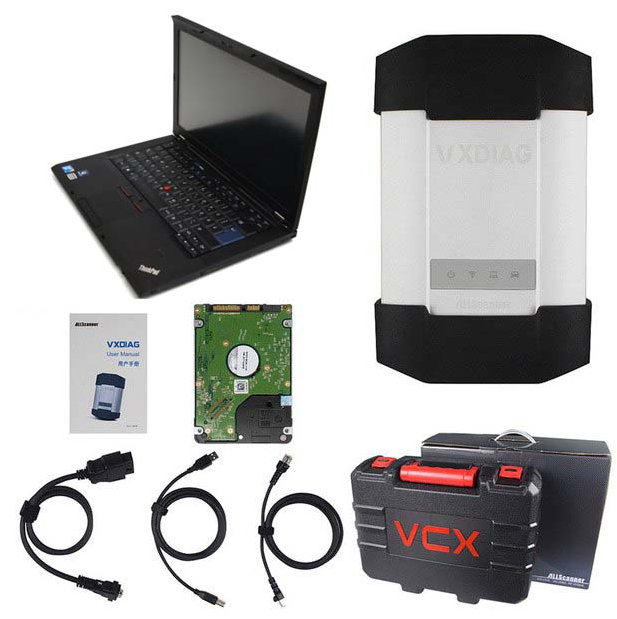
Package 2:
1pc x VXDIAG VCX-PLUS
1pc x OBDII Cable1pc x USB Cable
1pc x second hand Lenovo T410 laptop (4GB Memory I5 CPU and 500GB HDD)
Package 3:
1pc x VXDIAG VCX-PLUS
1pc x OBDII Cable1pc x USB Cable
1pc x new EVG7 Tablet laptop(4GB Memory and 500GB HDD)
VXDiag
MB SD Connect C6 support add more original software in feature, you
only need buy authorization from us. Already released original software
authorization has:
GM,Ford,Mazda,Toyota,Honda,LandRover,Jaguar,Subaru,Volvo,VW,and Porsche.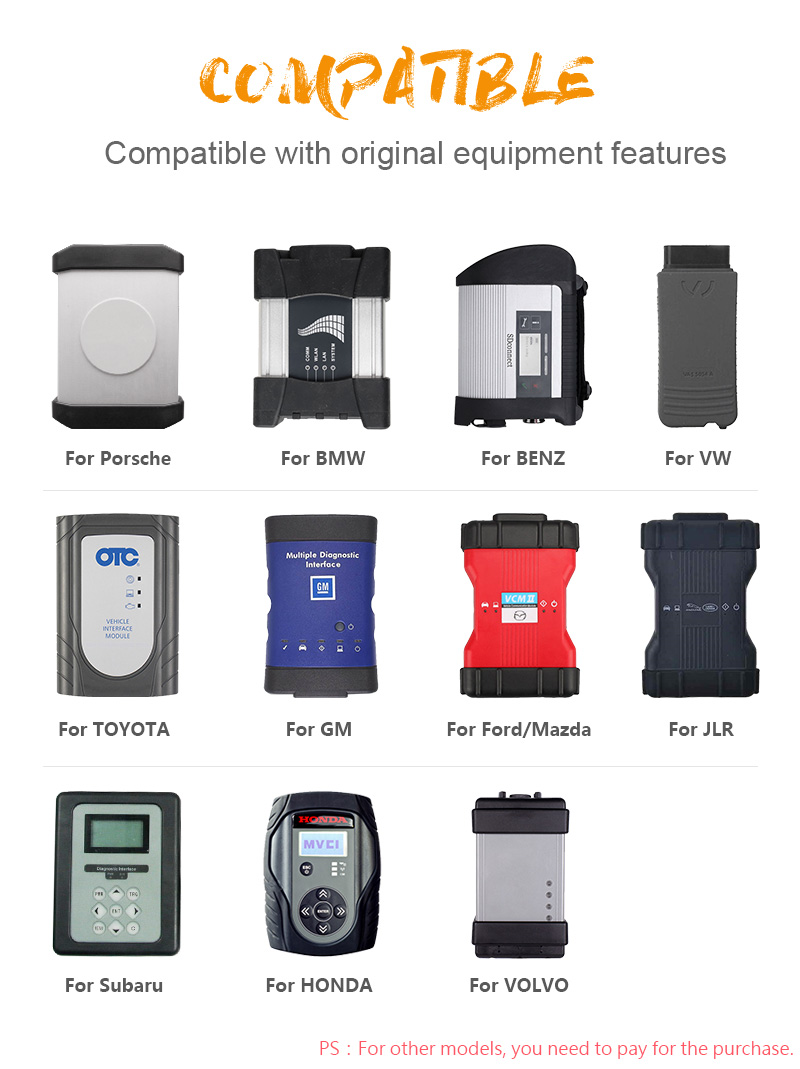
If you need above softwares,please contact us sales@obd2tool.com.
Why will you choose Xentry connect C5
Original Plan 1:1 Copy Mercedes Wifi Xentry Connect C5 multiplexer For Mercedes Car And Trucks.
After 2015, all Star Diagnosis equipment is no longer supported. First of all, this means that there is no update of the diagnostic data for the newest cars and their systems, as well as the lack of the possibility of coding and programming of electronic units due to the backlog of the software data level in the device, from data in the electronic control units of the car.
Already at the end of 2014, at most dealerships, almost all of the previously used Star Diagnosis Compact4 with SDConnect DoIP multiplexers were almost completely removed. Instead, dealers received Xentry Kit kits, which include the latest Xentry Connect multiplexers and Xentry Tab tablets from Panasonic. Tablets are custom-made, although they also have a “civilian” version – the Panasonic Toughbook CF-D1, somewhat inferior in terms of battery life to the original Xentry Tab, but it has a much more powerful configuration.
Honestly, the need to use the Xentry Tab on non-dealer services seems somewhat exaggerated to me. With dealers everything is clear – they were forced to use this equipment.
And what about workshop service? Undoubtedly, the tablet from Panasonic is not very bad … But … Its price is disheartening. The cost of the Japanese tablet is realistic to buy pieces of eight new laptops or tablets from other manufacturers.
So , we suggest you buy Mercedes Benz DoIP Xentry Connect C5 MB Star C5 Plus Panasonic CF52 Laptop from OBD2TOOL , We will install and activate for you ready to use. What’s more, this package offer saves you money than buying them alone.
After all, there are many reasons to choose Xentry C5 Connect. The main thing is one: since 2015, the diagnostic multiplexer Xentry Connect C5 becomes the only one used at dealerships.
Thus, by purchasing this equipment, you will not lag behind the progress. Each client of of yours, seeing with his own eyes ,that you are in your work using the same device that he saw at the dealer’s service station, will understand that he made the right decision entrusting his car to your specialists
2018.07 Mercedes Benz DoIP Xentry Connect C5 MB Star C5 Plus Panasonic CF52 Laptop With Engineering Software
mb star c3 vs mb star c4 vs mb star c5 vs mb star c6
Mb Star C3: It requires a laptop so that you can troubleshoot your Mercedes-Benz via Xentry software. While on paper it is slower than MB Star C4, it has proven to be a very reliable and robust scanner that is not plauged with WiFI connectivity issues like the Star C4.
MB Star C4 is the latest Mercedes-Benz wireless multiplexers that can connect to your PC via wireless connection. Being the latest Diagnostic Scanner for Mercedes-Benz it works faster, once you resolve any connectivity issues that is.
MB STAR C5 provides complete diagnosis for newest hybrid W222,with a qualitative improvement in hardware and software by authorization of diagnostic interface to control the software,it will allow you to work on windows xp, win7/8/10 system.
MB STAR C6: VXDIAG For XENTRY Diagnosis VCI is the latest interface for For Mercedes & SMART vehicles can replace Star C4/C5. VXDIAG For XENTRY Diagnosis VCI acts as a Pass-through Interface, also called Star C6, For Benz C6 multiplexer to provide complete communication between a vehicle and the VXDIAG For XENTRY software loaded on a PC.
Mercedes Benz MB Star C3 vs C4
Category : MB STAR
MB Star C4 is the latest Mercedes-Benz wireless multiplexers that can connect to your PC via wireless connection. Being the latest Diagnostic Scanner for Mercedes-Benz it works faster, once you resolve any connectivity issues that is.
Frequently Asked Questions
What is DAS? – Diagnostic Assistance System – This is the full diagnostic system for Mercedes-Benz vehicles. All functions for diagnosis including reprogramming, configuration, initialization, fault diagnosis and guided diagnostic tests are contained within DAS.
All control unit software (reprogramming calibrations) is contained within the DAS software which is distributed monthly via DVD media.
All access and functionality required in regard the configuration via SCN Coding and/or CVN Coding is covered.
What is WIS-NET? – Workshop Information System – This is the complete workshop information system as developed by DaimlerChrysler for use in the servicing of Mercedes-Benz vehicles. Contained within are installation instructions, procedures, functional and technical specifications. There is some linkage from certain procedures in DAS to respective documents in WIS.
What can Mercedes Star Diagnostic Tool do? The system offers total diagnostic coverage of all engine, chassis and body systems:
Reading and re-setting of diagnostic trouble codes (DTC)
Real-time reading of dynamic data
Full component activation clearing and re-setting of adaptation values
Coding of all engine, chassis, body and instrumentation modules
Key configuration
Procedure for fitting Mercedes- Benz accessories through the D2B ring and MOST bus
Total ASSYST / ASSYST + control (Active Service System) to update on board service history
What is Workshop Green Key? This is a unique one-time key from the factory which is necessary in certain situations such as:
Disabling a key track
Replacing the ECU
Replacing security related control units
Replacing EIS
Typically the workshop key and EIS must be ordered togheter and the green key is used to perform the final programing of the EIS.
What does it mean MARRYING a VIRGIN ECU and EIS? The ME (ECU=Engine Control Unit) and EIS (Electronic Ignition System) control module are electronically permanently married to each other after 40 engine starts. There is no factory procedure to undo this. This means that a used engine EIS or DAS control unit cannot be used on another vehicle. A new control unit can be installed for testing provided the 40 engine starts are not exceeded. Note that the new control unit must be variant coded before it can be used. If the 40 engine start cycles are not completed successfully resetting the counter to 0 (removing the version coding) is possible if you disconnect the power from the ECU for at least 45 minutes.
What model years does Star Diagnostic Scanner work with? The Star Scanner should work on cars from 1989 up to 2015 for Mercedes Cars, Buses, Trucks, Sprinter Vans, Smart cars, Etc.
What can I do with obd2tool.com Star Diagnostic SD Connect Scanner C3 & C4?
Reading/Erasing Trouble Codes
Read Live Data
Adaption of Modules
Coding/Programming of Modules
Component Testing
Maintenance Information Consultation
What is Xentry? New software released by Benz Company after 04/2009 by diagnosis new cars. WIS.net : Workshop Information System EPC.net: Electronic Parts Catalogue STAR UTILITIES: the movement management system and self-test DAS: the automatically Diagnosis Assistance System ST Finder 2008: Part location finder
What is Smart TAN Code? It openes special function in DAS program with Smart cars 450/451/452/454 Developer model: Mercedes-Benz engineer mode, remove limitations and open more functions.
What is Benz Disassembly system? Video lessons to teach you how to remove each part from Benz cars with details order steps.
Which control units can MB Star Diagnostic Scanner with Xentry troubleshoot?
Engines (All Gasoline & Diesel Systems)
Transmissions and Electronic Selector Modules
Airmatic and Active Body Control Suspension Systems
Traction Systems: ESP / ASR / ETS / ABS / BAS / SBC braking systems
Supplementary Restraint Systems (SRS) / Airbag, All body modules OCP / UCP / LCP / SCM / SKF / KFB / RCM / DCM’s
Drive Authorisation System
Sam (Signal Acquisition) Modules
Electronic Ignition System (EIS)
Pneumatic System Equipment and ATA functions
Air Conditioning / climate control Systems
Instrument Cluster
Tyre Pressure Control
Parktronic System
Keyless Go
D2b Command & Audio Gateway (D2B and MOST networks)
TV Tuner
Headlamp Range Adjustment
Seat Electronics
Rvc, RST & Vario Roof modules
Automatic Clutch System ACS
M-Class Body Modules (AAM / EAM / DAS / SEM / VG Transfer Case)
Assyst & ASSYST + systems
MB SD C4 Device not connection solution
One of our customer had the device not connection problem when using Mercedes MB SD Connect C4 diagnostic system. Here is the working solution provided by Obd2tool.com engineer.

Solution:
You are required to update the MB SD C4 firmware follow the guide here:
1. Install SD Connect C4 battery
2. Update SDConnect
He did follow the solution but still had the file for software update error

The problem is that the names are wrong in file “SDconnect Toolkit “, you need to correct them as:
Update_automatic , Update_manual ; Update_Special

Customer feedback:
this was the right solution of the Problem.
The Names were wrong.
Thank you very much for your help.
Solution:
You are required to update the MB SD C4 firmware follow the guide here:
1. Install SD Connect C4 battery
2. Update SDConnect
He did follow the solution but still had the file for software update error
The problem is that the names are wrong in file “SDconnect Toolkit “, you need to correct them as:
Update_automatic , Update_manual ; Update_Special
Customer feedback:
this was the right solution of the Problem.
The Names were wrong.
Thank you very much for your help.
Mercedes Star Diagnostic Scanner Tool – Everything you need to know
If you own a Mercedes-Benz and are looking to do your own repairs
you may have heard about Mercedes Star Diagnostic (SD) scanners C3 Star and Star C4. In this article, we discuss the advantages of Mercedes Star Diagnostic scanner
including things that you need to keep in mind before you buy a MB Star
Diagnostic scanner. A list of top alternative scanners to Star
Diagnostic is included as well. Note that this article is not written to
approve or sell any of the scanners mentioned here including Star
Diagnostic Scanner. We share our experience and research of diagnostic
scanners and hope to help you the Mercedes-Benz owner who are looking to
perform your own MB repairs and diagnostics.
Mercedes Star Diagnostic Tool and Software
Let’s first explain what Star Diagnostic SD (C3 or C4 SD Connect) tool is for those who may be wondering. This is the diagnostic scanner that is used at Mercedes-Benz dealerships and some auto repair shops. It can also be purchased by independent shops. These scanners include the hardware and Xentry which is the software that is used to troubleshoot the problems in any Mercedes-Benz. Original units can be purchased at STAR Tekinfo which is the official Mercedes-Benz site that offers technical documents, special tool and diagnostic software.
Mercedes-Benz Scanner MB-Star Diagnostic allows you to read and erase fault codes from any control unit in your Mercedes-Benz. With Star Diagnostic scanner you can read the actual configurations in each system, stream real time sensor data, activate sensors and perform SCN online, SCN offline coding and programing.
Mercedes Star Diagnostic for Sale

If you search the online resellers you will find Mercedes Star Diagnsotic C3 and C4 listed for sale. You have to be careful when buying online as many of these units may not be original.
Advantages of Star Diagnostic Scanner
This scanner is used by the dealer and it allow you to access and troubleshoot any system or control system in your Mercedes-Benz. Activate any sensor in the car, perform initiation test, stream live sensor data and also read and clear fault codes. If you own a shop who focuses on Mercedes-Benz cars then this is a must for you. Get it via official channels so that you can perform online SCN coding. All MB SD control units are accessible, like engine ECU, ABS, Airbags, SRS, Aircon, Immobilizer, Keyless Entry and the rest of 40+ control units used in MB cars. You can Read / Delete Faults, Live Data, perform sensor actuation, read current configuration, initialaztion and a lot more.
Things to consider before you buy one!
If you are looking to purchase a Star Diagnostic System with Xentry for Mercedes-Benz there are a few things you need to consider OBD2TOOL.
Learning Curve: In order to use the diagnostic scanner properly you need to learn how to use the Xentry software. While reading, clearing fault codes is not very difficult anything besides that requires that you have proper training. Yes, you can find a few guides online on how to perform certain programming using Xentry but if you don’t perform the programming accurately you may end up causing more problem than you solve.
Consider Genuine Scanner: The only problem is that they are quite expensive and require a yearly license. If you are considering to buy a clone of the scanner made in China keep the following concerns in mind.
SCN Online Coding: Unless you buy the scanner from the official Mercedes-Benz source, you will not be able to perform SCN coding of control units. That’s because Mercedes Star Diagnostic scanner will try to connect to Mercedes-Benz database for verification of SCN code in order to program certain control units. That is not possible unless you have purchased a valid license. With that said there may be some basic coding and programming of control units that can be done but this programing can also be performed with other advanced scanners.
Mercedes Star Diagnostic Problems with Software (Xentry) VM Ware Installation: All the setups that you see for sale that state that they use VMware environments are not legitimate hardware and software. Besides the fact that these scanners are not legal copies, they are also prone to crashing and run much slower than direct Windows installations. Yes, you are required to have a Windows XP with a serial port for the MB Star Diag C3 scanner. Many VMWare Mercedes Star Setups experience problems some of which you can see posted on this site: MB SD C4 C3 problems and solutions.
Mercedes Star Diagnostic Tool and Software
Let’s first explain what Star Diagnostic SD (C3 or C4 SD Connect) tool is for those who may be wondering. This is the diagnostic scanner that is used at Mercedes-Benz dealerships and some auto repair shops. It can also be purchased by independent shops. These scanners include the hardware and Xentry which is the software that is used to troubleshoot the problems in any Mercedes-Benz. Original units can be purchased at STAR Tekinfo which is the official Mercedes-Benz site that offers technical documents, special tool and diagnostic software.
Mercedes-Benz Scanner MB-Star Diagnostic allows you to read and erase fault codes from any control unit in your Mercedes-Benz. With Star Diagnostic scanner you can read the actual configurations in each system, stream real time sensor data, activate sensors and perform SCN online, SCN offline coding and programing.
Mercedes Star Diagnostic for Sale
If you search the online resellers you will find Mercedes Star Diagnsotic C3 and C4 listed for sale. You have to be careful when buying online as many of these units may not be original.
Advantages of Star Diagnostic Scanner
This scanner is used by the dealer and it allow you to access and troubleshoot any system or control system in your Mercedes-Benz. Activate any sensor in the car, perform initiation test, stream live sensor data and also read and clear fault codes. If you own a shop who focuses on Mercedes-Benz cars then this is a must for you. Get it via official channels so that you can perform online SCN coding. All MB SD control units are accessible, like engine ECU, ABS, Airbags, SRS, Aircon, Immobilizer, Keyless Entry and the rest of 40+ control units used in MB cars. You can Read / Delete Faults, Live Data, perform sensor actuation, read current configuration, initialaztion and a lot more.
Things to consider before you buy one!
If you are looking to purchase a Star Diagnostic System with Xentry for Mercedes-Benz there are a few things you need to consider OBD2TOOL.
Learning Curve: In order to use the diagnostic scanner properly you need to learn how to use the Xentry software. While reading, clearing fault codes is not very difficult anything besides that requires that you have proper training. Yes, you can find a few guides online on how to perform certain programming using Xentry but if you don’t perform the programming accurately you may end up causing more problem than you solve.
Consider Genuine Scanner: The only problem is that they are quite expensive and require a yearly license. If you are considering to buy a clone of the scanner made in China keep the following concerns in mind.
SCN Online Coding: Unless you buy the scanner from the official Mercedes-Benz source, you will not be able to perform SCN coding of control units. That’s because Mercedes Star Diagnostic scanner will try to connect to Mercedes-Benz database for verification of SCN code in order to program certain control units. That is not possible unless you have purchased a valid license. With that said there may be some basic coding and programming of control units that can be done but this programing can also be performed with other advanced scanners.
Mercedes Star Diagnostic Problems with Software (Xentry) VM Ware Installation: All the setups that you see for sale that state that they use VMware environments are not legitimate hardware and software. Besides the fact that these scanners are not legal copies, they are also prone to crashing and run much slower than direct Windows installations. Yes, you are required to have a Windows XP with a serial port for the MB Star Diag C3 scanner. Many VMWare Mercedes Star Setups experience problems some of which you can see posted on this site: MB SD C4 C3 problems and solutions.
MB Star Xentry Questions
Hi All, I am not sure if this is the right forum for MB Star questions, but since “the big MB Star thread” is in here, I figured I would give it a go.
I am about to pull the trigger on an MB Star C4 with laptop and wanted to get some clarification on a few things. I tried searching here, the net and a few sellers blogs, but could not find answers.
– What is SAM
– What is SCN
– When do I need/want online or offline programming?
I have a sprinter and a C230 and the things I would like to do are:
– diagnose and read/clear codes on all the computers
– simple resets (like steering angle sensor, adaptive transmission, calibrate rain sensor, etc.)
Would I need online/offline programming to do these things, or is it more for “hacking” the car and making custom tunes, etc.
Lastly – where can I find a Xentry user manual? Internet has not been much help here.
thanks for the info.
If what you state is the truth,then you don’t need a DAS Xentry C4 set. You can spend fifty bucks on and OBD scanner and meet and exceed your stated objectives!!
Additionally,if you don’t understand the definitions in your “What questions”, then you are not ready for a factory tool.
A Xentry user manual does not exist, the knowledge and the skill to use and interpret the tools outputs comes from OJT experience and in depth knowledge of the MB vehicle mechanical and electrical systems.
I would suggest you use the money to take the family out to dinner and or visit Disney World you will receive much more value from that investment!!
I’ve never needed to use the “ignore” feature on any of the forums I’m a member of, but if ever a member deserved to be on the list, Plutoe is it. His holier-than-though attitude, sarcastic “you’re dumb” demeanor towards fellow members, and utterly unhelpful snarkiness makes him one of the least useful trolls on the interwebs. He may (or not) have a clue about these cars, but he surely holds himself in such high regard that he deems it unfit to share the knowledge he may (or may not) have.
So:
Plutoe:
Why are you such a douchebag?
My experience with MB star C3
am going to keep posting my updates about doing an AAM and SRS module swap in my 01 ML 430 Sport using the Chinese clone Benz star c3 diagnosis tool.
I received my C3 yesterday and the Dell D620 a day earlier to use for the C3. Replacing the hard disk with the one supplied with the C3 was a snap. After watching a few videos on YouTube on how to set up the Xentry and Das programs I had them up and running. But then it took me another 3-4 hours of playing and researching online to figure out how to set up the RS232 port to see the Stardiagnos.
At 10:30 last night, and very exhausted it came to life. As I had figured the AAM and SRS modules were completely non responsive and could not be talked with via the tool.
This morning I ordered a new AAM from obd.com and with free shipping and $370 it is on its way to my shop. I picked up a SRS module from a wrecked ML in a local junk yard that I hope will work.
I plan on attacking the SRS system this weekend and the AAM next week. I have been working through the Xentry emulator to learn how to properly set up and program these parts today at my desk and think I have it down pretty well. It is pretty simple once you figure out the navigation and menu structure in the DAS system.
So stay tuned and offer a prayer for me that I do not brick any of the components in my truck.
Chinese MB STAR scanners
Since you’re reading this thread then I’m guessing you were like me
and are searching for information on these Chinese MB STAR systems.
I’m sure you’ve found several web sites selling these things, prices ranging all over from $380 up to over $800 but unfortunately I there isn’t a damn thing about anyone actually purchasing one of these and verifying the sellers claim on whether they really work or if they really don’t require the original IBM ThinkPad to work properly.
Well, here ya go folks!
So after months of searching and doing research with not much luck I finally took the risk and bought one of the Chinese MB STAR C3 systems.
I was very hesitant in buying one of these Chinese devices. The total price with shipping turned out to be $450. There were several places on the internet with prices ranging all over. I only found one place that was a little less expensive than $450 total, I think maybe $430 but that guy was not very prompt in returning my emails. I finally ordered mine from obd2tool.com. Michael Luo was the sales rep who immediately responded to my inquiry on the device and he immediately responded to all my emails and questions within a day at worst. He was very friendly and patient with me and his English surprisingly good.
The one they sell was claimed to work on most any laptop, not just the IBM ThinkPad was required to run the software. Which is what these systems were originally intended for.
It took me about three weeks to finally receive the device VIA DHL after I sent the payment. Mine took a little longer to receive because I placed the order right before Chinese new year, but Michael warned me that shipping will take an extra week because most of China was off for a week for Chinese new year.
When I finally received the unit I was very surprised on how heavy they box was. I guess this is why it was $50 just for the shipping.
When I opened the box I was very surprised and very impressed in the quality and the amount of contents. The multiplexer unit itself is a very heavy duty all aluminum enclosure with tough rubber end caps and real nice polished aluminum connector ends. It even came with the stickers to make it look like an original MB STAR system.
It came with several cables to make it work with most any car including the 32 pin round connector for those Euro models. All I really needed was the 16 pin cable that plugs into the CAN slot.
I was very impressed with the quality of all the cables. They all felt and looked very heavy duty and had heavy duty solid aluminum connectors. None of it looked cheap at all.
The kit came with a Samsung External USB 80 gig hard dive which had the MB STAR software loaded on it. Also included to my surprise was a PCMCI to serial card with driver software. I’m assuming that the STAR system will not run from a USB to serial box and since I told Michael which system I had, he knew that I did not have a serial port on my laptop so he included this for free.
All in all I was very impressed with what I received as far as quality and everything that was included for the $450.
Now on to the operation of the unit:
After doing a little research I learned that the software might not work on Windows 7.
I didn’t even bother trying since a buddy of mine gave me an old tablet with a serial port built in and already had XP loaded on it. So I just decided to use that since it was a touch screen and would probably be a little easier to use than my bulky 17” screen laptop.
I forgot to mention, you will need at least 1 gig of RAM to run this program, it will not even load with anything less than a gig. Luckily I had an extra 512 board lying around the office… Shhhh…lol
This is what I did first before I even started messing with the software:
Since this thing is already kind of bulky I really didn’t want to run it with an external hard drive attached so I figured out a way to include this image on my internal hard drive.
Since this image was about 63gig I needed a larger hard drive for my tablet. Luckily I had access to a 180gig laptop SATA drive from work since we sometimes through them out after we do testing on them. (Oh shut up, we through these things out! lol) I connected both drives to my desktop PC and went to work. You probably figured out by now that I did this all at work since who actually has a desktop at home anymore? I hope my boss doesn’t read this…lol The first thing I did was use Acronis and cloned the old tablet drive to the new 180gig drive so that I now had a large enough drive to add the STAR image to it. Next I used Partition Magic to add a logical partition of about 80gigs to the drive. Next I used a free program called Drive Image XML. I first made a backup image of the 80gig drive that came with the unit. I saved this to my secondary hard drive on my desktop PC (My own personal 1 Terabyte drive) just in case I needed the original image in the future. I then used the Drive Image software to restore the backed up image to the new 80gig logical partition I created on the new 180gig drive. When I first tried to put the new hard drive in the tablet it would not boot. It turned out that I needed to delete the drive letter from the main partition where my original XP image was. I recommend you do this by Automotive Scan Tool before you install it back in the laptop since I had to take the drive back out, hook it up to my other PC again and delete it from there, then re-install the drive into the tablet.
BAM! This worked! I now have a hard drive with my original bootable image of XP with a separate logical drive letter with the image of the 80gig drive that came with the kit all on one hard dive so it’s easily assessable from the my computer I-con.
Now on to the software that came with this:
The image that came on the external hard drive, which is now on my internal drive is actually an image of an IBM ThinkPad that runs in a program called VMware. I was not familiar with this software but just went with it. There are some simple start up instructions included in a couple of power point slides. I followed those instructions but couldn’t get it to run. I was getting an error, which I apologies but I can’t remember exactly what it was, something about a compatibility issue. This made me very nervous that the software wasn’t going to run on my tablet. So I did a search for this error on the net and sure enough my good ole friends at Google had a web site with the answer for me. The site I found had my exact error message and simply said to delete some configuration file in the VMware folder. I’m guessing this is some kind of setup file that came loaded on the hard drive that was not correct for my tablet. So I first made a backup of this file, just in case, then deleted this file from the logical drive like it said to. I restarted the VMware program and Vola, it worked!
I now had VMware running with image of from an IBM ThinkPad that was preloaded with a several different programs on its desktop that I have never heard of. One of these programs was Xentry another was DAS as well as a few others. I included a snap shot of the screen so you can see all what it came with.
I first clicked on the Xentry I-con, but it would not load. I then tried the DAS I-con and waited. This is the frustrating part, this software runs VERY slow and took nearly 8-10 minutes to completely load. Maybe my computer is just very slow or maybe I need more memory, I don’t know but eventually it was up and running.
Hooking it up to the car:
Once the software finally loaded I connected the 16 pin cable to my CAN port under my dash, and the serial connector to my tablet PC then turned on the ignition of the car. I followed the menus and chose the type of car, etc. Unfortunately it would not auto detect my car. I don’t know if this was just my car or if it’s a bug in the software/hardware. My car had a lot of electrical and computer issues that the mechanic told me about, which is why I decided to buy this thing since I already spent $5k for him to fix most of the problems. So it could have just been a problem with my car not allowing it to auto detect, I couldn’t tell you.
This really wasn’t a big deal. The software simply took me through a few questions to manually select my exact vehicle model.
After a couple of minutes I was finally connected to the cars computer systems. The main menu had a few different choices, but I found the “Start quick scan” was the best option. Unfortunately there is nothing quick about this. The whole scan took a good 10-15 minutes to complete. I started having low voltage problems from the car since I had to have the ignition on and the door open during this whole process. This actually cased more false codes and problems so I recommend that you start the car and let it idle during this whole process. You could probably hook up a battery charger, I didn’t try that but will next time since the engine started getting kind of hot idling there for a good 40 or so minutes while I was doing all this.
Once it was finally done it came up with a long list everything in the car. At the end of each line it had a status of either an “f” or an “i” or and “E” or a check mark.
I was not familiar with software at all, so I played around with it a bit and tried hitting the green checkmark button on the ones that had an ‘f” this did in fact bring up another screen that allowed you to view the fault codes and erase them if you wanted to.
There is also an option on the main screen to erase all codes. It doesn’t tell you that it’s all codes but I’m pretty sure it is. Unfortunately it only clears most of them and you may still have to go into each one manually and clear them or check them to see if they’re current or just stored.
After playing with this software a little more I found that there are actually some trouble shooting steps assigned to each fault codes. I’m sure this makes it much easier for a Mercedes tech. If you select the fault code then hit the green checkmark this should take you to the trouble shooter. I think you may have to hit the magnify glass button at some point, I can’t really remember.
There is going to be a learning curve here and you’ll soon find out that if you back to far out of certain screens you have to re-scan or after you leave the main screen you loose the option of clearing all the codes without a re-scan. It can be a little frustrating at first, but after a while of playing with the software and after several beers while waiting it started to come into play.
So I starting checking out some of my reoccurring fault codes, but wasn’t sure what was real or just logged from an old occurrence so I deleted all the codes, then did a re-read again. A couple of the codes kept coming back as “f” but I expected this. I’m having an SRS problem that I’m trying to trouble shoot. When I finally got into the SRS code that kept reoccurring I learned that the software is in real time. Meaning that you can actually see the screen change if you fix the fault or re-cause it. Very cool!
So this is about as far as I got with the DAS software.
Right now I have 4 codes relating to my SRS system that I’m trying to clear up so I can get rid of the pesky SRS light and finally get the SRS system fixed.
The DAS software gave me a component number and a code which I am now trying to trouble shoot. This is where the other software comes into play. Keep reading…
The StarFinder software:
This software is ultra cool!! Again there was a bit of a learning curve but it didn’t take me too long to figure it out enough to find what I was looking for.
With this software I was able to type in the fault code that the DAS gave me and it popped up a schematic with the circuit of the part. You can then click on the diagnostic button to find out what it is and how to test it. Here is the really cool part!… When you click on the Star Finder button it brings up a list of all the fault codes or you can do a search and type yours in. Once you click on your fault code it brings up a series of actual pictures of the car of where the device is located and how to get to it. That was just too cool!! The star finder software makes it worth the money alone! Although, I guess it wouldn’t do you any good unless you had the error code from the DAS system. Lol So the two programs complement each other very well.
I think the other programs have something to do with warranty information and data entry by the tech while he’s working on the car. Which really makes me think this is an actual image of a complete hard drive from a service shop that seems to be cracked. Hey, at least it works!
So in conclusion the Chinese system I ordered for $450 was a great deal and works great! The car I used it on was a 2006 SL500. I also tried it on a 2001 SLK320 and had success with that as well. The VMware image thing was kind of odd but seemed to work just fine. My only complaint was that it was very slow. The system might run faster and better on an actual IBM ThinkPad but for what I’m doing, this setup works just fine. Just have a 6 pack of beer handy because you’re going to be doing a lot of waiting on the system to boot and load.
I hope this helps anyone who is thinking about buying one of Mercedes Star Diagnostic. I got mine for a total of $450 shipping included from obd2tool.com. I have done a lot of research and I highly recommend buying from these guys. I think it’s worth the extra $10-$20 over the cheaper site that I found. I promise I am in NO way affiliated with these guys what so ever. I am just a truly satisfied customer.
I recommend you emailing them first and telling them what computer you plan on using it on and what operating system and whether you have a serial port or not, etc. I’m not sure if it works on windows 7 or not. Also make sure you have at least a gig of RAM on the system you’re planning on running it on. It will not load with anything less.
Here are some screen shots from the software. I apologies but I didn’t get any photos of the unit or cables but you’ll just have to trust me when I say that everything looked even better than the photos they advertise on their site. Everything looked like really heavy duty good stuff. Nothing looked cheap at all!
Friday, March 23, 2018
2018. 03 MB SD Connect C4 C5 Xentry Start Key Activation
Here is the steps to teach you how to activate XENTRY:
Step 1: Double Check the icon name “starkey Center ” which on the computer desktop.


Record the computer’s Hardware ID

Step2: Double Check the folder”TOOLS” which on the computer desktop.

Run xentry developer V1.10

Step3:
As shown below: Enter the computer’s Hardware ID, Stat Date, Expiration Date. Calculate the license string.


Step4:Copy licenseto Start keys and save


Step5: Run xentry, as follows

We can supply Laptop + Software all ready for you.
We can supply FULL package C4 C5 SD + Laptop + Software for you.
We can carry out some C4 C5 SD repairs.
Remote installations available (if you supply the correct HDD size and install the correct Windows OS).
Teamviewer remote support available.
If you are interesting in buy MB Star Diagnostic Tools , Please contact our sales via sales@obd2tool.com
Step 1: Double Check the icon name “starkey Center ” which on the computer desktop.
Record the computer’s Hardware ID
Step2: Double Check the folder”TOOLS” which on the computer desktop.
Run xentry developer V1.10
Step3:
As shown below: Enter the computer’s Hardware ID, Stat Date, Expiration Date. Calculate the license string.
Step4:Copy licenseto Start keys and save
Step5: Run xentry, as follows
We can supply Laptop + Software all ready for you.
We can supply FULL package C4 C5 SD + Laptop + Software for you.
We can carry out some C4 C5 SD repairs.
Remote installations available (if you supply the correct HDD size and install the correct Windows OS).
Teamviewer remote support available.
If you are interesting in buy MB Star Diagnostic Tools , Please contact our sales via sales@obd2tool.com
How to use SD connect C4 + Xentry/DAS on Macbook Pro
I’m running Xentry/DAS 2015.12 (not OpenShell) on my MacBook Pro together with SD Connect C4 via LAN cable and VMware. Works without problems.
Need bridged networking in VMware. And adjust the network settings/IP addresses.
VMware:
Use VMware Fusion Professional and and allocate enough resources to the VM.
Mac hardware specification:
MacBook Pro, Core i7, 16GB RAM, 512 SSD, 15″ 1GbE, SuperDrive, Mid-2012
Virtualization:
That is the magic of virtualization. If you can locate a copy of Star Diagnosis that was intended for the IBM ThinkPad T30 running Windows NT 4.0 Workstation, you could easily install Windows NT 4.0 in a virtual machine and replicate that environment with near native performance. If you prefer to use a Windows XP-based version, that is easily done as well, up to and including Windows 10 1709 or Windows Server 2016. Almost any computer you purchase now will not have drivers available for Windows XP, so either an old PC such as a Dell D630/D830 will allow you to install Windows XP natively and make it work, but virualization takes the headache out of that. OS X us built on UNIX, so it is a very stable host OS and can run nearly any version of Windows was a guest with easy, stability and performance. The only think I would refrain from doing at this point in time, is if you are using OS X 10.13 High Sierra, do not use APFS just yet. It still is not as stable IMO as HFS+. You certainly don’t want to introduce system instability when programming a control module!
Battery:
The battery life is good when running Windows in a VM, as OS X has excellent power management. Allocate at 2 cores to the Windows VM, and if using an XP-based version, 2048GB of RAM should be sufficient.
In detail…How to setup Xentry/DAS on a Mac OS X
It is very straight forward. I elect to not use the automated installation of Windows, as it automatically configures the partition sizes, formats them, etc. Instead, do a custom installation and select your ISO. It will then determine the contents of the OS ISO and select your low-level hardware components automatically, such as CD-ROM bus, HDD bus, etc.
For the network cable, it defaults to NAT, so it shares the IP of OS X, but cannot receive unsolicited network traffic due to the nature of NAT. You can select Bridged, and it can have an IP on the same subnet as OS X.
I think I would prefer to install my installation from scratch, as the pre-built images that are distributed have an unknown product key, and also could contain malware or other unwanted applications.
If you are installing the XP version of DAS/Xentry, specify your virtual disk to be about 120GB, and when Windows XP asks you to specify your partition size, instead of pressing Enter and allowing it to consume the disk specify 20GB and quick format as NTFS. Create the remaining three partitions in Disk Management after XP completes installation.
Also, the first thing you will want to do is install VMware Tools after XP installs. If you want to install all available updates for Windows XP, and download WSUS Offiline version 9.2.3 and it will get your all of the available updates that were released when XP reached EOL.
I have used 12.2015, but if I still used it, I would revert back a few months to avoid the hard-coded timebomb that was implemented at the end of 2015.
Result:
I have used this setup for many years for control module programming and SCN coding with no issues from OBD2TOOL.
What is Xentry PassThru
Xentry PassThru
is a subscription service that is offered by Daimler to Independent
Service Providers to allow them to perform certain repairs of vehicles
and control module programming. The US version is mandated by MBUSA
rules, and the EU version is mandated by Daimler AG, so although they
are both used by independent workshops, depending on if you live in the
EU or US, they are priced differently and offer different features.
To clarify what PassThru software is, when OBD1 was common in the 1980s and early 1990s, each manufacturer had a different connector, diagnostic machine/computer, used different protocols and provided unique trouble codes depending on the make of the vehicle. The J2534 initiative attempted to standardize that, creating a standard set of Powertrain DTCs and other diagnostic information in the OBD2 standard (and the EOBD standard I assume is similar in the EU, but I am honestly not familiar with it). J2534 also provides an avenue for independent workshops to program, flash, and code control units using a standardized protocol, connection, and VCI for many makes and models. J2534 is not as comprehensive as the automaker’s own diagnostic tools, but provides a level not seen before available to independent workshops.
Instead of purchasing an SD Connect, Xentry Kit, or other automakers proprietary diagnostic device, J2534 allows you to purchase a J2534 compliant VCI from a number of manufacturers such as Bosch, Snap-On, AVDI, Drew Technologies, etc. Once you have one of these J2534 adapters, you can use it with the automakers software to communicate, troubleshoot, flash, and code control units not only by Daimler, but by Ford, General Motors, Dodge/Chrysler, etc. They all have different software that you must use unique to their make, but use the same interface to connect to the car, and has the advantage of being installed on a non-proprietary laptop, such as a standard Windows-based ThinkPad or Surface Pro.
In summary, the PassThru option is less expensive, less capable, but more flexible and is certainly better than the offerings just 7-8 years ago. You may order the Xentry PassThru subscription from Daimler and install it on your laptop and it is licensed to you, however in the US it will *only* communicate with control units that are emissions related such as the ECU, SCR, etc. This if course is dictated by the permissions the StartKey allows, and the StartKey you are assigned with this subscriptions is artificially limited to those control modules with the exception of 2018 and newer vehicles, in which all control units may be interrogated and flashed.
MB SD C4 Xentry activation complete but need to active again after reboot solution
Does your MB SD C4
meet such problem that Xentry activation complete, but requires to
active again after reboot and again and again. If that, please follow
this post for solution.
Take a MB SD C4 activation info for example:


Right click the folder “Shortness to the LicDir”, copy “lic_key_2” and paste it into the same folder and has a new name “Copy of lic_key_2”.


Right click “Copy of lic_key_2”, choose “Rename” and rename as ” lic_key_2.x4711″
Right click “lic_key_2.x4711” and choose “Properties”, then tick on “Read only” and click on “Ok”.

Delete ” lic_key_2″.

Done
Don’t you think it is too easy to solve the Xentry activation can’t save problem.
Take a MB SD C4 activation info for example:
Right click the folder “Shortness to the LicDir”, copy “lic_key_2” and paste it into the same folder and has a new name “Copy of lic_key_2”.
Right click “Copy of lic_key_2”, choose “Rename” and rename as ” lic_key_2.x4711″
Right click “lic_key_2.x4711” and choose “Properties”, then tick on “Read only” and click on “Ok”.
Delete ” lic_key_2″.
Done
Don’t you think it is too easy to solve the Xentry activation can’t save problem.
Wednesday, February 28, 2018
Clone Xentry Connect C5- Good & Bad Things
I bought “Original Clone Xentry Connect C5” from China’s retail store Obd2tool.com in 2017/12.
Good thing:
1. Unlike bad products of C5 type C4 motherboard, texture is good
2. DoIP specification
Bad thing:
1. Because it is VM system + 32bit, the reaction is slow (SSD though …)
2. Vediamo can be used, but feeling like driving with DELL D 630 (unsuitable)
3. The DTS Monaco software is installed but the connection with the vehicle is NG (currently retail stores and manufacturer engineers are thinking about how to fix it)
4. Passwords are applied to each drive, making it hard to customize
5. Retail shops and manufacturer engineers lack knowledge (take time to support)
My thoughts
I think purchasing this product is still early.
There are too many trouble elements.
I’ll report it when the situation changes.
What I currently use (stable and comfortable)
New car: eCom (64 bit)
Normal: Clone SDConnect C4 (64 bit)
Old car: Clone C3
Best regards
Labels:
Benz diagnostic tool,
c4,
c5,
MB SD Connect C4,
MB SD Connect C5,
MB Star,
MB Star C4,
MB STAR C4 C5,
MB STAR C5,
Mercedes Diagnostic Tool,
sd connect c4,
SD Connect c5,
SDConnect 4,
SDConnect 5
XentryDAS Expire, How to solve
Here is 12.2017 Xentry/DAS Expire Error Message and Solution:
Xentry/DAS Expire Error:
La validata dell’attuale versione dei dati scadra dal 2018/02/21. installare una versione dei dati attuale.
Error message in English:
The validated current version of the data will range from 2018/02/21. install a current version of the data.
Upload photos…


How to solve:
Reactivate SDConnect 4 or setup your PC time earlier
Better reactivate
Xentry/das can be reactivated yourself anytime if you have software from the site: obd2tool.com
Xentry/DAS Expire Error:
La validata dell’attuale versione dei dati scadra dal 2018/02/21. installare una versione dei dati attuale.
Error message in English:
The validated current version of the data will range from 2018/02/21. install a current version of the data.
Upload photos…
How to solve:
Reactivate SDConnect 4 or setup your PC time earlier
Better reactivate
Xentry/das can be reactivated yourself anytime if you have software from the site: obd2tool.com
Labels:
Benz diagnostic tool,
c4,
c5,
MB SD Connect C4,
MB SD Connect C5,
MB Star,
MB Star C4,
MB STAR C4 C5,
MB STAR C5,
Mercedes Diagnostic Tool,
sd connect c4,
SD Connect c5,
SDConnect 4,
SDConnect 5
How to do 2009 Benz E350 Gas tank mod reset cluster
Purpose:do Gas tank mod reset cluster on my 2009 E350.
Tool option: MB SD Connect C4 with dell 6410 laptop(Has ssd, 4gb mem, so it should be quicker than a dell630.)
Here we go:
Found out how to reset cluster: See below part, it’s towards the end of the post.
Gas Tank Mod (Gallons) ***Need Developer Mode***


After you hit F3 it will carry on the coding process (hit “F1” to go back)
so we can reset the ECU so coding can take effect by MB SD Connect C4.


So far I’m loving STAR. I am going to code the car this weekend for Bi-Xenons and then code the card to accept the OEM front LED city lights. I’m doing a e55 bi-xenon retro fit to replace the stock crappy h7 halogen e55 projectors.
Tool option: MB SD Connect C4 with dell 6410 laptop(Has ssd, 4gb mem, so it should be quicker than a dell630.)
Here we go:
Found out how to reset cluster: See below part, it’s towards the end of the post.
Gas Tank Mod (Gallons) ***Need Developer Mode***
After you hit F3 it will carry on the coding process (hit “F1” to go back)
so we can reset the ECU so coding can take effect by MB SD Connect C4.
So far I’m loving STAR. I am going to code the car this weekend for Bi-Xenons and then code the card to accept the OEM front LED city lights. I’m doing a e55 bi-xenon retro fit to replace the stock crappy h7 halogen e55 projectors.
Labels:
Benz diagnostic tool,
c4,
c5,
MB SD Connect C4,
MB SD Connect C5,
MB Star,
MB Star C4,
MB STAR C4 C5,
MB STAR C5,
Mercedes Diagnostic Tool,
sd connect c4,
SD Connect c5,
SDConnect 4,
SDConnect 5
Subscribe to:
Comments (Atom)